62-11785
3–10
3.7
CHANGING SETPOINT
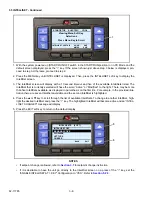
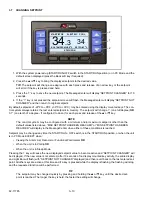
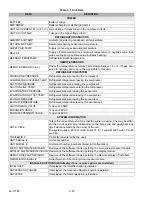
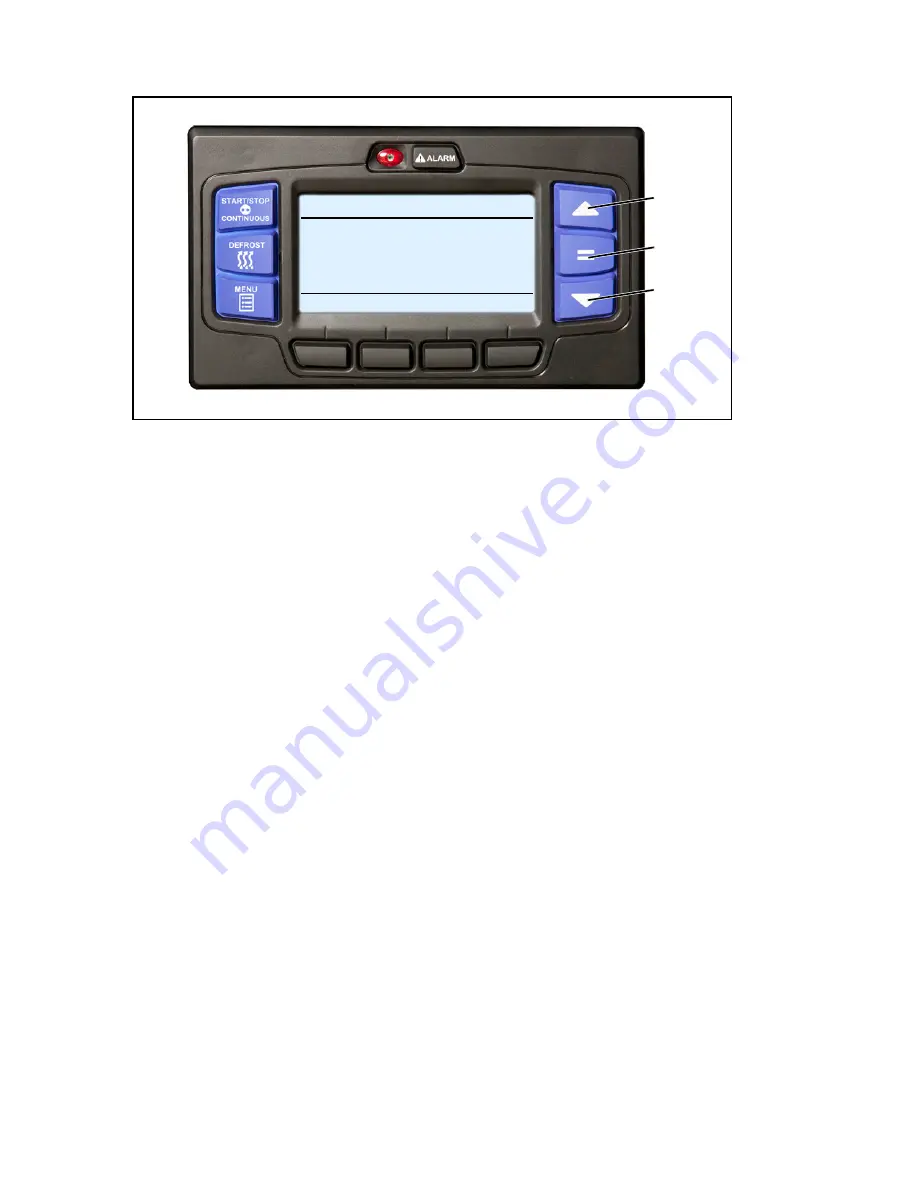
1. With the system powered up (START/RUN-OFF switch in the START/RUN position) or in PC Mode and the
default screen displayed (press the Back soft key if required):
2. Press the
▲
or
▼
key to bring the displayed setpoint to the desired value.
TIP:
The setpoint will change one degree with each press and release of an arrow key or the setpoint
will scroll if the key is pressed and held.
3. Press the “=” key to save the new setpoint. The MessageCenter will display “SETPOINT CHANGED” for 10
seconds.
4. If the “=” key is not pressed the setpoint screen will flash, the MessageCenter will display “SETPOINT NOT
CHANGED” and then return to original setpoint.
By default, setpoints of -22°F to +95°F (-30°C to +35°C) may be entered using the display mounted keys. The con-
trol system always retains the last entered setpoint in memory. The setpoint will change 1° (one full degree)
OR
0.1° (one tenth of a degree - if configured to do so) for each press and release of the
▲
or
▼
key.
NOTE
The control system may be configured with a minimum and/or maximum setpoint other than the
default values listed above. “MAX SETPOINT HAS BEEN REACHED” or “MIN SETPOINT HAS BEEN
REACHED” will display in the MessageCenter when either of these conditions is reached.
Setpoint may be changed any time the START/RUN - OFF switch is in the START/RUN position, or when the unit
is in PC Mode EXCEPT when:
• Viewing the Alarm List, Data List or Functional Parameters
OR
• When the unit is in Pretrip
OR
• When the unit is in Sleep Mode.
Pressing the = key will cause the new displayed setpoint value to become active and “SETPOINT CHANGED” will
be displayed. If the new value is not entered, after 10 seconds of no display mounted key activity, the entire display
and Light Bar will flash (with “SETPOINT NOT CHANGED” displayed) and then revert back to the last entered set-
point. All other keys are active at this time and if a key is pressed while the display is flashing, the flashing will stop,
and the requested function will be performed.
TIP
The setpoint may be changed quickly by pressing and holding the
▲
or
▼
key until the desired set-
point is reached. The longer the key is held, the faster the setting will change.
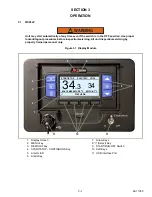
2
1
2
START/STOP
ELECTRIC
COOL
BOX TEMPERATURE
o
F
SETPOINT
o
F
STATUS OK
34
.3 34
Summary of Contents for VECTOR 8100
Page 2: ......
Page 4: ......
Page 12: ...62 11785 viii ...
Page 16: ...62 11640 12 ...
Page 18: ...62 11785 ...
Page 24: ...62 11785 1 6 1 3 SAFETY DECALS ...
Page 25: ...1 7 62 11785 ...
Page 26: ...62 11785 1 8 ...
Page 27: ...1 9 62 11785 ...
Page 28: ...62 11785 1 10 ...
Page 30: ...62 11785 ...
Page 50: ...62 11785 ...
Page 82: ...62 11785 ...
Page 96: ...62 11785 4 14 ...
Page 98: ...62 11785 ...
Page 129: ...5 31 62 11785 ...
Page 130: ...62 11785 5 32 ...
Page 134: ...62 11785 6 4 ...
Page 138: ...62 11785 ...
Page 230: ...62 11785 ...
Page 271: ...8 41 62 11785 ...
Page 272: ...62 11785 8 42 ...
Page 274: ...62 11785 ...
Page 286: ......
Page 287: ......
Page 288: ...62 11785 10 8 ...
Page 292: ......
Page 293: ......

