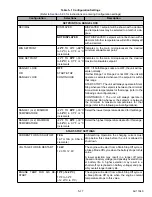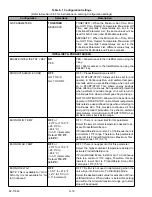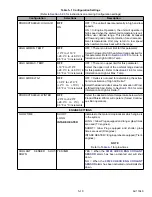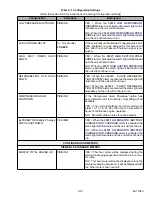
62-11640
5–14
5.5.2
Main Microprocessor Module Replace-
ment
1. Ensure the unit will not start automatically by
disabling any two way communication, placing
the STOP/RUN–OFF switch in the OFF position
and removing the negative battery cable.
2. Release the tabs and remove the two 35 pin
connectors and 8 pin connector from the front of
the module.
3. Replace module. Tighten mounting hardware to
96 inch/lbs (10.8 Nm).
4. Reinstall connectors ensuring tabs are fully
locked in place.
5.5.3
Main Microprocessor Setup
1. Ensure that the replacement main microproces-
sor is in place, all wires connected and the neg-
ative battery cable is reconnected.
2. Make sure the latest software has been loaded
to ensure all modules are compatible, refer to
NOTICE
When a module is replaced, software
should be upgraded before switching the
unit on. This will ensure software com-
patibility of all modules.
3. Power up the system by placing the START/
RUN - OFF switch in the START/RUN position.
The display will immediately go into the Unit
Identification Configuration screen. The unit
model information must be entered before the
System can display the correct screens for this
unit.
4. Select the correct model family and then enter
the correct model number by using the UP or
DOWN ARROW keys. Scroll through the list until
the correct Model Number appears (verify by
reading the Model/ Serial Plate on the unit).
Press the “=” key to enter the new model number.
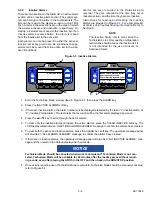
5. Press the UP ARROW key again, and the Unit
Serial Number field will appear. Refer to
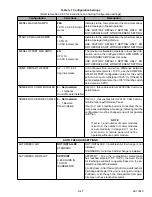
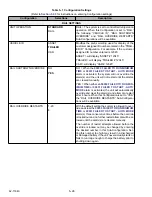
for instructions on entering the unit
serial number.
6. Press the UP ARROW key again, and the
Trailer ID field will appear. Refer to
for instructions on entering the Trailer ID.
NOTICE
Ensure that the clock you are using is
accurate. Also, some customers are
located in different time zones from the
repair location. If you know the owners
desired location time, enter that time. If
you don’t, enter the current time at your
location.
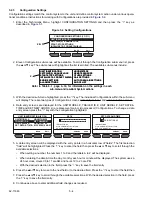
7. Now, press the DOWN ARROW key until “SET
DATE & TIME” appears. Refer to
for instructions on entering the date and time.
8. Press the UP ARROW key to go to “SET NEW
HOURS”. Press the “=” key then the Up Arrow
key to enter that menu.
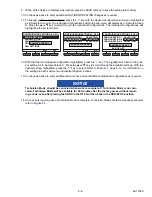
9. The first hourmeter is Engine Protect Hours.
Press the “=” key to select this meter. The cursor
will be blinking on the ten-thousands place.
Press the UP or DOWN ARROW key to select
the correct value, then press the “=” key. If the
correct number in any of the locations is 0
(zero), just press the “=” key to enter 0 as the
value and move the cursor to the next place. For
example, if you are entering 567 hours, you will
press the “=” key twice to leave a 0 for the first
two numbers, then use the UP and DOWN
ARROW key to scroll through the numbers to
enter the correct hours. When the correct hours
for Engine Protect Hours has been entered,
press the “=” key to advance to the next hour-
meter. If an invalid number is entered, a warning
message will flash in the MessageCenter. For
Change 09/14
Summary of Contents for Vector 8500
Page 23: ...62 11640 1 6 1 3 SAFETY DECALS ...
Page 24: ...1 7 62 11640 62 03958 ...
Page 25: ...62 11640 1 8 ...
Page 26: ...1 9 62 11640 ...
Page 27: ...62 11640 1 10 ...
Page 125: ...62 11640 SECTION 6 MESSAGECENTER PARAGRAPH NUMBER Page 6 1 MESSAGECENTER MESSAGES 6 1 ...
Page 321: ......
Page 322: ......

