62-11640
7–110
24100
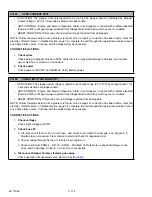
NO COMM FROM MICRO TO CCB1
• ACTIVATION: Alarm 21100 is not active, and Unit is not starting in diesel. No communication from the
CCB1 Module for 10 seconds.
• UNIT CONTROL: Engine and Electric Operation: Required Shutdown. If alarm remains active for 2 min-
utes issue a shutdown command to all modules except the display.
• RESET CONDITION: Communication received from the CCB1 Module in the past 10 seconds or alarm
may be manually reset by turning the unit off, then back on again.
NOTE: Follow the steps below until a problem is found. Once a repair or correction has been made, clear the
alarm(s). (Refer to Note 1 in
Section, page 7-2.) Operate the unit through the appropriate modes to see if
any active alarm occurs. Continue with the steps below as necessary.
CORRECTIVE ACTIONS:
1.
Check CCB1 status indicator. Refer to
.
2.
Check Fuse F9
a. Visually check fuse. Verify correct fuse, check fuse holder for damage, see
. Replace
fuse as required. Clear alarms, restart and check for repeat alarm(s).
b. Check voltage. Check voltage through the fuse. If fuse is blown, replace it.
c. Check wiring. Verify there is no physical damage to harness, and no damage, moisture, or corro-
sion in connectors.
3.
Check for power at CCB1
Check power at pins 14 and 26. Verify battery power.
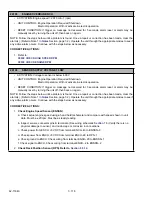
24101
SENSOR INPUT VOLTAGE LOW CCB1
• ACTIVATION: The Voltage Supply for the Sensors on the CCB1 is below the low voltage limit 4.5V
• UNIT CONTROL: Engine and Electric Operation: Alarm Only.
• RESET CONDITION: The Voltage Supply for Sensors on CCB1 is above the low voltage limit 4.5V
NOTE: Follow the steps below until a problem is found. Once a repair or correction has been made, clear the
alarm(s). (Refer to Note 1 in
Section, page 7-2.) Operate the unit through the appropriate modes to see if
any active alarm occurs. Continue with the steps below as necessary.
CORRECTIVE ACTIONS:
1.
Check CCB1 status indicator. Refer to
2.
Check Fuse F9
a. Visually check fuse. Verify correct fuse, check fuse holder for damage, see
. Replace
fuse as required. Clear alarms, restart and check for repeat alarm(s).
b. Check voltage. Check voltage through the fuse, if fuse is blown, replace it.
c. Check wiring. Verify there is no physical damage to harness, and no damage, moisture, or corrosion in
connectors.
3.
Check for power at CCB1
Check power at pins 14 and 26. Verify battery power.
Summary of Contents for Vector 8500
Page 23: ...62 11640 1 6 1 3 SAFETY DECALS ...
Page 24: ...1 7 62 11640 62 03958 ...
Page 25: ...62 11640 1 8 ...
Page 26: ...1 9 62 11640 ...
Page 27: ...62 11640 1 10 ...
Page 125: ...62 11640 SECTION 6 MESSAGECENTER PARAGRAPH NUMBER Page 6 1 MESSAGECENTER MESSAGES 6 1 ...
Page 321: ......
Page 322: ......

