7–29
62-11640
00051
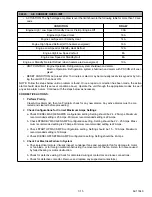
ALTERNATOR (BATTERY CHARGER) NOT CHARGING
• ACTIVATION: Unit is running and the current flow is less than -1.0 amps between the alternator and the
battery for 3 continuous minutes.
• UNIT CONTROL: Engine Operation: Alarm only or (if Alternator Check Shutdown configuration is set to
YES (configured for shutdown) engine and unit shutdown & alarm.
Electric Operation: Alarm only regardless of configuration setting.
• RESET CONDITION: Auto reset (if not shutdown) when battery charger is charging or alarm may be
manually reset using the display mounted keys or by turning the unit off, then back on again.
NOTE: Follow the steps below until a problem is found. Once a repair or correction has been made, clear the
alarm(s). (Refer to Note 1 in
Section, page 7-2.) Operate the unit through the appropriate modes to see if
any active alarm occurs. Continue with the steps below as necessary.
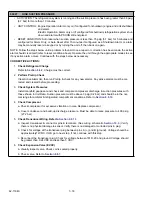
CORRECTIVE ACTIONS:
1.
Check Current Transformer (CT)
a. Check current value. Power up control system in PC Mode. (Refer to
Data. Must be -2.0 to 1.5A with no load.
b. Check CT power from main microprocessor. Must have +5 VDC from terminal 2MM-29 to PCM-31.
c. Check CT ground to main microprocessor. Check wiring from terminal 2MM-23 to PCM-30.
d. Check CT signal to main microprocessor. Check wiring from terminal 2MM-12 to PCM-29.
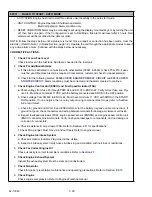
2.
Check Battery Charger Wiring
a. Check output & ground wire (unit OFF.) Negative lead on Ground terminal Positive lead on Output
terminal = same as battery voltage.
b. Check battery charger input. Must be within voltage limits shown in
. Must be
between the two red Wires.
c. Inspect harness & control box connector pins & terminals. (See wiring schematic
Verify there is no physical damage to harness, and no damaged or corroded pins.
d. Check output and ground wire voltages (unit running.) When the unit is started, battery voltage at
the battery will begin near 12.0 VDC, and slowly rise toward 13.5 VDC as the battery charges.
NOTE
Do not test for voltage at output connector of battery charger without connector being connected to
the battery. Without the battery connected any reading will be very inaccurate. (Refer to
for more information on checking battery charger.)
e. Check output (with the unit running). When the unit is started, voltage at the battery will begin near
12.0 VDC, and slowly rise toward 13.5 VDC as the battery charges.
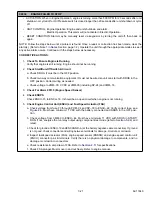
3.
Check High Voltage Fuses, Wiring from Fuses to Batter Charger
Check fuses F33, F34, F35. Verify correct fuse, and check fuse holder for damage, see
.
Replace fuse as required. Clear alarms, restart and check for repeat alarm(s).
4.
Check For Add-on Equipment Drawing Too Much Current
Check amperage of added-on components & accessories. Total current draw including the actual
unit current draw and all add-on components & accessories must be less than alternator rating.
5.
Perform Pretrip Check
Clear Active Alarm list, then run Pretrip & check for any new alarms. Any active alarms must be cor-
rected and cleared before proceeding.
Summary of Contents for Vector 8500
Page 23: ...62 11640 1 6 1 3 SAFETY DECALS ...
Page 24: ...1 7 62 11640 62 03958 ...
Page 25: ...62 11640 1 8 ...
Page 26: ...1 9 62 11640 ...
Page 27: ...62 11640 1 10 ...
Page 125: ...62 11640 SECTION 6 MESSAGECENTER PARAGRAPH NUMBER Page 6 1 MESSAGECENTER MESSAGES 6 1 ...
Page 321: ......
Page 322: ......

