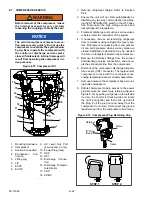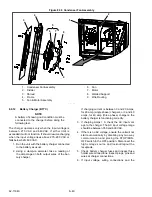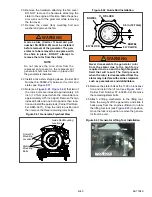
8–29
62-11640
c. Diagnostics
−
Valve
NOTE
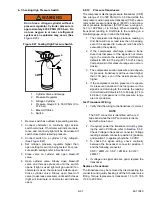
If the valve failed Pretrip and passed the pre-
ceding diagnostic testing, this is an indica-
tion that the valve internal mechanism is
damaged and the piston and motor assem-
bly is to be replaced.
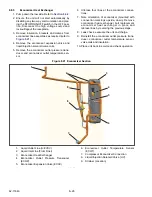
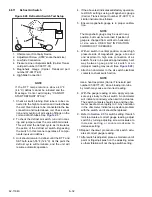
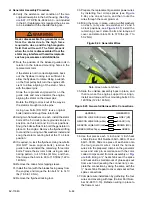
Figure 8.25 Evaporator Expansion Valve
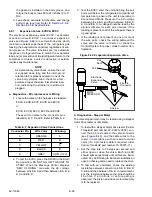
Test the EVXV valve internal mechanism:
1. Install a manifold gauge set on the suction ser-
vice valve and a stepper motor drive tester.
Refer to
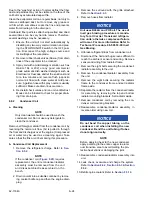
NOTICE
The scroll compressor achieves low suc-
tion pressure very quickly. Do not use the
compressor to evacuate the system
below 0 psig. Never operate the compres-
sor with the suction or discharge service
valves closed (frontseated). Internal dam-
age will result from operating the com-
pressor in a deep vacuum.
2. Start the unit, set the step rate to 200 steps per
second, open and close the valve while watch-
ing the suction pressure. Within one minute the
suction pressure should begin to fall.
3. If the suction pressure does not change, this is
an indication the valve is stuck and the piston
and drive motor assembly is to be replaced.
Test the ECXV valve internal mechanism:
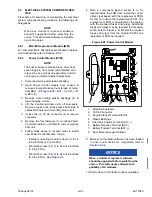
1. To test the ECXV, install a stepper motor drive
2. Use the stepper motor drive tester to close the
ECXV completely, and run the unit for 5 min-
utes.
3. Check for a temperature change through the
valve. If there is a temperature change, it indi-
cates that the ECXV is stuck open and needs to
be replaced. If there is not a temperature
change, record the CDT and AC current from
Unit Data.
4. Use the stepper motor drive tester to open the
ECXV, and run the unit for 5 minutes.
5. Check for a temperature change through the
valve, if there is a temperature change, it indi-
cates that the ECXV opened correctly.
From Unit Data, make sure the CDT tempera-
ture reading went down, and that the AC current
draw went up.
d. Replace Expansion Valve & Strainer
1. Pump down the low side. Refer to
.
2. Remove coil and unbraze valve. Clean all tube
stubs so new valve fits on easily.
3. Verify the strainer is in place.
4. Use a wet rag to keep the replacement valve
cool and braze in place.
5. Leak check and evacuate the low side. Refer to
and
NOTE
The strainer for the ECXV is located in the
tube above the LIV connection, refer to
A
B
B
A
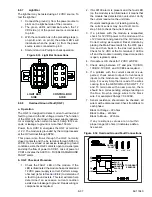
PIN A (ORANGE)
PIN B (RED)
PIN C (YELLOW)
PIN E (GRAY)
PIN D (BLACK)
COMMON
(+12VDC)
Summary of Contents for Vector 8500
Page 23: ...62 11640 1 6 1 3 SAFETY DECALS ...
Page 24: ...1 7 62 11640 62 03958 ...
Page 25: ...62 11640 1 8 ...
Page 26: ...1 9 62 11640 ...
Page 27: ...62 11640 1 10 ...
Page 125: ...62 11640 SECTION 6 MESSAGECENTER PARAGRAPH NUMBER Page 6 1 MESSAGECENTER MESSAGES 6 1 ...
Page 321: ......
Page 322: ......

