T-296
4-2
0
30
60
90
120
150
180
210
240
0 10 20 30 40 50 60 70 80 90 100
AIR
FLOW
(CMH)
1-
!
/
2
”
PERCENT OPEN
50HZ
T-BAR
2-
%
/
8
”
3”
T-BAR
T-BAR
0
40
80
120
160
200
240
280
0 10 20 30 40 50 60 70 80 90 100
AIR
FLOW
(CMH)
1-
!
/
2
”
PERCENT OPEN
60HZ
T-BAR
2-
%
/
8
”
3”
T-BAR
T-BAR
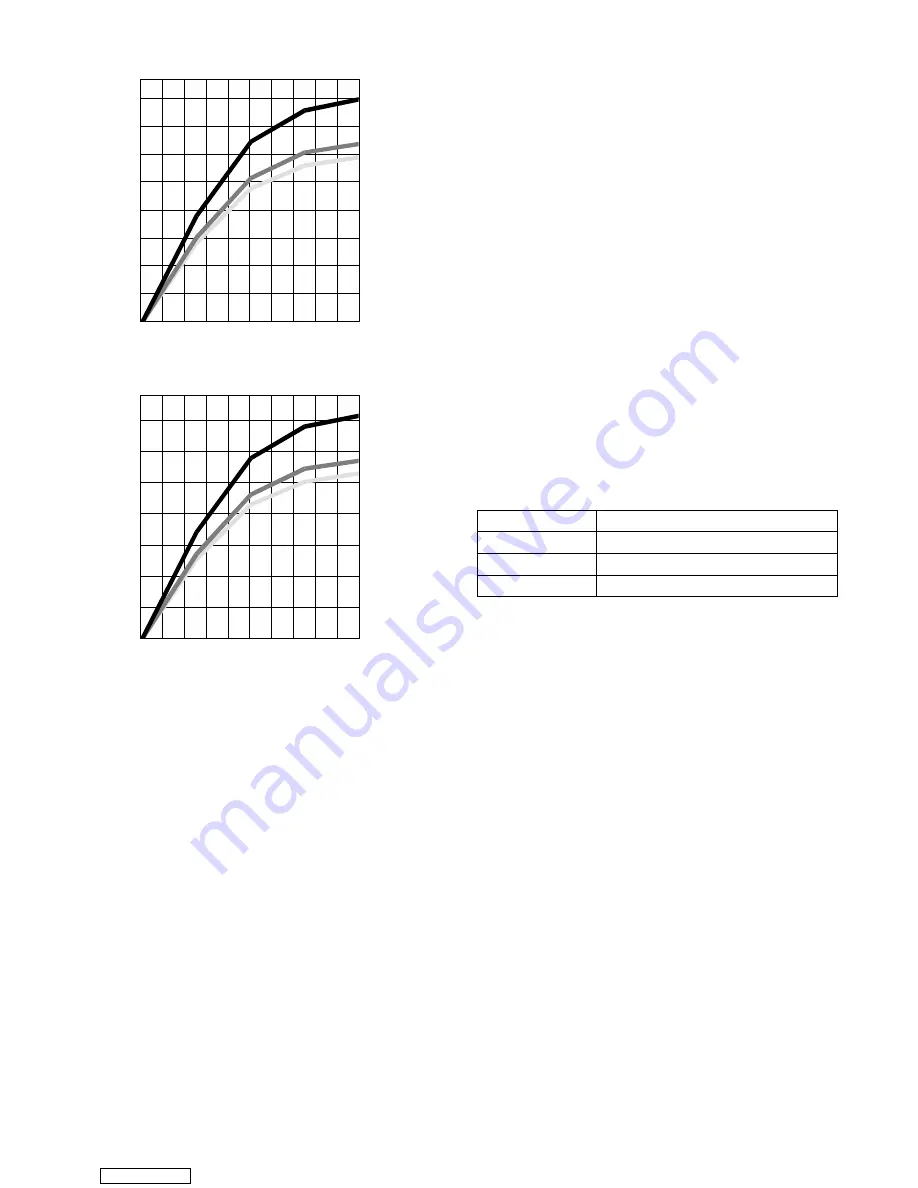
Figure 4-2 Make Up Air Flow Chart 50/60Hz
4.4 CONNECT WATER-COOLED CONDENSER
The water-cooled condenser is used when cooling
water is available and heating the surrounding air is
objectionable, such as in a ship’s hold. If water cooled
operation is desired, connect in accordance with the
following subparagraphs.
4.4.1 Water--Cooled Condenser with Water Pres-
sure Switch
a. Connect the water supply line to the inlet side of con-
denser and the discharge line to the outlet side of the
condenser. (See Figure 2-5.)
b. Maintain a flow rate of 11 to 26 liters per minute (3 to 7
gallons per minute). The water pressure switch will
open to de-energize the condenser fan relay. The
condenser fan motor will stop and will remain stopped
until the water pressure switch closes.
c. To shift to air-cooled condenser operation,disconnect
the water supply and the discharge line to the water-
cooled condenser. The refrigeration unit will shift to
air-cooled condenser operation when the water pres-
sure switch closes.
4.4.2 Water-Cooled Condenser with Condenser
Fan Switch
a. Connect the water supply line to the inlet side of con-
denser and the discharge line to the outlet side of the
condenser. (See Figure 2-5.)
b. Maintain a flow rate of 11 to 26 lpm (3 to 7 gpm).
c. Set the condenser fan switch to position ”O”. This will
de-energize the condenser fan relay. The condenser
fan motor will stop and remain stopped until the CFS
switch is set to position ”I.”
CAUTION
When condenser water flow is below 11 lpm
(3 gpm) or when water-cooled operation is
not in use, the CFS switch MUST be set to
position ”1” or the unit will not operate
properly.
d. To shift to air-cooled condenser operation, stop the
unit, set the CFS switch to position ”I” and restart the
unit. Disconnect the water lines to the water-cooled
condenser.
4.5 CONNECT REMOTE MONITORING
RECEPTACLE
If remote monitoring is required, connect remote
monitor plug at unit receptacle. (See item 9, Figure 2-6.)
When the remote monitor plug is connected to the
remote monitoring receptacle, the following remote
circuits are energized:
CIRCUIT
FUNCTION
Sockets B to A Energizes remote cool light
Sockets C to A Energizes remote defrost light
Sockets D to A Energizes remote in-range light
4.6 STARTING AND STOPPING INSTRUCTIONS
WARNING
Make sure that the unit circuit breaker(s)
(CB-1 & CB-2) and the START-STOP switch
(ST) are in the “O” (OFF) position before
connecting to any electrical power source.
4.6.1 Starting the Unit
1. With power properly applied, the fresh air damper set
and (if required) the water cooled condenser con-
nected, (refer to paragraphs 4.2, 4.3 & 4.4) place the
START-STOP switch to “I” (ON).
2. Continue with Start Up Inspection, paragraph 4.7.
4.6.2 Stopping the Unit
To stop the unit, place the START-STOP switch in
position “0” (OFF).
4.7 START--UP INSPECTION
4.7.1 Physical Inspection
a. Check rotation of condenser and evaporator fans.
b. Check compressor oil level. (Refer to paragraph
6.8.6.)
4.7.2 Check Controller Function Codes
Check and, if required, reset controller Function Codes
(Cd27 through Cd39) in accordance with desired
operating parameters. Refer to paragraph 3.2.2.
4.7.3 Start Temperature Recorder
Downloaded from


