background image


main unit to ensure the main unit can receive the channel. The main unit gives a 

“beep” sound if it received the temperature. 


Display outdoor temperature: 

z


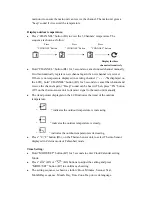
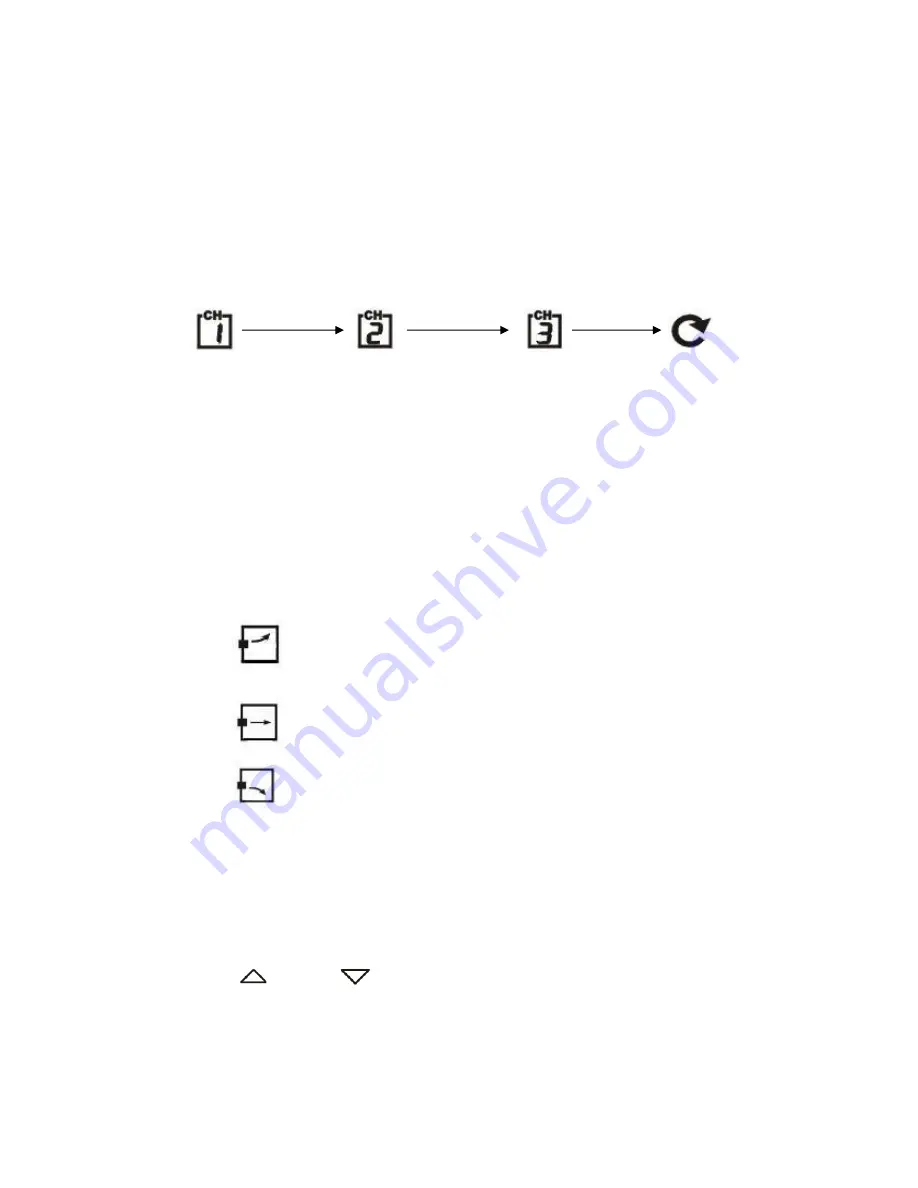
Press “CHANNEL” button (B3) to view the 3 Channels’ temperature. The 

sequence is shown as follow: 


Press


Press


Press


“CHANNEL” button


“CHANNEL” button     “CHANNEL” button 


  Display the three   

channels alternatively


z


Hold “CHANNEL” button (B3) for 3 seconds to cancel unused channel manually. 

It will automatically register a new channel again if a new channel is received. 

If there is no temperature displayed in existing channel ( “ 

- - . –“is

 displayed on 

the LCD), hold “CHANNEL” button (B3) for 3 seconds to cancel that channel and 

receive the channel again ( “Beep” sound can be heard.) Then, press “TX “button 

(D7) on the thermo sensor unit to transmit signal to the main unit manually 

z


The trend pointer displayed on the LCD indicates the trend of the outdoor 

temperature. 

“ 

      ” indicates the outdoor temperature is increasing.   

“ 

    ” indicates the outdoor temperature is steady. 

“ 

    ” indicates the outdoor temperature is decreasing.   

z


Press “°C /°F” button (D6), on the Thermo Sensor unit, to select Thermo Sensor 

displayed in Celsius mode or Fahrenheit mode.   


Time Setting: 

z


Hold “MODE/SET” button (B7) for 3 seconds to enter Clock/Calendar setting 

Mode. 

z


Press “

” (B5) or “

” (B6) buttons to adjust the setting and press 

“MODE/SET” button (B7) to confirm each setting. 

z


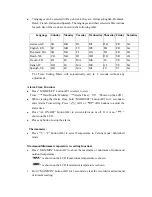
The setting sequence is shown as follow: Hour, Minutes, Second, Year, 

Month/Day sequence, Month, Day, Time Zone, Day-of-week language. 

Summary of Contents for KW9025CC

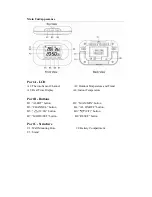
Page 1: ... Outdoor temperature 20 C 50 C z Outdoor temperature alert function z Max Min Memory for Indoor and Outdoor Temperature z Low battery indicator for Outdoor Remote Sensor z Perpetual Calendar Up to Year 2069 z 12 24 Hour time display selectable z Day of week in 7 Languages Selectable z Table Stand or Wall Mount Selectable z Battery Main Unit DC 1 5 V AA size x 2 pcs Thermo Sensor Unit DC 1 5 V AAA ...

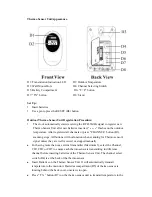
Page 2: ...re and Trend A3 Real Time Display A4 Indoor Temperature Part B Buttons B1 ALERT button B2 MAX MIN button B3 CHANNEL button B4 AL ON OFF button B5 12 24 button B6 C F button B7 MODE SET button B8 RESET button Part C Structure C1 Wall Mounting Hole C2 Battery Compartment C3 Stand ...

Page 3: ...ss CHANNEL button B3 scanning stops All buttons will not function when scanning for Thermo sensor s signal unless they are well received or stopped manually z For having more than one external transmitter Maximum3 select the Channel CH1 CH2 or CH3 to ensure each thermo sensor is transmitting in difference channel before inserting batteries of the Thermo Sensor Unit The channel select switch D4 is ...

Page 4: ...el that channel and receive the channel again Beep sound can be heard Then press TX button D7 on the thermo sensor unit to transmit signal to the main unit manually z The trend pointer displayed on the LCD indicates the trend of the outdoor temperature indicates the outdoor temperature is increasing indicates the outdoor temperature is steady indicates the outdoor temperature is decreasing z Press...

Page 5: ...lock Function z Press MODE SET button B7 to select to view Time Date Month Weekday Alarm Time Shown on the LCD z When viewing the Alarm Time hold MODE SET button B7 for 3 seconds to enter Alarm Time setting Press B5 or B6 buttons to adjust the alarm time z Press AL ON OFF button B4 to switch alarm on or off If it is on shown on the LCD z Press any button to stop the alarm Thermometer z Press C F b...

Page 6: ...ppears on the LCD if this function is on Low batteries indicator z Low battery icon appear at particular channel indicating that Thermal Sensor Unit of the channel is in low battery status The batteries should be replaced Note z Always read the users manual carefully before operating the Unit z Use a pin to press the reset button B8 if the Unit does not work properly z Avoid placing the clock near...

Page 7: ... interference in a residential installation This equipment generates uses and can radiate radio frequency energy and if not installed and used in accordance with the instructions may cause harmful interference to radio communications However there is no guarantee that interference will not occur in a particular installation If this equipment does cause harmful interference to radio or television r...

Reviews: