Profile:
It is our latest designe and with strict production control and quality inspection product. It has a good outlook
appearance and easy installation. It is a best choice for professional projectors.
Performance:
1. Ultra thin designed to meet up with narrow installation place.
2. Smooth performance with low noice.
3. Overheat protection function.
4. Easy cabling installation
Specification:
Operating environment for indoor use only:
1. Temperature: -10°C --- +40°C.
2. RH<95%.
3. Environment with non-corrosive gas.
4. Environment without organic aerosol inflammable and explosive gas.
5. Voltage: 100V / 220V
(
±10
%)
.
6. Avoid violent vibration and collision.
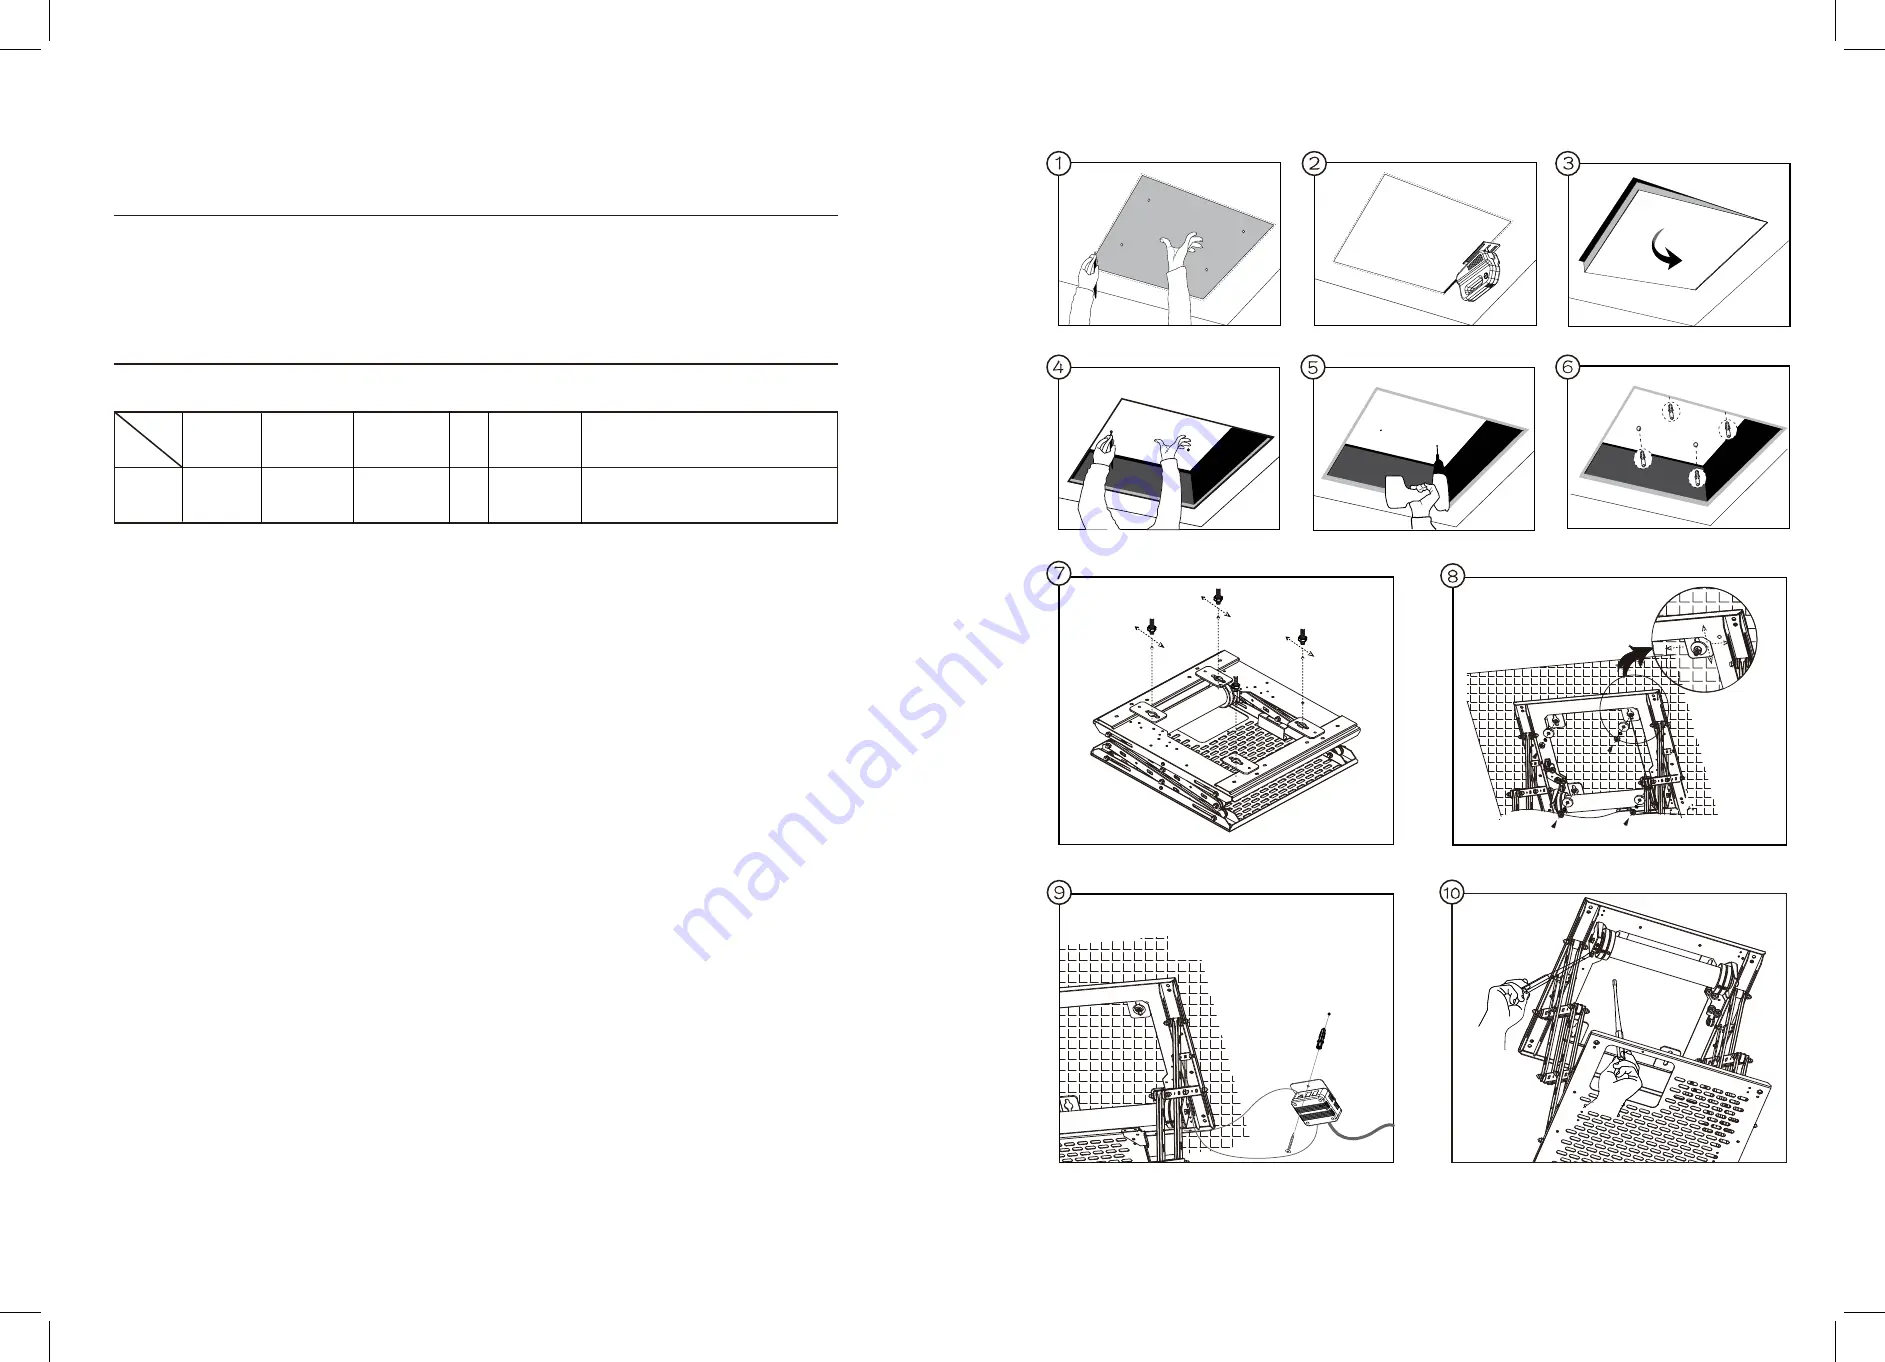
Installation steps :
1. Based on the screen size and the projector’s focal distance to set the installation place,
use the measuring plate to make underline on the false ceiling.
2. Cut out the holes as above underline.
3. Take out the cut board for later using.
4. Mark out 4 locations where the expansion screws should locate on the ceiling by the measuring board.
5. Drilling out those 4 holes as the marks.
6. Screw an expansion screw into each hole.
7. Install the main body onto the screws.
8. With a metal gaskets to each screw, fine adjust the main body to the right position.
9. Drilling out the expansion screws hole onto the real ceiling which beside the lift body(please look out the distance
between the screw hole and the lift motor not exceed its connect cable length), then screw the expansion screw
into the hole, instal the control box by M5 self-tapping screw.
10. Turn the projector lift on and set the UP and DOWN limits.
11. Install the necessary cables such as HDMI.
12. Install the patch of mounting plate by M5 scews.
13. When use M4 screws fixed projector onto the lift tray, please use M6 screws to fixed the decorate plate.
14. When use M4 screws fixed projector hang on the tray, please use M6 screws to fixed the decorate plate, and
fixed the decorte plate to suitable position by adjusting the M6 screw nut.
Body size
(mm)
Model
Spec.
Travel distance
(mm)
Lay: projector depth dim65
Hang: projector depth dim170
Lay: 390*400
Hang: 530*470
20
544*544*168
CM76X
170-750
574*574
Decorative plate
(mm)
Load
(kg)
Projector size
(mm)
Installation diagram:
Set the DOWN limits
Set the UP limits
Distance from ceilling to
false ceiling(mm)


