background image

Page 5 of 24 


Place battery in tray. Insert battery cable into caddy, 
making sure to align pins. Depress silver spring lock 
before removing cable. 


Load golf bag onto caddy. Balance weight of golf bag 
equally “side to side”. Attach bag straps using the metal 
latches; the shorter strap goes on the bottom and the 
longer strap attaches to the underside of the top bag rest. 
For best results always leave the lower bag strap attached 
and stretch it out over the bottom of your golf bag. 


Insert two AAA batteries into the remote control.  Turn 
on the remote control.  The on off switch is on the 
backside of the remote control. Notice the antenna on the 
remote. It is optional to pull out. Pull out if needed for 
longer range. 


There are two spare 40 Amp Blade Fuses packed with 
your caddy. You should carry these in your golf bag. In 
case of ‘power loss’, check the fuse. The fuse block is in 
the battery bag on the red lead of the battery cable. 


Place the USB cable that comes with your caddy in a 
secure location. It is only used if you need to “pair” a new 
remote to your caddy. Your remote is already matched 
and paired to your caddy. 


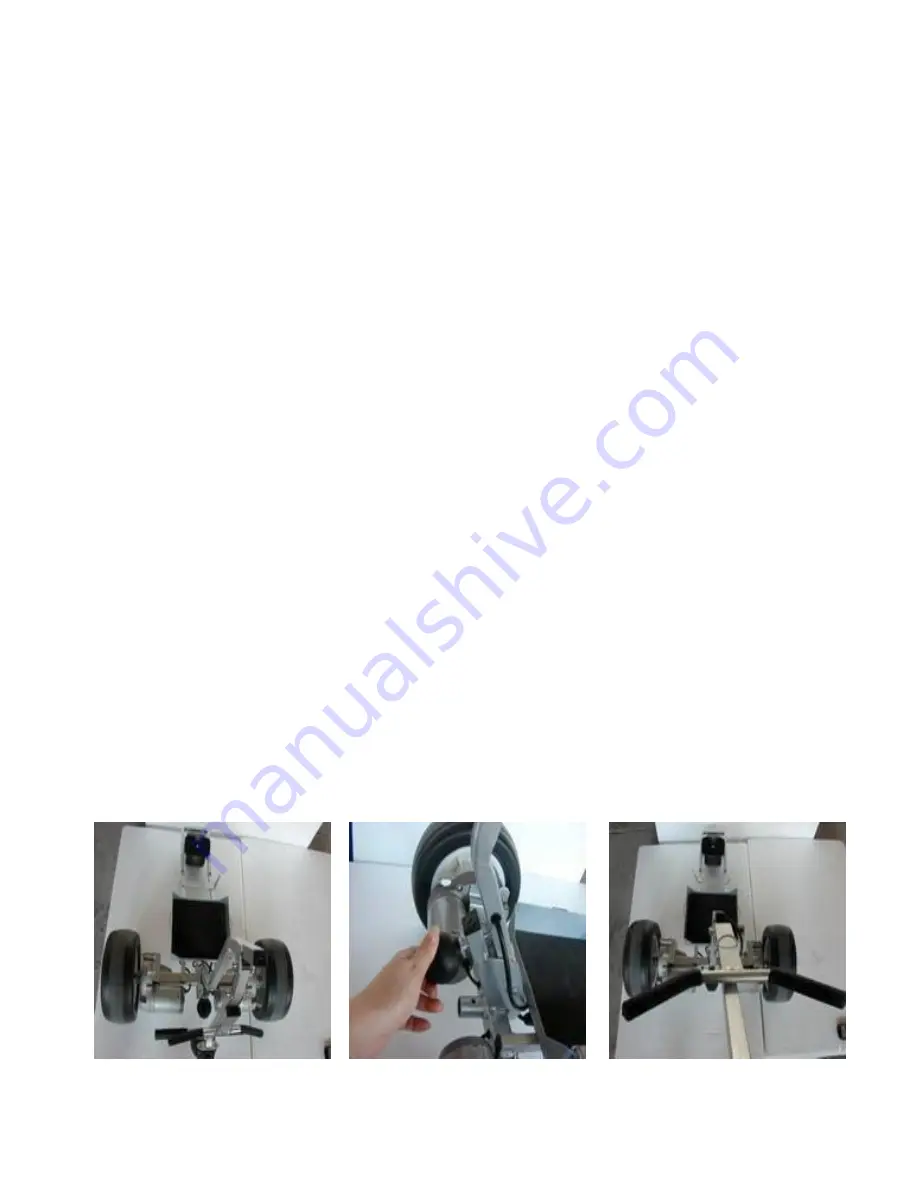
1.) Lift handle into 

up- right position. 

2.) Tighten Lower 

locking knob. 

3.) Lower upper bag 
rest to lock handle 

Summary of Contents for GRX-1200-R

Page 1: ...ughly quality control checked before being shipped to your address We do everything possible to assurethat your caddy is in perfect working order upon arrival Should you have any issues or questions about the performance of your caddy please contact us at don carttekcanada ca or888 245 7835 ...

Page 2: ... BASIC SET UP 4 PRECAUTIONS 6 BATTERY MAINTENANCE 8 TURNING ON YOUR GRX 1200R 10 MANUAL MODE 11 REMOTE TRANSMITTER 11 REMOTE CONTROL MODE 13 PROGRAMMING YOUR GRX 1200R CADDY CART 14 TROUBLE SHOOTING GUIDE 17 WARRANTY SPARE PARTS AND ACCESSORIES 24 ...

Page 3: ... to ensure safe and secure transit Check that all components are included in the package Main Caddy frame Transmitter Drive wheels Anti tip wheel Battery complete with battery bag and batterycable Battery charger Accessories User Manual Tool kit Contents of this manual cover assembly from the delivery carton operating instructions maintenance and troubleshooting Please note that our design and man...

Page 4: ...ure it is engaged and attached to the axle Attach rear anti tip wheel Lift handle and secure with lower locking knob Extend handle fully and secure in position bylowering the upper bag rest which is already attached to the handle Securely attach antenna to receiver dome on the top of the handle After unpacking the caddy and while reading this manual place the battery on charge while you assemble t...

Page 5: ...he remote control Turn on the remote control The on off switch is on the backside of the remote control Notice the antenna on the remote It is optional to pull out Pull out if needed for longer range There are two spare 40 Amp Blade Fuses packed with your caddy You should carry these in your golf bag In case of power loss check the fuse The fuse block is in the battery bag on the red lead of the b...

Page 6: ...may lead to tracking errors i e too much weight on the right side will cause caddy to veer to the left 3 The front wheel must stay grounded during play The only exception is on steep inclines Your GRX 1200R should only tip onto the rear wheel when on extreme inclines Over 25 degree inclines 4 On steep inclines if the front wheel does come off the ground use manual mode to guide the caddy Avoid ste...

Page 7: ...he caddy perpendicular across the hill and hit the coast button and then the parking brake button 7 Periodically spray the front wheel bearings with WD 40 wipe off excess residual 8 Periodically spray the bearings on the drive wheels between the drive collars and gearboxes with WD 40 wipe off excess residual 9 Do keep a set of fresh unopened AAA batteries in yourgolf bag for your remote Replace re...

Page 8: ...und of golf Battery should be connected to charger whenconnecting AND disconnecting charger from power source To maximize battery life always charge your caddy battery immediately following your round of golf even if you only played 9 holes After a round of golf always verify that the charger light is RED when connecting battery tocharger The charger LED will flip to Green when battery isfully cha...

Page 9: ...top and bottom surfaces of ring connectors Periodically remove and clean ring terminals and battery terminals with WD40 Wipe off excess film and screw battery cable back on to battery Do this at least once a year even if you think it does not need it Ensure that the battery cable is not loose on the battery The ring terminals on the battery cable that connect to the battery terminals should be scr...

Page 10: ...serting and removing battery cable from caddy When first connecting the battery to the caddy the green LED on the receiver dome will slowly flash This is Standby mode Push and hold on off button until the green LED is solid To completely turn off the caddy disconnect the battery cable Power standby Indicator LED Antenna Speed Dial On off button Receiver Dome on Caddy Handle ...

Page 11: ...on the receiver dome once Push the coast button on the remote control To resume use in manual mode turn the speed dial back to zero and then turn speed dial clockwise to the desired speed REMOTE TRANSMITTER The transmitter has a small on off switch on the backside To save battery life turn off the remote control transmitter when not in use Replace AAA batteries as needed If your caddy misses signa...

Page 12: ...ng to change speed settings Left Right Arrows Turns caddy to the left or Parking Brake Thered button in the middle of the directional controls is an electronic parking brake On inclines park your caddy across perpendicular to hill Program Coast Button This button performs two functions 1 A single quick push allows the caddy to coast to a stop No brakes are applied all power to motors is suspended ...

Page 13: ...op the caddy on an incline turn caddy across the hill hit the coast button and then hit the parking brake The range of the transmitter is 50 100 yards depending on environmental conditions The caddy cart will shut down when it is outside of the remote transmitters range We recommend you operate your caddy within 20 30 yards for best control For your protection the caddy has a 60 second timer To pr...

Page 14: ...hooting page 19 of this manual before using electronic tracking adjustment Reset Caddy back to original Factory Settings This is useful if your caddy accidently gets programed or you program it and you do not like the new settings For the instructions below that say go into program mode follow these instructions On your remote transmitter Press the parking brakebutton When first using your caddy p...

Page 15: ...ing at your new desired speed Button is now set to new speed 2 Adjust turning force You can increase or decrease the speed at which the caddy turns Go into Program Mode Press the reverse button to stop the caddy To increase the turning power press the forward button To test the adjustment press the left or right turn buttons To decrease the turning power press the reverse button Test as above To s...

Page 16: ...l Programing back to Original Factory Settings Go into Program Mode Press the reverse button to stop the caddy Press 1 3 4 2 then the parking brake button Your caddy should be at factory settings 5 Matching a New Remote Transmitter to your caddy Should you need to replace your remote transmitter you will need to pair match it to your GRX 1200R NO need to go into program mode With the caddy on soli...

Page 17: ...ote buttons TROUBLE SHOOTING GUIDE My caddy will not show any indicator LED on the caddy handle 1 Ensure Caddy Battery is plugged into the Caddy receptacle 2 Check Caddy Battery terminal connections Check both sides of ring terminals for corrosion verify they are clean and tightly screwed into the battery 3 Check fuse block on Battery Power Cable Inside the battery bag located on the positive red ...

Page 18: ...nsmitter 2 Try restarting the caddy by disconnecting the battery for 5 seconds then powering the caddy back on Test remote again 3 Ensure that the remote has a flashing red LED when pressing a function button If not replace batteries in remote 4 Pair remote transmitter to caddy cart receiver by using the supplied USB cord Follow the directions in the manual or check our video 5 If problem persists...

Page 19: ... for corrosion Remove any corrosion and tighten cable to battery 3 If problem persists call CartTek for TechnicalSupport My caddy has erratic steering i e Spins to the right left goes forward backwards when pressing right left 1 Ensure both wheels are fully engaged into the drive collars located on the axles 2 Check that drive collars are secured onto the axles The drive collar is attached to the ...

Page 20: ...nually adjust tracking on the front wheel If your caddy is going off track more than 3 feet within 20 yards adjust the axle in the front wheel To fine tune the front wheel axle is to move the front wheel axle very slightly If caddy turns to the right you will adjust the right side of front wheel axle forward and vice versa if the caddy tracks left you will move the axle slightly forward on the lef...

Page 21: ...Page 21 of 24 ...

Page 22: ...D means Low Battery Slow Flashing Red indicator LED means High Temperature and you need to allow the caddy to cool down Rapid Flashing Red indicator LED means High Current Draw This can be caused by too much weight on your caddy or trying to climb too steep of hill 3 Ensure the AAA batteries in the transmitter are fresh 4 Due to on board electronics there might be environmental interferences causi...

Page 23: ...opped working what was the situation 2 What color was the LED light on the receiver dome on the caddy In bright sunshine you may have to cup your hands over the done to see the light This is critical information to the troubleshooting process There are 5 options a Solid green b Flashing green c Solid Red d Flashing Red e No Light 3 The last time you charged your battery did you see the charging li...

Page 24: ...Page 24 of 24 FOR WARRANTY SPARE PARTS AND ACCESSORIES Contact Us Toll Free 888 245 7835 http www carttekcanada ca CartTek Canada 1372 Merrybrook Lane Oakville Ontario L6M 1T4 Email don carttekcanada ca ...

Reviews:

Related manuals for GRX-1200-R