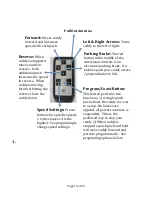


Page 16 of 25
QUICK TIP
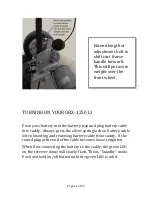
YOUR GRX-‐1250 LI CADDY CART
The caddy electronics may be customized for your personal
preferences. All programing customization is done via the
remote transmitter. Using “Program Mode” you can adjust the
electronics to:
•
Adjust Turning Force. Depending on your course, flatter
golf courses require less turning force that hilly or
undulated golf courses.
•
Tracking issues. If a caddy veers off to one side. Read all
tracking information under Precautions page 6 and
Trouble Shooting page 19 before using electronic tracking
adjustment.
•
Reset Caddy back to original Factory Settings. This is
useful if your caddy accidently gets programed or you
program it and you do not like the new settings.
For the instructions below that say “go into program mode”,
follow these instructions;
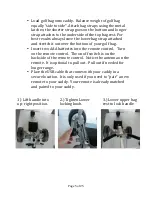
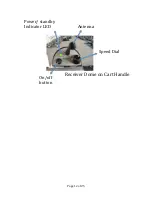
On your remote transmitter, “Press the parking brake button.
When first using your caddy, practice in a large open area.
Take the time to practice the difference between a single
touch of a key and a prolonged push especially with left and
right functions. Also get comfortable with the coast and
parking brake buttons. Practice turning the caddy
perpendicular to hills when parking on an incline.


