

Page 24 of 25
2.
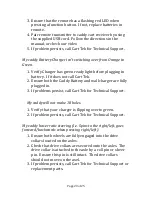
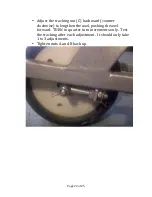
Press the blade on the wheel hub and pull wheels out of
drive collar and lock wheels into groove on axel. Ensure
that the wheel is locked onto the axel.
3.
In free wheel mode you can pull the caddy backwards.
My caddy has stopped working and I cannot figure out what is
wrong. Please call CartTek customer service and have the
following information available.
1.
When the caddy stopped working, what was the
situation?
2.
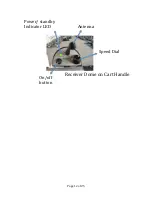
What color was the LED light on the receiver dome on
the caddy? In bright sunshine you may have to cup your
hands over the done to see the light. This is critical
information to the troubleshooting process. There are 5
options:
a.
Solid green
b.
Flashing green
c.
Solid Red
d.
Flashing Red
e.
No Light
3.
The last time you charged your battery did you see the
orange charging light? When the battery is on the
charger now after the caddy stopped working, do you see
the orange charging light?
4.
Were you able to get the caddy to work again? If so what
steps did you take?


