

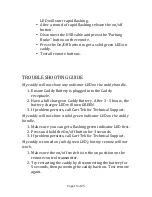
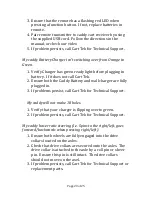


Page 9 of 25
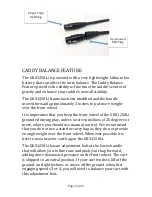
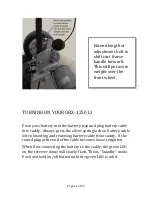
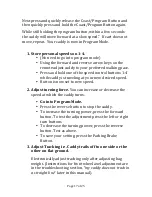
CADDY BALANCE FEATURE
The GRX1250Li is powered with a very lightweight Lithium Ion
battery that can affect the carts balance. The Caddy Balance
Feature provides the ability to fine tune the caddie’s center of
gravity and enhance your caddie’s overall stability.
The GRX1250Li frame has been modified and the handle
moved forward approximately 2 inches to put more weight
over the front wheel.
It is imperative that you keep the front wheel of the GRX1250Li
grounded during play, unless on steep inclines of 25 degrees or
more, where you should use manual control. We recommend
that you do not use a stand or carry bag as they do not provide
enough weight over the front wheel. Whenever possible it is
best to use a heavier cart bag on the GRX1250Li.
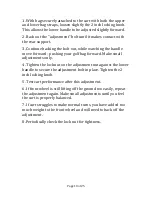
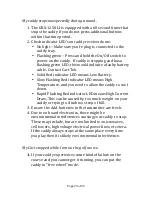
The GRX1250Li has an adjustment bolt at the lower handle
that will allow you to fine tune and push your bag forward,
adding more downward pressure on the front wheel. The cart
is shipped in a neutral position. If your cart tends to lift off the
ground on slight inclines or raises off the ground when first
engaging speeds 3 or 4, you will need to balance your cart with
this adjustment bolt.
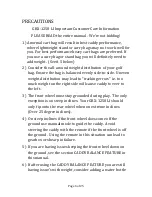
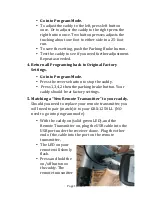
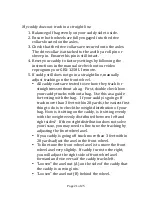
Proper Tight
XLR Plug
Un-‐screwed
XLR Plug


