background image

Electric Golf Cart User Manual 

Page 12 of 15   

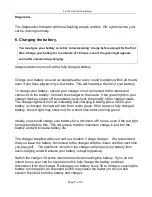
DO NOT leave the charger connected to the mains if the battery is not attached. This 
will shorten the life of the charger. 


DO NOT leave the charger connected to the battery if it is not connected to the mains. 
This will discharge your battery. 


DO NOT charge your battery on a concrete floor - always charge on a shelf/bench 
or place the battery on a plank of wood.   

7  Use & Maintenance 

  Battery 

1)  Regularly check to see if the battery is damaged 

2)  Keep the battery surface clean, and check underneath the battery cover to 

make sure that no dirt or water has attached to it. 

3)  Check  the  battery  connections  –  underneath  the  small  plastic  covers  –  for 

any signs of corrosion or bad connection. 

4)  Check that the wires from the battery cover are firmly fixed to the terminal 

posts. 

5)  After use always place the battery on charge – in warm dry conditions. 

6)  If the cart will be used again soon then you can leave the battery on charge 

until that time. Always allow sufficient charging time to completely charge the 

battery – overnight or 6 to 8-hours should be sufficient. 

7)  If the battery is to be stored – for instance over winter – and not used it can 

be  disconnected.  If  disconnected  for  storage  always  recharge  the  battery 

completely at intervals – at least once every 30-45 days. Allowing the charge 

of the battery to drop to a completely exhausted state can shorten the life of 

the battery. 

8)  Do  NOT  charge  the  battery  with  a  different  charger  that  that  supplied  with 

the cart. 

9)  If stored place the battery on a wooden shelf – not on a concrete floor. Keep 

away from fire – flames – heaters – and do not allow it to be in a temperature 

of over 45 deg C (113 deg F) 


Summary of Contents for GRX-860

Page 1: ...GRX 860 Electric Golf Cart User Manual...

Page 2: ...Manual Page 1 of 15 Index 1 Introduction 2 Identification main components 3 Assembly 4 Handle and LED display 5 Operating functions and modes 6 Drive wheels 7 Use and maintenance 8 Troubleshooting 9 S...

Page 3: ...luded in the package Main cart frame Drive wheels Battery complete with battery bag Battery charger User Manual Tool kit After unpacking the cart place the battery on charge whilst you assemble the un...

Page 4: ...l Page 3 of 15 2 Main component identification 1 On off switch 5 Battery 9 Front wheel assembly 2 Handle 6 Drive wheel 10 Bag support and strap 3 Up bag support 7 Wheel hub 11 Battery support 4 Centra...

Page 5: ...nd of the axle and the wheel marked R on the right end of axle And then slide and hold the knob on the centre hub cap and push the wheel fully on to the axle Pull up on the handle and unfold the cart...

Page 6: ...Electric Golf Cart User Manual Page 5 of 15 Put the battery into the battery case Connect the battery plug Flip the upper bag support down This is how the cart should look when fully assembled...

Page 7: ...hold the centre knob for 3 seconds then release The screen will light up There are 5 Operating Modes Modes 0 4 Mode 0 Competition Mode no display of speed or distance Mode 1 Speed Setting and normal u...

Page 8: ...to move forward To adjust the speed turn the Command Button clockwise to increase speed To reduce speed turn the Command Button anti clockwise To stop your cart briefly press the Command Button In Mo...

Page 9: ...o adjust the speed turn the Command button to increase or decrease the speed When your cart is moving the display will show the speed you are traveling in mph or kph This may vary slightly as you go u...

Page 10: ...nd button too quickly the display will count up more slowly A moderate turn is the optimum Point your cart in the right direction and briefly press the Command button Your cart will travel the set dis...

Page 11: ...nything else To increase the counter simply press the left button Each press will add 1 to the count The total will be memorized To reset the Counter to 000 switch your cart off and back on again Batt...

Page 12: ...reen Ideally you should charge your battery for a minimum of 8 hours even if the red light turns green before this This will ensure that the maximum charge is put into the battery and will increase ba...

Page 13: ...he wires from the battery cover are firmly fixed to the terminal posts 5 After use always place the battery on charge in warm dry conditions 6 If the cart will be used again soon then you can leave th...

Page 14: ...rom the cart as soon as possible Fault Instruction When the screen displays the following Mode 5 Indicates a fault in the sensor system from the drive system to the controller Could be a faulty sensor...

Page 15: ...the cart Bad wire connection Either to the switch in the handle or at the connection plugs to the controller Same conditions as above but the LED is illuminated Bad wire connection to the motor Either...

Page 16: ...al spare parts This also applies to the battery Only lend the cart to people who are familiar with the use The cart must only be pushed Never pull the cart until the wheels have been changed Waste ele...

Reviews: