background image


_K 

'-- -

-' 

\-u'SE 

AMP 

SLDW·� 

- _, 

C4 

SWIB 

2JOCJ 

2-oOV 

cs 

2100 

L\ 

2oov 

R7 
SIK 

D6 

c33 

c_g 

ND1£S 

� 

UNLE<)�  0\HE.�W\SE  SPEUf\ED 

l. 

IS 

\N  0\-\MS 

/4 

W. 

Z.  C..A.l"A.C.\\ t>.NL."E.  \<:, 

IN  UF. 

lON! 

l TR 

Rf VISION$ 

OlSOllPTtOI'< 

3.  U2. 

\'S 

A. 

LM 3�. 

"'1. 

DA')HED  LINE  (

- - - -

'S:.\-\0\NS  BRE.C..K  'BEIWEEN 

BOARD  ANb  C.\-\A SS\"::. 

MDUN'"TED 

C..Ot../\PONENI<;, 

• 

5.  D10DES  ARE  IN414B. 

b.I(  R20 

�R.ZS-

,'R40 

� 

·�4\  A�t  11011\E..Ml" 

CaEFFIC.El\.n 

'TYPE  RES. 

(2> 

M.l\002'3 

lS 

A  DA�UNG \ON  T�N-.1"'::.\'S.\OR. 

(NOTE.5 

O"'ll'""lNUED" 

C2£.LO\N) 

R34 

'=>.8K 

R49 

+5 V  <:a..! UL 

f"lll.t:D  Tl'{1M  C.AI" 

• 

VALUf'  .O.">  R!:.Q'b 

'F�  �'l.AN�l<\l:.l 

LOI. 

IN4007 

2.0 

Y"f-W 

R<D6 

IOK. 

Q6 

tv\J\0025 

D\li:i 

01: 

2.0 

IN40D7 

(z.�) 

Y4W 

\OOOV 

ID 

.02 

3W 

r. 

Q7 

M..;  \OOlS 

CT> 

3 3. 

.3W 

. OIB 

t;,50 V 

FIE> 

.Ols 

�sov 

33  3W 

'BLUE 

PURPLE 

DI� 

MR. &52.. 

l�X) 

PURr'LE 

� 

WIRE  DIRECTLY  TO  WIRE 

PAD  .. F". 

Uflflf5�  OlHf.Wl'H  �Clfl[[_ 

C()NlAACl  H(' 

;::�::::��;:_.:��1:_:�0 

• 

CAR \IE R  C OR PO R A\  \ 0 N 

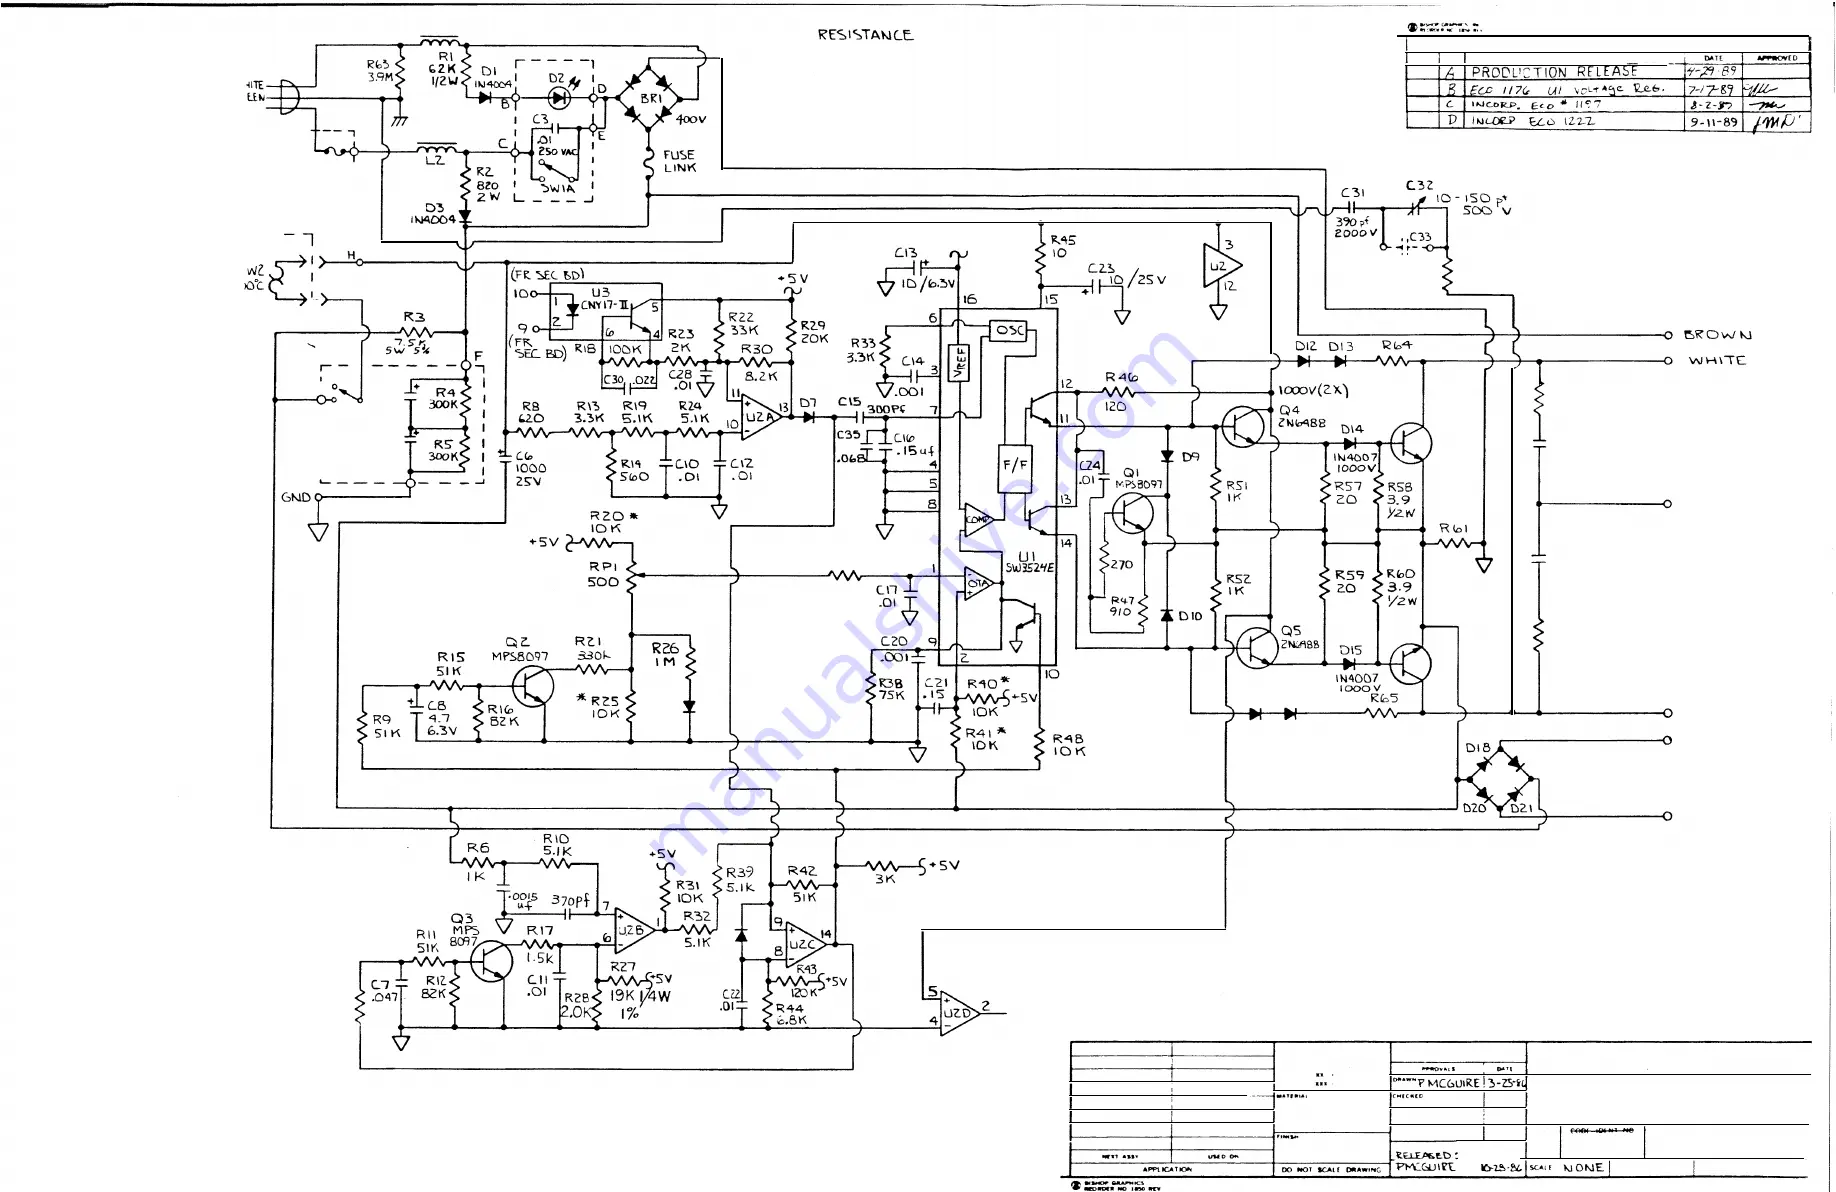
SCHEMAT\C 

PR\MAR.Y 

BOARD, 

PM-2.0t  EUR. 

SHl 

()RAWING  NO 

C  REV  � 

605 

-

0040\-05 

., ... ! f T  1 

fH 

Summary of Contents for PM 2.0t

Page 1: ...0 0 CARVER P R OFE S SIO N AL PM 2 0t SERVICE MANUAL q ti H H Powerf aJJff C R CJON 0 0 o o o o o o llKR 0 0 0...

Page 2: ......

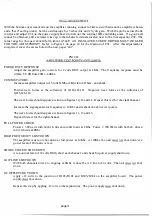
Page 3: ...has been made that the technician is familiar with Carver Magnetic Field amplifiers and will have little difficulty with that portion of the PM 2 0t The power supply however is totally different from...

Page 4: ...d to the input of U2 B When a predetermined voltage appears across R61 it causes the output of U2 B to go high This sets the output of U2 C to it s high state and disables the outputs of Ul Because of...

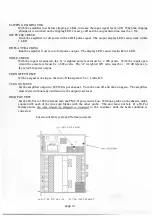
Page 5: ...drive to turn on under light load conditions As the load requirements go up the drive required increases miJx as required to maintain proper operation The overall system efficiency is greater than tha...

Page 6: ...to the amplifier must be muted momentarily to allow the supply to complete it s start cycle and toggle into the high power mode This is accomplished with the muting FETs 0134 0334 and the drive circu...

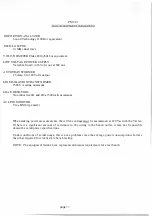
Page 7: ...0131 a constant voltage lead is maintained for the output transistors regardless of power supply ripple or line voltage variations The 125 volt commutators are active when the amplifier output voltage...

Page 8: ...U2 14 output low c Ul 16 5 volts regulated 5 6 Decrease the supply output to 15 volts and check or adjust a Adjust RPl for a duty cycle of 60 sec at Ul 11 14 b Output amplitude of Ul 11 14 2 7 volts p...

Page 9: ...output g Fan speed switch in Hi position With the power switch off bring the Variac up to 120 Vac There should be no current draw and the power LED should glow dimly Reduce the line voltage to 95 Vac...

Page 10: ...een ready LED s should come on 2 to 4 seconds later The unit should not draw any current and both fans should be running at the same speed Increase the AC line voltage to 120 Vac and adjust the signal...

Page 11: ...eck Positive wave forms at the collectors of Q123 122 121 Negative wave forms at the collectors of Q125 126 127 The wave forms should appear as shown in figures 10 12 and 14 Repeat this test for the r...

Page 12: ...be s 800 volts The A weighted S N ratio must be 110 dB relative to the rated 8Q power output TURN OFF THUMP With no signal at the input the turn off thump must be s 2 volts DC TURN ON MUTE Set the am...

Page 13: ...ve 4Q and 8Q at 500 watts minimum AC LINE MONITOR True RMS type meter When making power measurements the AC line voltage m ufil be maintained at 120 Vac with the Variac If there is a significant amoun...

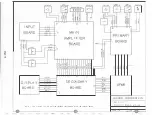
Page 14: ...LED 3 GROLND 5 6 7 6 1 2 5 4 8 6 7 39 3 4 v 91 SECONDARY BOARD 2 9 I 0 9 NOTE 1 THIS CIRCUIT IS LINE ISOLATED THROUGH OPTOCOUPLER U3 ON THE PRIMARY BOARD BLUE YELLOW ORANGE RED BLACK XFMR RED ORANGE...

Page 15: ...t 02 LOW CURRENT START 03 _J OVER CUR TRIP u 28 OVER CUR HOLDOFF U 2C CURRENT FEEDBACK LINE 5V OUTPUT OUTPUT DUTY CYCLE CONTROL PWM CONTROL OUTPUT SHUTDOWN s TG ER 1 111 sw t ER 04 06 BASE DR I VE CLA...

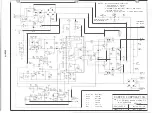
Page 16: ...ES UNLESS OTHERWISE SPECIFIED RESISTANCE IS IN OHMS CAPACITANCE IS IN uF 3 DASHED LINE INDICATES CHASSIS MTD PARTS DIODES ARE IN4148 5 R20 R25 R40 R41 ARE o TEMP COEFFICIENT C31 910pF 1KV FIXED TRIM C...

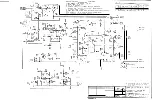
Page 17: ...MS 2 CAPACITANCE IS IN uF 3 DASHED LINE INDICATES CHASSIS MTO PARTS 4 DlODES ARE 1N4148 5 R20 R25 R40 l R41 ARE o TEMP COEFFICIENT II FIXED TRIM CAP AS REO O FOR TRANSFORMER LOT 010 MPS 8097 Ul 3 12 R...

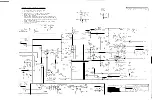
Page 18: ...IN414B 6 l R2o R z s R4o A A c a 11E M CO EFF1cEr Ji TYPE RE S M llOOZ3 IS A DA i UN6 0N N 1 S OR NOTES COJ f INUED LOvv R34 BK Cl 01 CZD f3B 7SK R49 10 01eo on 2 0 DOB SW Q7 M J OOl IT CZ I 033 IOOOV...

Page 19: ...ARE IN414B b I R20 R ZS R40 4 A t 11011 E Ml CaEFFIC El n TYPE RES 2 M l 002 3 lS A DA UNG ON T N 1 S OR NOTE 5 C O ll lNUED C2 LO N R34 8K R49 5V a UL f lll t D Tl 1M C AI VALUf O R Q b F l AN l l l...

Page 20: ...N iil LL llo P IN DIP SOC ET U IDE i UI II CCM ONt Nl S N cJ l NC ii EX c ELD 1 2 11 i ME lG Ll i A IE f W l EAC f l l I 12 t ND RL I LEAt l S OIU THL 50l0Ck AD FOIZ CCl ilAL 1 A t A Y REW ON Q t Ql...

Page 21: ...L0 UNITS DELETE ITEM 16 t JSTALL JUMPER 1 3 DIA GDNALL AS SHOWN I N DEIA IL 2 0 23 2 zx D ill 8 Q 3Z2 6 2X rD DE A L DETfl 1 L 2 LEE l Tl Ll AllON JUMff K INS l U 110N FOK f CA 10 BLOC UNliS I FOl Rli...

Page 22: ...2 1 l lV D I CB 1 1 Z 4 1 I CaV I Z V i 1 l 1 0 K R l J l 750 R I Z 4 C I O R ll o 750 C IOIO no R IZS TI FUSE RES Q l 03 MF 5 u o Q I D D MP UIO R l 3 1 33 ruSE RE RHO 1 5 K _ R I 7 zoo l lZ W R 31 I...

Page 23: ...FSET llSTDaw i FROM AMP BD R 2 c Z K R Z I RZZ SbO 2 W RZ3 CIS 4 7 1 toV 0 3 FROM AMP BD _Kt At Lt Z3 V _ _ _ nn zoo RZ4 2W SCDO 1 12W 1 0 3V 3 V 8 A i Af PR 1 1 7 _ a c 89 j_ 1 f I 1 Y W t Y t I _ DB...

Page 24: ...00 IOI IOloll OO 40 IOSll OO 01 1 5 b OO 4 01 101 10 IOI Ol C A llQ OOO OO FOOl FEL l rAO C11U U1 A t ZO AW Wl l 8 U 18 o ZO AW Slu S Zl AwU WH Y b 00 WI Ill 11 00 I VIOL l 11 o l D 0 DETA L JUMPEf I...

Page 25: ...r v R IB on R G l ANNE L Dl4 P A L SION fT r __ __ DlSCl tlPll N r r RE At Y 4 _ LEO D I S R Mu l3 V NDTES UNLESS Q Tt ERW E 5PEC F ED l R E T NC E IC I OHMS l w Z DI O DE A E R SCS W l 3 IC ARE a __...

Page 26: ...N01E 5 UNLESS OTHE R WlSE PEC lFlE D Ol OS a DB DIO 0 13 DIS ou i D B I MUY TANO 06 11 OF F IHE OOAKO 4 E E OETA L I t Ooj DE TA L Ol PLAY 50ARD IUFF 60 00405 00 __ 4 A I D SPL AY BOARD PM 2 D l...

Page 27: ...iO AMr f D Z l M 1 ___ v L ZZ t I 0 1 R lo c LE llE tt OL CO AC1 DAA P MC UltE ll iS tELl J U t MC U ll 10 21 1L I l t K E UNLE C THtilW 5 PEC fl R 10 A lE l O MS 4 W 2 U I U 2 ARE L0 1 2 CARVER CORPO...

Page 28: ...11 00 r r 12 z s I I I L 40I IO ilO CC WH lE l Z S I 10 I 4CA IOSIO OC Ott 11 N E I q 40l 10008 00 Vf LLOW I 8 IZV 40 IOSSl 00 WH YEL e I R 1 518 00 W ltE 22 AllolC if W t RE C q s I 0 5 l JZ J JI J 4...

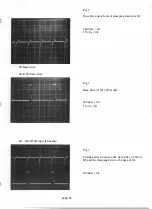
Page 29: ...ship page 25 Fig 1 Base drive wave form of clamping transistor 01 200 Sec div 2 Volts div Fig 2 Base drive of 04 05 at idle 200 Sec div 1 Volt div Fig 3 Timing pattern between the base drive of 04 or...

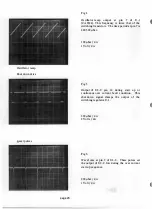
Page 30: ...eriod at pin 7 is 480 500 Sec 100 Sec div 1 Volt div Fig 5 Output of U2 C pin 14 during start up or continuous over current fault condition This shut down signal clamps the output of the switching reg...

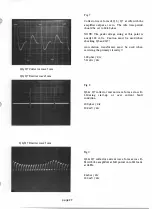
Page 31: ...at this point is nearly 400 volts Caution must be used when checking 06 and 07 An isolation transformer must be used when servicing the primary circuitry 200 Sec div 50 volts div Fig 8 06 07 collecto...

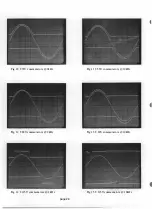
Page 32: ...Fig 10 55V commutators 2kHz Fig 11 55V commutators lOkHz Fig 12 80V commutators 2kHz Fig 13 80V commutators lOkHz Fig 14 125V commutators 2kHz Fig 15 125V commutators lOkHz page 28...

Page 33: ...impedance of 8 Ohms IM DISTORTION Less than 0 1 SMPTE FREQUENCY BANDWIDTH 5HZ 40kHz 1 dB at 1 Watt output level GAIN 29 dB with input level controls at maximum INPUT SENSITIVITY 2 16 Volts RMS for ra...

Page 34: ...5 lK 1 4W R17 lK 1 4W 1 5K 1 4W R21 lM 1 4W 330K 1 4W R33 7 5K 1 4W 4 3K 1 4W R47 l 8K 1 4W 910Q 1 4W R58 3 6Q 1 2W 3 9Q 1 2W R60 3 6Q 1 2W 3 9Q 1 2W R62 36Q 2W 33Q 7W R67 lK 1 4W 270Q 1 4W C9 OOl F 3...

Page 35: ...06 00 1 cs 10 000 F 90V 2 100 F 200V 20S 00106 00 1 D 12 1N4004 1N4007 320 20003 00 1 013 1N4004 1N4007 320 20003 00 1 014 1N4004 1N4007 320 20003 00 1 01S 1N4004 1N4007 320 20003 00 1 D16 1N4004 1N40...

Page 36: ...the mono position only the left channel bias pot is active To set the bias allow the unit to warm up for a few minutes at idle and check the left and right channel bias levels While measuring the hig...

Page 37: ...321 40000 00 4 0112 0312 0117 0317 2N6490 321 60006 00 4 0115 0315 0116 0316 2N6488 321 60004 00 4 0113 0313 0122 0322 0121 0321 2SC3281 321 30013 00 10 0120 0320 0123 0323 0118 0318 0119 0319 TIP35B...

Page 38: ...4004 2 MR852 CA3524 3 LM339 CNY 17 l0 000 f 4 7 10 150pF VAR CAP TRANSFORMER s 008Q 5W 6 DPDT lOA 100 C SWITCH 4 2 100 F 200V used on European version P N 5 The European version uses P N 6 02Q 3W used...

Page 39: ...4 lOOO F 160V 2 1800 F 80V 2 1500 F 63V 2 2200 F 25V 2 MISC PARTS Description Filter pad Fan Motor Rear mtg bracket Carver P N 321 40000 00 321 40010 00 321 40009 00 32 1 40003 00 320 20015 03 320 200...

Page 40: ...NOTES This page left blank for notes and test procedure changes page 36...

Reviews: