


CARVIN
®
GOLD SERIES OVAL POOL | USER MANUAL
16
A
B
DETAIL A
SCALE 1 : 20
DETAIL B
SCALE 1 : 10
A
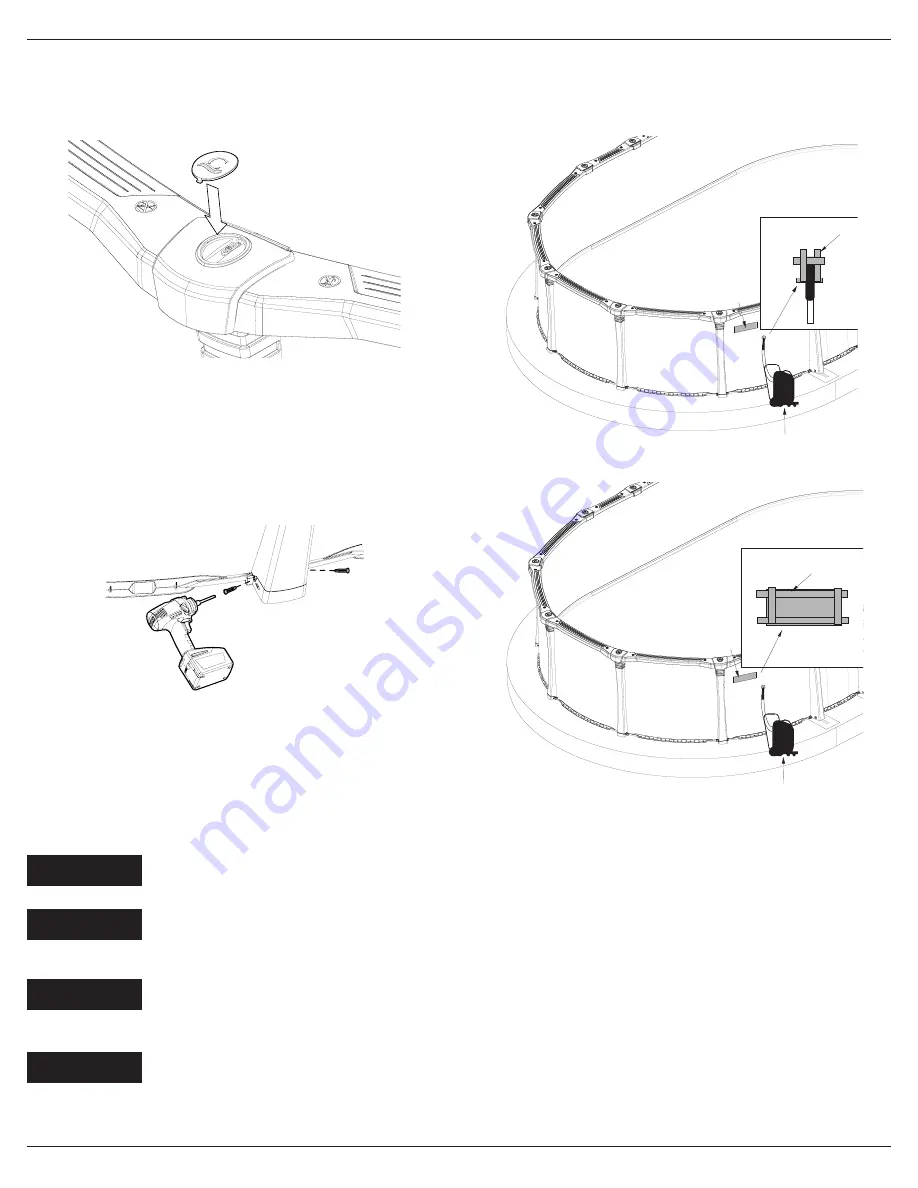
STEP 5
Install the top ledge cover cap by inserting one snap into cavity and push the other
into place until it clicks.
LOCKING THE FOOTS IN ROUND SECTION
Screws 14455032 on the bottom of the uprights now be installed to solidify the
whole structure and prevent uprights and bottom plates against ground movements
due to freezing/thawing.
FILLING THE POOL WITH WATER
STEP 1
You can use a vacuum cleaner to remove the air between the liner and the pool wall.
By removing the air, the liner will stretch a little and start sticking to the pool wall.
This will allow you to correct the surface of the liner and remove folds and wrinkles.
Do not use an industrial vacuum cleaner that could suck
the liner and damage it or pierce it.
Make sure the vacuum cleaner nozzle does not have
sharp corner(s) that could damage the liner. Tape the
end of the nozzle to prevent any damage.
Insert the end of the nozzle into the return of the wall
(about 12 in/30 cm). Make sure the nozzle is at least
4 in/10 cm from the cove of the pool so it is not moved
or sucked by the vacuum cleaner.
Tape the vacuum hose to the side of the pool wall with
duct tape. Make sure the return hole is blocked
properly to keep air out. The vacuum must be outside
the pool.
ATTENTION
ATTENTION
ATTENTION
ATTENTION
STEP 2
Close skimmer opening on the outside of the pool wall with cardboard and duct tape
to also prevent air from escaping.
Water return outlet
Duct Tape
Skimmer
Water return outlet
Duct Tape
Skimmer
STEP 3
Start the vacuum cleaner. The liner will begin to stick against the wall. If you notice
any wrinkles, smooth out the bottom. To avoid damaging the liner do not wear
shoes for this step.
STEP 4
Start filling the pool with water by using a gardening hose.
During the whole filling process:
•
Check for wrinkles in the liner.
To prevent the liner from moving, smooth out
any visible wrinkles at the bottom of the pool before there is too much water in
the pool. The slow flow of the gardening hose will allow the liner to stretch and
give you time to put it back in place if you see any wrinkles.
•
Inspect the structure regularly.
Make sure the rails stay in place and flat to the
foundation. Make sure the wall stays in place in the rail.s and no kinks are formed
when the weight of the water pulls on the liner. If the wall kinks, immediately stop
filling with water, investigate and correct the issue with the structure.
STEP 6
Install the safety labels as prescribed in Section Warnings of this manual.


