31
30
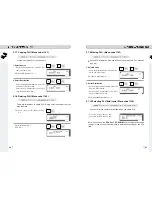
How to access PROGRAM MODE
You can see the Program Menu screen by pressing the MENU key.
The 2 numbers at top right (1/3) indicate the number of pages or screens. The
number to the left of the slash is the current page or screen number and the number to
the right of the slash indicates the total number of pages or screens. You can use the
PG UP and PG DOWN keys to navigate from page to page, or you can use the Arrow
keys to go through each page.
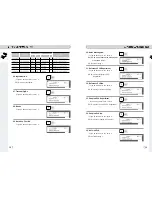
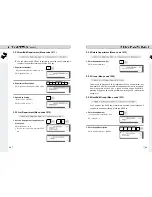
If you press “PG DOWN” key, you can see other menu screens as below.
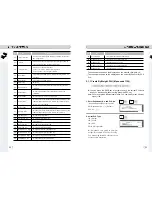
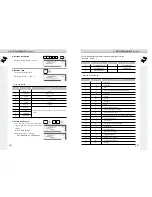
You can set 47 items for a PLU as below table and if you do not want to use
some items, you can prohibit those items in menu code:1144.
No
Item
Description
1
Department
Department No.
2
PLU No
PLU No.
3
PLU Type
Select PLU type among By Weight, By Count or By-PCS
4
Name
Enter name 1 of item. Maximum 40 characters.
5
Name 2
Enter name 2 of item. Maximum 40 characters.
6
Name 3
Enter name 3 of item. Maximum 40 characters.
7
Group No.
Select group number. This value can be from 0 to 99.
8
Label No.
(0~99) (0=Do not use Label No.), Label Formats “1~30”.
If Global Setting is YES, it is not shown.
9
Aux. Label No.
(0~99) (0=Do not use Label No.), Label Formats “1~30”.
This function prints aux. label as saved number of label number
10
Origin No.
(0~500) 0=Do not use origin.
11
Unit Weight
Unit weight of Price(No.19) (2:unit price for 100g, 1:unit price
for 1kg)
12
Fixed Weight
The weight is fixed regardless of item
13
Prefix
Enter serial code for PLU (Greece version of CL5000 series)
14
Item code
Item code
15
Use Fixed Price Type
You can set whether use Fixed Price or not
16
Pieces
(0-999) Set the number for By-PCS PLU
17
Quantity Symbol ID
(0~8) Set symbol of PCS or Count
18
Fixed price
Price is fixed regardless of weight or pcs
19
(Unit) Price
This value can be from 0 to 999999.
20
Special Price
It can be unit price by using Special key.
21
Tax No.
Enter tax number. This value can be from 0 to9
Summary of Contents for CL5000-B
Page 1: ......
Page 9: ...17 16 DISPLAY KEYBOARD ...
Page 10: ...19 18 Basic set up H type tray NOTE Push down ball connection B P R type ...
Page 15: ...29 28 ...


