background image


33

CAS  ELECTRICS  CO.,LTD 

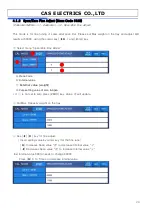
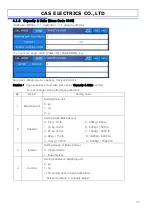
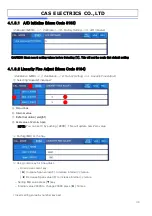
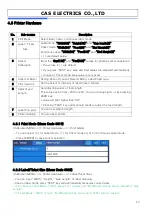
4.1.5    Percent Calibration (Menu Code 8150)   

(Calibration MENU -> 1. Calibration -> 5. Percent Calibration) 


When the case you don’t have max weight for calibration. Percent Calibration enables to use lighter weight. 


①  For 5kg weight, input [5]key and press [ENTER] 


②  Clear the tray and press [ENTER], then “Wait4~Wait0” will display. 


③  Put 5kg on the tray the press [ENTER] after “Wait4~Wait0” exit menu. 


Summary of Contents for CL7200 series

Page 1: ...1 CAS ELECTRICS CO LTD CL7200 Series Service Munual Rev 2014 12 17 ...

Page 2: ...eries can use with both ticket and label Auto measuring system enhances use any types of roll paper Just entering a label s length and width dimensions you can use practically any roll Also cartridge loading mechanism helps to refill the label roll easyly Also you can print logos templates Nutri Facts panels ingredient messages advertisement lines and more to promots your store Remember for proper...

Page 3: ...scount 99 Origin 1 499 499 Traceability 1 99 99 Slaughter House 1 99 99 Cutting Hall 1 99 99 Traceability Country 1 99 99 Label Format Default 45 User 20 Bitmap 14 14 Customer 1 99 99 Quantity Symbol 1 8 8 Scroll Message 1 9 9 Pay Type 0 8 8 Sales Message 1 99 99 Nutrifact 1 500 500 Tare Table 1 99 99 Currency 1 4 4 Report X1 X2 Z1 Z2 Scale PLU Misc PLU Group Department Hourly Clerk Report Printin...

Page 4: ...e scale are contained in this manual Please make sure to read carefully ALL warnings and cautions before operating the scale 4 Observe the following safety precautions Shut the scale OFF and unplug the scale whenever you are changing the label roll or whenever working in the printer bay The outlet that the scale is plugged into should be properly grounded Whenever connecting or disconnecting ANY c...

Page 5: ...he direct path of oscillating fans ventilation systems or strong drafts as these air disturbances can be picked up by the scale s very sensitive weighing platform and may cause incorrect weight readings 1 1 General Footer Factory setting Footer location is following picture 1 2 Short Case Footer Unscrow the footer and place in center hole for narrow place ...

Page 6: ...le Turn the legs clockwise or counterclockwise so as to center the bubble of the leveling gauge inside the indicated circle Turning the adjustable legs counter clockwise viewed from top of scale will lower that part of the scale Turning the adjustable legs clockwise viewed from top of scale will raise that part of the scale See Fig ...

Page 7: ...ng on it Also make sure that the wiring to the electrical socket is correct If you are uncertain as to the state of your work electrical lines please contact a certified electrician Once you are sure as to the safety of the electrical line make sure to ONLY plug the scale into a 3 prong outlet The third prong is a safety ground and an electrician should properly wire this if it is not correct or i...

Page 8: ...8 CAS ELECTRICS CO LTD 2 Classification 2 1 Scale Overview CL7200 has 2 differrnt type Standard Type Self Type Standard U Type Self Type ...

Page 9: ...80 Rear 800x480 display on CL7200 LCD display indicates program tare weight unit price total price Underbar inicates stable net zero auto save prepack D C shift data transfer LCD display shows menu massages for program mode CL7200 U CL7200 Sale mode Operator View Rear ...

Page 10: ...10 CAS ELECTRICS CO LTD CL7200 S ...

Page 11: ... weight indicator AUTO AT AUTO Print Mode indicator SAVE SV SAVE Auto clearing status indicator PREPACK PRK PREPACK Auto clearing status and Print mode indicator D C DC D C Discount status indicator SHIFT SH SH Speed key shift status indicator TR TR Data transmission status indicator M Master status indicator S Slave status indicator LN Ethernet Connection Status ...

Page 12: ... quality ROHM printer head 50km 5x10⁷pulses Improved a rotating force by using 2 independent motors Large compartment for 120mm paper roll High speed at 100 mm sec 5 speed ranges for paper roll quality adjustment Supports Paper Labels Continuous strip labels Lineless paper ...

Page 13: ...AS ELECTRICS CO LTD 2 4 Commuication Standard RS232 Cash Drawer Ethernet USB Device USB Host x 2 Options Wireless Ethernet Module Wireless Ethernet Module RS232 Ethernet Cash Drawer USB Host x 2 USB Device ...

Page 14: ...14 CAS ELECTRICS CO LTD 3 Getting Started 3 1 Sealing Method Method 1 Method 2 Method 3 Method 4 ...

Page 15: ... receipt roll 40 50 60mm Width of label roll 60mm MAX Print Area Width of label 60mm MAX Length of label 120mm MAX To install the label roll at ANY time you must follow the directions in this section 1 Press the ON OFF key and make sure that the display is completely off Open the printer s side access panel See fig 1 2 Lift up TPH lever as fig 2 ...

Page 16: ...as fig 4 4 5 Place the label in the scale as fig 5 5 6 Press the FEED key NOTE For auto label calibration press FEED key two or three times If label position is not correct you have to check the followings a Label size Label setting menu b Feed Adjustment Feed adjustment menu c Senseor calibration Sensor Calibration menu ...

Page 17: ... screen by pressing the MENU key Lower end of left number represents the Page number of Main Menu and Lower end of right number represents the Page number of Sub Menu Left number based on means Present Page and Right means the number of total pages You can enter the page where you want by pressing the arrow keys ...

Page 18: ...te department 1220 Group 1221 New Edit group 1222 List group 1223 Delete group 1240 Sales Message 1241 New Edit Sales Message 1242 List Sales Message 1243 Delete Sales Message 1250 Origin 1251 New Edit origin 1252 List origin 1253 Delete origin 1260 Barcode 1261 New Edit barcode 1262 List barcode 1263 Delete barcode 1270 Tare 1271 New Edit tare 1272 List tare 1273 Delete tare 1274 Tare key 1280 Un...

Page 19: ...onfiguration 1432 Edit Scroll Message 1433 List Scroll Message 1440 Currency 1441 New Edit Currency 1442 List Currency 1443 Delete Currency 1450 Job Batch Schedule 1451 New Edit Schedule 1452 List Schedule 1453 Delete Schedule 1460 Scanner 1461 New Edit Conv Table 1462 List Conv Table 1463 Delete Conv Table 1464 Scanner Config 1470 Label Format Key Table 1500 Global setting 1510 Label Format 1520 ...

Page 20: ...20 CAS ELECTRICS CO LTD 1635 Department 1636 Hourly 1637 Clerk 1640 Z2 report 1650 Clear All 1660 Non sending Report ...

Page 21: ... 1830 Department Store ID 1840 Data Time 1850 User Security Configuration 1851 New Edit User 1852 Change Password 1853 List User 1854 Delete User 1855 Config Permission 1856 Clerk Key 1860 Test 1861 Display 1862 A D 1863 Keyboard 1864 Chess Print 1865 Printer Sensor 1866 Memory Information 1867 Firmware Version 1868 Communication 1870 Scale Parameter 1871 Display 1872 Printing 1873 Sale setup 1874...

Page 22: ...g 8183 A D Inutialize 8184 Linearity Fine Adjust 8185 Hysteresis Calibration 8186 Creep Setting 8187 A D Firmware 8200 System Option 8210 Clear Mamory 8220 Scale Type 8300 Printer Hardware 8310 Print Mode 8320 Label Ticket size 8330 Sensor Calibration 8340 Sensor motor 8350 Print Intensity 8360 Adjust Feed Length 8370 Label Pre print 8380 Printer Initialize 8400 Network Option 8410 Enable Interfac...

Page 23: ...on MENU 1 Calibration Execute Weight Calibration and A D related settings Access Authorized CAS Tester only Open the tray and remove the calibration sealing Order to access calibration mode Insert a stick into the CAL switch Switch power on while pushing the CAL button ...

Page 24: ...24 CAS ELECTRICS CO LTD First page of Calibration mode ...

Page 25: ...esult prepare 15kg 6kg max weights Display shows the amount of weight that you will need Caution Span calibration must take place after Capacity Units setting Select Span Calibration Empty tray and press ENTER While calibrating zero display shows Wait4 Wait0 and follow next message for Span Calibration Put on the Weight for Max Capacities then press ENTER ...

Page 26: ...CAS ELECTRICS CO LTD Menu 8130 sets the max capacity for calibration Display shows Wait4 Wait0 then following message Error Message When tray is unstable during calibration process following message appear ...

Page 27: ...D When calibration weight was too heavy or light following message will appear When A D failure is detected during Calibration following message will appear Please check the connector between main board and other controller ...

Page 28: ...enu Span Zero Fine Adjust ⓐ Menu Code ⓑ Internal value ⓒ External value weight ⓓ Pure setting value of zero Span If ⓒ is not set to zero press ZERO key Value ⓓ will update Put Max Capacity weight on the tray Use key for fine adjust Insert setting value by cursor key for the fine tune Increases Span value ⓓ to decrease Internal value ⓑ Decreases Span value ⓓ to increase Internal value ⓑ Ex Internal...

Page 29: ...29 CAS ELECTRICS CO LTD You can make the Internal value number as 60 000 automatically by pressing TEST key Span value ⓓ will be updated automatically ...

Page 30: ...ing after Span calibration No Option Setting Value 1 Weighing Unit Setting Scale Unit 0 kg 1 lb 2 g 2 Capacity Setting Scale Max Capacity 0 6 kg 15 lb 5 300kg 600 lb 1 15 kg 30 lb 6 600kg 1500 lb 2 30 kg 60 lb 7 1500kg 3000 lb 3 60kg 150 lb 8 3000kg 6000 lb 4 150kg 300 lb 9 6000kg 15000 lb 3 Interval Setting Usage of Multi interval 0 Single Interval 1 Dual Interval 4 Cal Unit Setting Calibration W...

Page 31: ...e Manamah 9 7904 Norway Oslo 9 8189 Bolivia La Paz 9 7844 Panama Panama City 9 7814 Brazil Brasilia 9 7889 Peru Lima 9 7829 Canada Montreal 9 8069 Philippines Manila 9 7844 Ottawa 9 8069 Poland Swider 9 8159 Toronto 9 8054 Portugal Lisbon 9 8009 Vancouver 9 8099 Rumania Bucharest 9 8054 Check Republic Prague 9 8114 Saudi Arabia Riyad 9 7904 Chile Santiago 9 7979 Scotland Stockholm 9 8189 China Hon...

Page 32: ...4 Detroit 9 8039 Japan Mishima 9 7979 Los Angeles 9 7979 Korea Seoul 9 7994 New York 9 8024 Kuwait Kuwait 9 7919 Philadelphia 9 8024 Lebanon Beirut 9 7964 San Francisco 9 7994 Mauritius Port Louis 9 7859 Venezuela Caracas 9 7829 NOTE The G Constant is the acceleration of gravity m s2 ...

Page 33: ... 5 Percent Calibration When the case you don t have max weight for calibration Percent Calibration enables to use lighter weight For 5kg weight input 5 key and press ENTER Clear the tray and press ENTER then Wait4 Wait0 will display Put 5kg on the tray the press ENTER after Wait4 Wait0 exit menu ...

Page 34: ...ity Adjust You can re adjust the mid range weight level for precise calibration For 5kg weight input 5 key and press ENTER Clear the tray and press ENTER then Wait4 Wait0 will display Put 5kg on the tray the press ENTER after Wait4 Wait0 Put 15kg on the tray the press ENTER after Wait4 Wait0 exit menu ...

Page 35: ... the allowance percent range for zero display OIML regulation restricts 4 of maximum weight range can be used Overload Range d You can set the maximum overload range For example 9 set as 15 045g 5gx 9 45g If the weight is over 15 045 overload message will appear Accumulation Y N You can set Tare weights additively This is useful additional package is used for different goods Subtraction Y N You ca...

Page 36: ... is set to zero Zero mark will display In other words Net Weight is zero Gross Zero Tracking Y N Zero tracking is possible during Gross Weight is 0 Factory setting is Y Net Zero Tracking Y N Zero tracking is possible during Net Weight is 0 Factory setting is N ...

Page 37: ...37 CAS ELECTRICS CO LTD 4 1 8 Factory Setting Menu Code 8180 Calibration MENU 1 Calibration 8 Factory Setting This setting A D s advanced setting only for factory primary setting ...

Page 38: ...y Setting 4 Linearity Fine Adjust Selecting LinearityFineAdjust ⓐ Menu Code ⓑ Internal value ⓒ External value weight ⓓ Real value of Zero Span NOTE You can set 0 by pushing ZERO This will update new Zero value Put 5kg Mid on the tray Using cursor key for fine adjust How to use cursor key Increase Span value ⓓ to reduce internal ⓑ value Decrease Span value ⓓ to increase internal ⓑ value Setting Mid...

Page 39: ...imate value using number key then press TEST key for results This process may take several times to set 20000 During this process Mid weight is needed for best result Ex Input 37371 by keypad and press TEST key Put 15kg Max on the tray and change Span value Press SAVE to save and exit ...

Page 40: ...lecting Hysteresys Calibration For 5kg Mid weight input 5 key and press ENTER Empty tray and press ENTER While calibrating zero display shows Wait4 Wait0 and follow next message for Mid Calibration Put on the Weight for Mid weight then press ENTER While calibrating Mid weight display shows Wait4 Wait0 and follow next message for Span Calibration ...

Page 41: ... ENTER Menu 8130 sets the max capacity for calibration While calibrating span display shows Wait4 Wait0 and follow next message for Mid Calibration Put on the Weight for Mid weight Capacities then press ENTER While calibrating Mid weight display shows Wait4 Wait0 and exit ...

Page 42: ...eep Setting Choose N or Y to determine the Creep Compensation At Span Fine Adjust enter the Changed internal value after increasing max weight for 30minute Creep Direction 1 0 4 1 8 5 A D Firmware Menu Code 8187 Calibration MENU 1 Calibration 8 Factory Setting 7 A D Firmware It shows Firmware version of A D module ...

Page 43: ...Clear Report Menu Code 8211 Calibration MENU 2 System Options 1 Clear Memory You can clear memory depends on options below 4 2 1 2 Clear All PLU Menu Code 8212 Calibration Menu 2 System Option 1 Clear Momory 2 Clear All PLU Clear all PLU data This time discount data is will be cleared ...

Page 44: ... 1 4 Report PLU Table 삭제 Menu Code 8213 Calibration Menu 2 System Option 1 Clear Momory 4 Clear Report PLU Table Clear Report PLU Table data 4 2 1 5 Flash All Clear Menu Code 8214 Calibration Menu 2 System Option 1 Clear Momory 5 Flash All Clear NOTE After clearing all the memory You must install primary data Except the program data all the item and font data will clear at once ...

Page 45: ...0 Calibration MENU 2 System Options 2 Scale Type Select model Basic type CL7200 B pole type CL7200 P CAUTION Selecting wrong model code will effect on key function 1 Standard type CL7200 B 2 Pole type CL7200 P 3 Hanging type 4 Self Service 5 Double B type ...

Page 46: ...et adjusting values of feed length This value can be from 200 to 200 You can change sign by pressing ZERO key value will print higher than THP Pressing TEST key automatically feeds to adjust the feed length 7 Label Pre print You can set preprint length 8 Printer Initialize You can reset printer 4 3 1 Print Mode Menu Code 8310 Calibration MENU 3 Printer Hardware 1 Print Mode You can select 0 for La...

Page 47: ...alibration Menu Code 8330 Calibration MENU 3 Printer Hardware 3 Sensor Calibration You can input Gap Peel manually Pressing TEST key will operate Auto Calibration For Ticket mode display will be same except Gap value Gap value will not save ...

Reviews: