13
P
anama
®
E
nErgy
s
tar
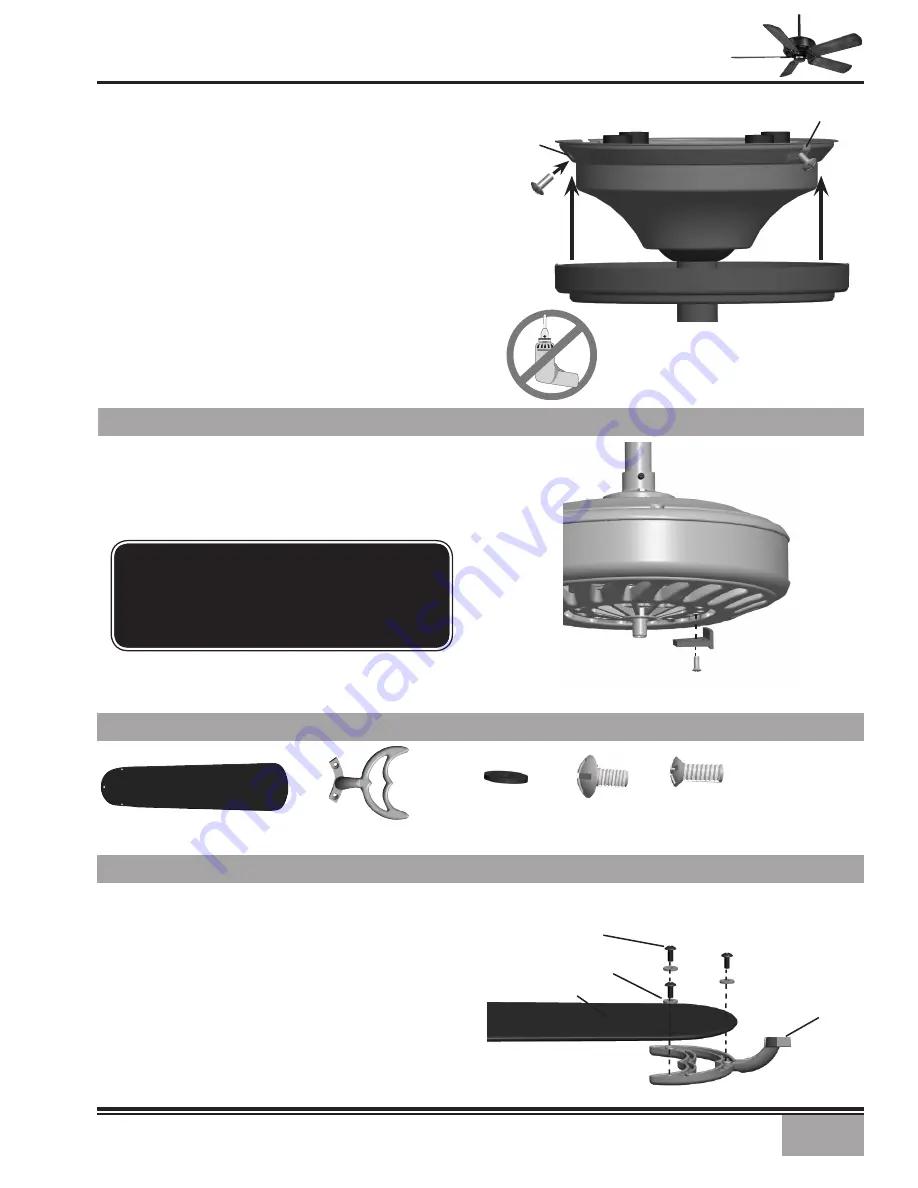
Step 10. Raise the Canopy over the Hanger Bracket.
Align the partially installed screws with the key slots
in the canopy.
Step 11. Twist the Canopy clockwise to secure.
Step 12. Install the third & fourth canopy screws in
the round holes on Canopy. Securely tighten all four
screws.
Step 13. Using both hands, push the Canopy Trim
ring up to the top of the Canopy.
Step 14. Twist the Canopy Trim ring clockwise to
secure it to the Canopy.
Keyhole Slot
Round
Hole
REMOVE SHIPPING BLOCKS
BLADE HARDWARE
BLADE INSTALLATION
Blades (5)
Not Included
Blade Irons (5)
Blade
Screws (16)
Blade Iron
Screws (11)
Step 1. Attach a blade to a blade iron by first
pressing the blade iron onto the blade, then attaching
the blade iron using 3 blade screws and blade
washers as shown in Figure #1. Using a phillips head
screwdriver, tighten securely by hand only. Repeat
for each blade assembly.
Blade
Washers (16)
Blade
Blade Iron
Blade Washers
Blade Screws
Step 1. On the motor, remove the five shipping
blocks by unscrewing the screws. Discard the
shipping blocks.
CAUTION:
Do NOT discard the Blade Iron
Screws. They will be used for
Blade Installation.
FIGURE 1.


