5
S
ILHOUETTE
II
™
MOTOR INSTALLATION
NOTE: You will need an assistant to help hold up the
ceiling medallion bracket and motor in steps 3 and 4.
Step 3a.
Remove the paper shield from the motor.
Step 3b.
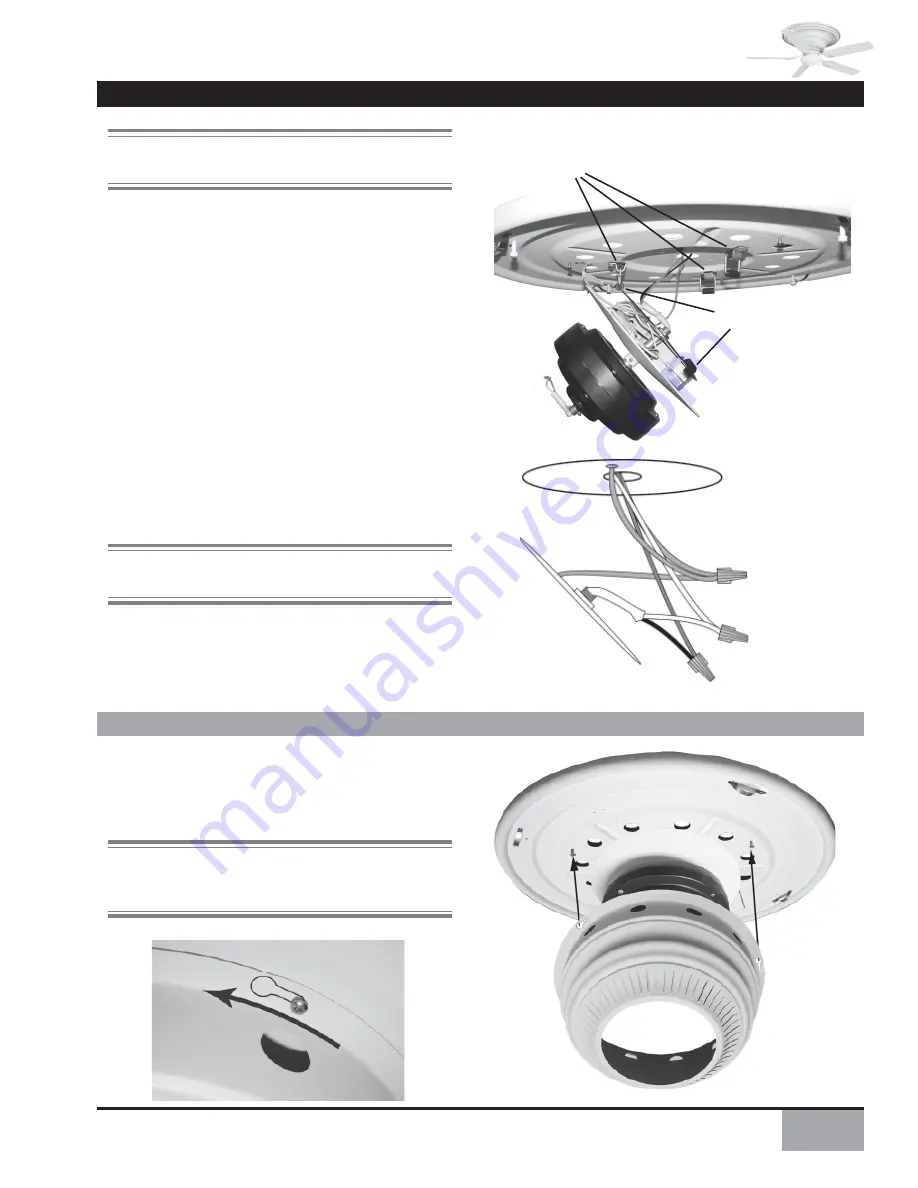
Attach one of the hooks on the outside of the
motor onto one of the loops hanging from the ceiling
medallion bracket.
Step 3c.
Attach the fan wires to the ceiling medallion
bracket wiring by placing the bare end of the wires side by
side and then securing with a wire nut (Pack C). Test that
the connection is secure by pulling on the wire nut.
Connect in this order:
• GREEN leads f rom ceiling medallion bracket
to GROUND conductor of power source. Secure with
wire nut.
• WHITE wire from fan to white NEUTRAL wire in
ceiling medallion bracket. Secure with wire nut.
• BLACK power wire from fan to BLACK power wire in
ceiling medallion bracket. Secure with wire nut.
NOTE: If the color of your ceiling wires differs from that
described, consult an electrician.
Step 3d.
Trim excess motor wires to six inches and tuck
inside.
Step 3e.
Attach other two hooks.
Motor
Hooks
Ceiling
Medallion
Loops
MOTOR HOUSING INSTALLATION
Step 4.
Align the three motor housing (B) screws into the
keyholes on the motor housing and twist until secure.
Tighten screws using the Phillips-head screwdriver.
NOTE:
When aligning the screws, center the motor
housing so that there is an even amount of space all around
the motor.
1 Blue to 1 Black wire
2 White Wires
3 Green Wires
Summary of Contents for Silhouette II
Page 15: ...15 SILHOUETTE II NOTES...
Page 16: ...16 NOTES...

