51
|
P a g e
cascadesciences.com
|
Tel. 503 847-9047
USER MAINTENANCE
Continued on next page
Calibration Continued
3
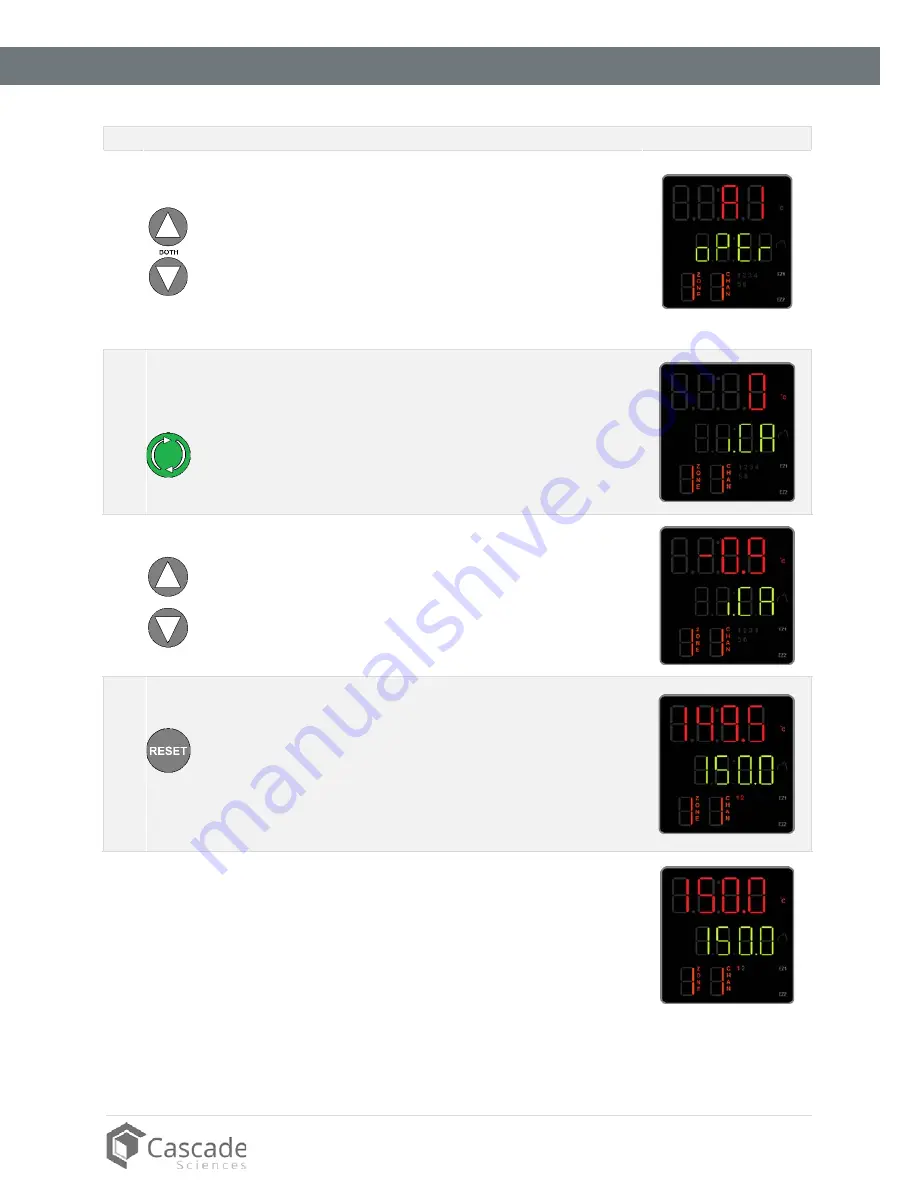
Place the controller display in the Operations menu.
a.
Press and hold both the
Up
and
Down
arrow
buttons simultaneously for approximately 3
seconds.
b.
Release the buttons when “A1” appears on the top
display line and “oPEr” appears in the mid display
line.
Operations Menu
4
Advance through the Operations menu to the
Temperature Calibration offset parameter.
a.
Push the green
Advance
button repeatedly until
“i.CA” appears on the green mid display line and a
number value on the red top line.
5
Adjust the number value in the top display to match the
offset value from step 2a, using the arrow buttons.
6
Save the calibration offset and return to the homepage.
a.
Push the Reset button repeatedly until the display
shows the homepage.
•
The oven will begin to heat or passively cool to
reach the current set point using the offset display
value for the current temperature.
7
Allow the oven to stabilize after achieving the
temperature set point using the offset display value.
Note:
The unit is stabilized when no fluctuations of
±0.2°C
or
greater
are detected for 30 minutes.
Summary of Contents for CVAC-9.3
Page 1: ...Installation Operation Manual CVAC 9 3 Vacuum Oven ...
Page 5: ...5 P a g e cascadesciences com Tel 503 847 9047 REPLACEMENT PARTS 53 ...
Page 6: ...6 P a g e cascadesciences com Tel 503 847 9047 TABLE OF CONTENTS ...
Page 8: ...8 P a g e cascadesciences com Tel 503 847 9047 CERTIFICATIONS ...
Page 12: ...12 P a g e cascadesciences com Tel 503 847 9047 INTRODUCTION ...
Page 28: ...28 P a g e cascadesciences com Tel 503 847 9047 INSTALLATION ...
Page 30: ...30 P a g e cascadesciences com Tel 503 847 9047 GRAPHIC SYMBOLS ...
Page 34: ...34 P a g e cascadesciences com Tel 503 847 9047 CONTROL OVERVIEW ...
Page 46: ...46 P a g e cascadesciences com Tel 503 847 9047 OPERATION ...
Page 54: ......


