background image


24 | 

P a g e


cascadesciences.com 

|


Tel. 503 847-9047


INSTALLATION 


Fuses 

All fuses must be installed and not blown for the unit to operate. The cause of a blown fuse should 
always be determined and fixed prior to returning the oven to operation. 

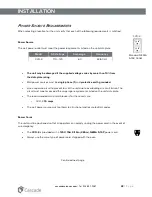
CVO ovens ship with the following 5x20mm fuses installed: 

Model 

Type 

Quantity 

Location 

CVO-2 

T8A 250V 

Power cord inlet. 


G

ENERAL 

P

OWER 

S

AFETY


Your unit and its recommended accessories are designed and tested to meet strict safety 
requirements. It is designed to connect to a power source using the specific power cord type 
shipped with the unit. 

For continued safe operation of your unit, always follow basic safety precautions including: 


Always plug the unit power cord into a protective earth grounded electrical outlet that 

conforms to national and local electrical codes. If the unit is not grounded properly, parts 

such as knobs and controls can conduct electricity and cause serious injury. 


Do not bend the power cord excessively, step on it, or place heavy objects on it. 


A damaged cord can be a shock or fire hazard. Never use a power cord if it is damaged or 

altered in any way. 

Summary of Contents for CVO-2

Page 1: ...Installation Operation Manual CVO 2 Benchtop Vacuum Ovens...

Page 2: ...a gov Advertencia Este producto contiene sustancias qu micas incluido el triglicidil isocianurato que el estado de California sabe que causa c ncer as como defectos de nacimiento u otros da os reprodu...

Page 3: ...3 P a g e cascadesciences com Tel 503 847 9047 Benchtop Vacuum Ovens 110 120 Voltage Part Number Manual 4861832 Revision July 15 2019...

Page 4: ...Required Clearances 22 Power Source Requirements 23 General Power Safety 24 Lifting and Handling 25 Leveling 25 Install the Oven 26 Installation Cleaning 26 Shelving Installation 27 Connect to the Va...

Page 5: ...5 P a g e cascadesciences com Tel 503 847 9047 Electrical Components 49 Vacuum Pump Maintenance 49 REPLACEMENT PARTS LIST 51...

Page 6: ...6 P a g e cascadesciences com Tel 503 847 9047 TABLE OF CONTENTS...

Page 7: ...ens for appropriate professional industrial or educational use T V S D America Inc is an OSHA recognized NRTL and a Standards Council of Canada accredited certification body The units have been tested...

Page 8: ...8 P a g e cascadesciences com Tel 503 847 9047 CERTIFICATIONS...

Page 9: ...cal for units produced in the series We reserve the right to alter technical specifications at all times TEMPERATURE PERFORMANCE Operating Range Fahrenheit Celsius Ambient 18 to 300 F Ambient 10 to 15...

Page 10: ...to 760 10 to 101 0 1016 to 1 0125 Vacuum Display Range inHg mmHg kPa bar 0 0 to 29 9 37 5 to 757 5 to 101 0 05 to 1 013 WEIGHT Shipping Weight Unit Weight 218 lb 99 kg 179 lb 81 2 kg DIMENSIONS Inches...

Page 11: ...11 P a g e cascadesciences com Tel 503 847 9047 SPECIFICATIONS SHELF CAPACITY BY WEIGHT Per Shelf Total 35 0 lb 15 8 kg 105 0 lb 47 6 kg...

Page 12: ...12 P a g e cascadesciences com Tel 503 847 9047 SPECIFICATIONS...

Page 13: ...aking applications under vacuum in professional industrial and educational environments The ovens are not intended for use at hazardous or household locations CONTACTING ASSISTANCE Please have the fol...

Page 14: ...a bar 3 0 76 10 0 1016 GASKETS Each oven comes with a replaceable cured silicone gasket installed on the chamber liner This gasket seals against the chamber door to maintain the vacuum integrity of th...

Page 15: ...o the unit follow the carrier s procedure for claiming damage or loss 1 Carefully inspect the shipping carton for damage 2 Report any damage to the carrier service that delivered the unit 3 If the car...

Page 16: ...nces com Tel 503 847 9047 RECEIVING ORIENTATION Front Control Panel Intake Vent Control allows external atmosphere into the oven chamber Vacuum Valve Control Temperature Sensor Probe Chamber Liner Gas...

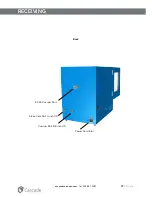
Page 17: ...17 P a g e cascadesciences com Tel 503 847 9047 RECEIVING Back Intake Vent Port inch OD Power Cord Inlet Vacuum Port 3 8 inch OD KF 25 Vacuum Port...

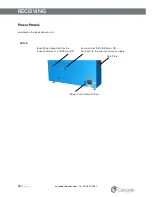
Page 18: ...03 847 9047 RECEIVING Power Panels Located on the back of each unit Power Cord Inlet with fuse Backfilling Intake Vent for the oven chamber in 6 35mm OD CVO 2 Data Plate Vacuum Inlet 3 8in 9 52mm OD C...

Page 19: ...ecord the unit model number and serial number below for future reference Tech Support needs this information to provide accurate help during support calls and emails The data plate is located on the l...

Page 20: ...20 P a g e cascadesciences com Tel 503 847 9047 RECEIVING...

Page 21: ...page 22 Check that the spacing clearance requirements are met page 22 Unit dimensions may be found on page 10 Check that a suitable electrical outlet and power supply is present page 23 Install the o...

Page 22: ...g and cooling vents or other sources of fast moving air currents High traffic areas Direct sunlight REQUIRED CLEARANCES These clearances are required to provide air flows for ventilation and cooling 6...

Page 23: ...phase 1 and protective earth grounded Use a separate circuit to prevent loss of the unit due to overloading or circuit failure The circuit must meet or exceed the amperage requirements listed on the u...

Page 24: ...ict safety requirements It is designed to connect to a power source using the specific power cord type shipped with the unit For continued safe operation of your unit always follow basic safety precau...

Page 25: ...e for lifting or stabilization Restrain the oven completely while lifting or transporting so it cannot tip Remove all moving parts such as shelves and trays and lock doors in the closed position durin...

Page 26: ...ning the shelving and oven chamber prior to installation of the shelving in the chamber The unit was cleaned at the factory but may have been exposed to contaminants during shipping The unit was clean...

Page 27: ...e shelf temperatures All oven heating specifications are for shelving temperatures only 1 Carefully slide the short shelf into position on the chamber floor sliding the clip on the bottom of the shelf...

Page 28: ...en o Optional A clean or inert gas supply source may be connected to this port Please page 29 KF 25 Fitting o This large fitting is normally used to introduce sensor probes into the oven chamber using...

Page 29: ...nnected to the vent intake port located on the back of the oven This supply will backfill the evacuated oven chamber when the vent intake valve is opened on the front control panel The maximum allowed...

Page 30: ...30 P a g e cascadesciences com Tel 503 847 9047 INSTALLATION...

Page 31: ...que que l interrupteur est en position marche O indique que le commutateur est en position d arr t Adjustable Temperature Indique une temp rature r glable Lighting Indique l clairage Heating pause Ind...

Page 32: ...32 P a g e cascadesciences com Tel 503 847 9047 SYMBOLS...

Page 33: ...odes and input the temperature set point or calibration adjustment value Hold Button Temporarily disables heating in the oven chamber Pushing the button once turns off power to the heating elements Pu...

Page 34: ...his valve allows the connected vacuum supply to evacuate the oven chamber In the closed position the valve cuts off the vacuum draw Vent Valve Control Backfill Inlet This valve controls the chamber in...

Page 35: ...endommager le four Le non respect des consignes de s curit et des pr cautions d utilisation d lib r ment ou par erreur est un comportement dangereux de la part de l op rateur SAFETY GUIDELINES Failur...

Page 36: ...outside the workspace in a safe manner in accordance with all applicable laws ordinances and regulations Do not operate the oven in an unsafe area with noxious fumes Do not use this oven for applicati...

Page 37: ...ing on the outgassed byproduct types and moisture level produced in the oven chamber Gasket types have varying resistances and vulnerabilities to different outgassed chemicals Heating in a Vacuum In c...

Page 38: ...ength of the heating pulses Likewise when operating in a warm room the unit uses shorter pulses If the ambient temperature conditions change significantly there may be minor over or undershoots as the...

Page 39: ...the unit to the power inlet receptacle on the back of the oven Plug the power cord into the workspace electrical supply 3 Verify the vacuum and vent valves are both closed Always verify the oven chamb...

Page 40: ...Minimum Place the Chamber Under Vacuum for a minimum of 10 minutes to verify the integrity of the vacuum supply system See page 41 7 Set the operating temperature Set the Oven Temperature to your baki...

Page 41: ...r vacuum pump 3 Open the oven Vacuum Valve Turn the control all the way counterclockwise The Vacuum Gauge on the front panel should show the chamber pressure decreasing The achievable vacuum level is...

Page 42: ...Down arrow buttons to activate the temperature setpoint adjustment mode The display will briefly flash the letters SP then show the flashing adjustable temperature setpoint Note The display will auto...

Page 43: ...int OVER TEMPERATURE ACTIVATION Possible causes of Over Temperature Limit Activation A heat source in the oven chamber is pushing the oven temperature above the limit setting Significant outgassing in...

Page 44: ...the current chamber pressure Units of Measurement Display Characters kPa Kgf cm2 bar psi mmHg inHg mmH2O Zeroing the Gauge As set at the factory the vacuum gauge shows a reading of 0 inches of mercur...

Page 45: ...Max Vac Obtainable Sea Level Sea Level 14 70 psi 29 9 inHg 1000ft 305m 14 16 psi 28 9 inHg 2000ft 610m 13 66 psi 27 8 inHg 3000ft 914m 13 16 psi 26 8 inHg 4000ft 1219m 12 68 psi 25 8 inHg 5000ft 1524...

Page 46: ...l down while remaining sealed 6 hours may be required to cool down from 150 C to 100 C 16 hours may be needed for the oven to return to room temperature cooling from 150 C Backfilling the oven does no...

Page 47: ...agents with the parts of the equipment or with material contained in it Warning Exercise caution if cleaning the unit with alcohol or flammable cleaners Always allow the unit to cool down to room tem...

Page 48: ...s When disinfecting external surfaces use disinfectants that will not damage painted metal glass and plastic MAINTAINING ATMOSPHERIC INTEGRITY Periodically inspect the door latch trim catch and gasket...

Page 49: ...or bubbling or strained noises from the pump may indicate that the pump is in need of maintenance Pump Manual Refer to the operation manual supplied with your vacuum pump for recommended maintenance...

Page 50: ...50 P a g e cascadesciences com Tel 503 847 9047 MAINTENANCE...

Page 51: ...512 Fuse CVO 2 5X20mm T8A 250V Requires 1 fuse Please see the power panel illustration on page 18 for the CVO 2 fuse location 3300546 Power Cord CVO 2 125 Volt 15Amp 9ft 5 in 2 86m NEMA 5 15P 1800510...

Page 52: ......

Reviews: