background image

12

6921954

Table of Torques for ROLLERFORKS®

When ordering components, you are advised to not only look up the product numbers in the appendices but also 

 to check the measurements of the relevant components yourself. This is because a special version may be involved, in which some 

components may vary from the standard version.

Ordering Components

Torques

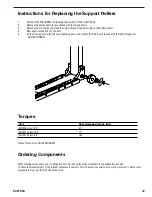
1.

Set the ROLLERFORKS® to hip height and switch off the forklift truck.

2.

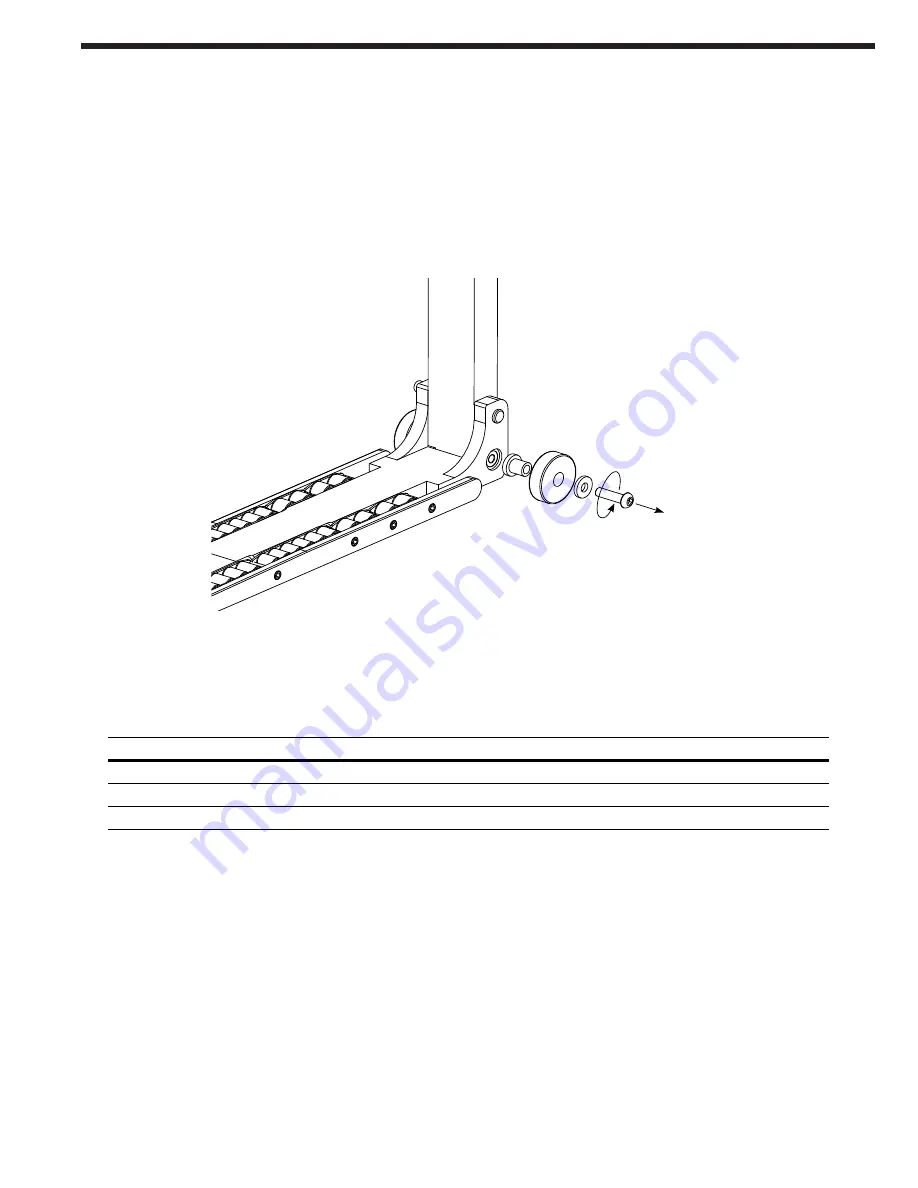
Remove the components in accordance with the image below.

3.

Remove the old Loctite and clean the screw thread of the bolt using Loctite 7063 cleaner.

4.

Now apply Loctite 2701 to the bolt.

5.

Fit the new support roller and accompanying parts, and tighten the bolt in accordance with the table Torques for 


                ROLLERFORKS®.

Instructions for Replacing the Support Rollers

Item

Recommended torque (Nm)

Bolt M8 class 12.9

37

Bolt M10 class 12.9

70

Bolt M16 class 8.8

180

Summary of Contents for KOOI ROLLERFORKS

Page 1: ...Manual Number 6921954 Cascade KOOI is a Registered Trademark of Cascade Corporation SER MANUAL ROLLERFORKS U...

Page 2: ...he cartridges 11 Instructions for replacing the tip 11 Instructions for replacing the support rollers 12 Torques 12 Ordering Components 12 Appendices 13 Appendix 1 Spare Parts for ROLLERFORKS RFC10 D1...

Page 3: ...able for accidents or instances of damage arising from the use of this manual Please note that the information in this manual may be changed at any time without prior notice and that it may contain te...

Page 4: ...until they have been expertly repaired Warning While driving with a load contact between the ROLL ERFORKS and the ground must be avoided As soon as the ROLLERFORKS touch the ground the load will roll...

Page 5: ...ING Never exceed the capacity indicated on the forklift truck s type plate The capacity of the combination of forklift truck and extension is the responsibility of the forklift truck manufacturer and...

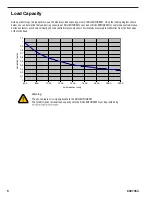
Page 6: ...distance Correction factors are shown vertically and load centre distances are shown horizontally measured in millimetres from the front edge of the fork s back Warning The above diagram is only appl...

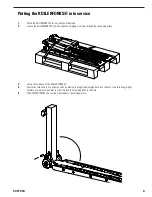
Page 7: ...straps Putting the ROLLERFORKS into service 3 Lift up the fork back of the ROLLERFORKS 4 Secure the fork back in its upright position by placing the supplied clamping bush into the hole see following...

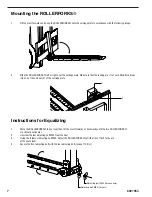
Page 8: ...the same level 4 Secure the front adjusting bolt with the rear adjusting bolt torque 170 Nm Instructions for Equalizing Adjusting bolt M20 for securing Adjusting bolt M20 for sets Mounting the ROLLERF...

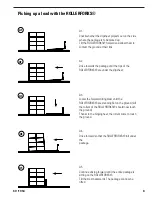
Page 9: ...l the tips of the ROLLERFORKS are under the slipsheet A3 Lower the forward tilting mast until the ROLLERFORKS are standing flat on the ground All the rollers of the ROLLERFORKS should now touch the gr...

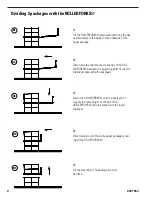
Page 10: ...re the tips of the ROL LERFORKS between the projecting parts of the two slipsheets separating the packages B3 Lower the ROLLERFORKS until the heels are at roughly the same height as the tips of the RO...

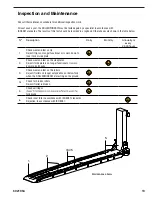
Page 11: ...Check wear and tear on tip Reject if tip is no longer functional or is worn down to inner fork or side plate 2 Check wear and tear on the side plates Reject if side plate is no longer functional or is...

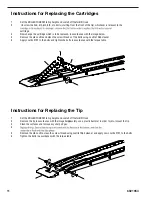
Page 12: ...5 Apply Loctite 2701 to the bolts and tighten the bolts in accordance with the torque table 1 Set the ROLLERFORKS to hip height and switch off the forklift truck 2 Remove the tip in accordance with t...

Page 13: ...nents Torques 1 Set the ROLLERFORKS to hip height and switch off the forklift truck 2 Remove the components in accordance with the image below 3 Remove the old Loctite and clean the screw thread of th...

Page 14: ...p com AMERICAS Cascade KOOI U S Headquarters 2201 NE 201st Fairview OR 97024 9718 Tel 800 CASCADE 227 2233 Fax 888 329 8207 Cascade KOOI Canada Inc 5570 Timberlea Blvd Mississauga Ontario Canada L4W 4...

Reviews: