INTRODUCTION
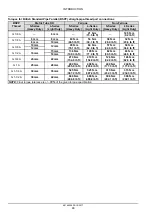
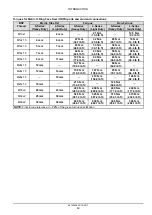
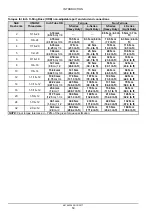
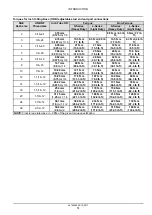
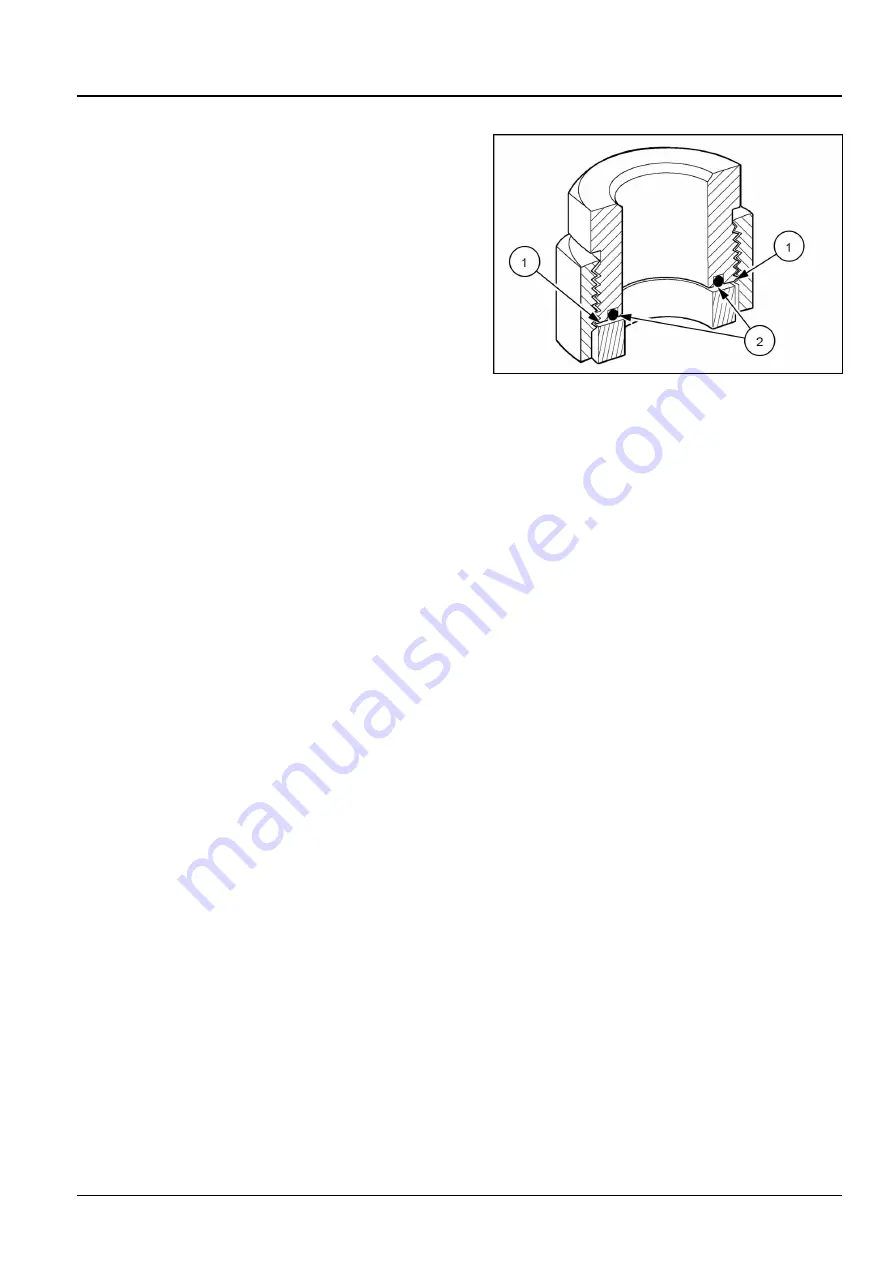
Installation of O-Ring Face Seal (ORFS) connections
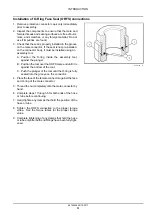
1. Remove protective connector caps only immediately
prior to assembly.
2. Inspect the components to ensure that the male and
female threads and sealing surfaces are free of burrs,
nicks, and scratches, or any foreign material. Do not
use if impurities are found.
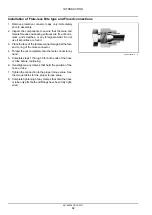
3. Check that the seal is properly installed in the groove
on the male connector. If the seal is not pre-installed
on the connector body, it must be installed using an
assembly tool:
A. Position the O-ring inside the assembly tool,
against the plunger.
B. Position the tool over the ORFS male end until it is
against the bottom of the tool.
C. Push the plunger of the tool until the O-ring is fully
seated into the groove on the connector.
4. Place the face of the female connector against the face
and O-ring of the male connector.
50011183
5
5. Thread the nut completely onto the male connector by
hand.
6. Complete steps 1 through 5 for both ends of the hose
or tube before continuing.
7. Hand-tighten any clamps that hold the position of the
hose or tube.
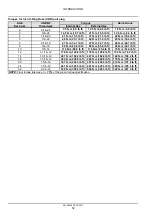
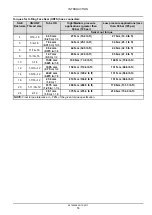
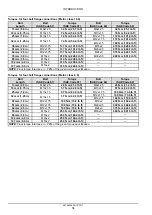
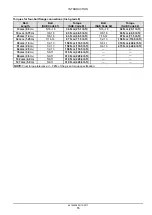
8. Tighten the ORFS connection to the proper torque
value. See the torque tables for the proper torque
value.
9. Complete tightening of any clamps that hold the hose
or tube only after both end fittings have been fully tight-
ened.
48194558 20/10/2017
61


