CHAPTER 7 - ELECTRICAL
7-9
6-34551NA
Issued 8-04 Bur
REPLACING A BULB
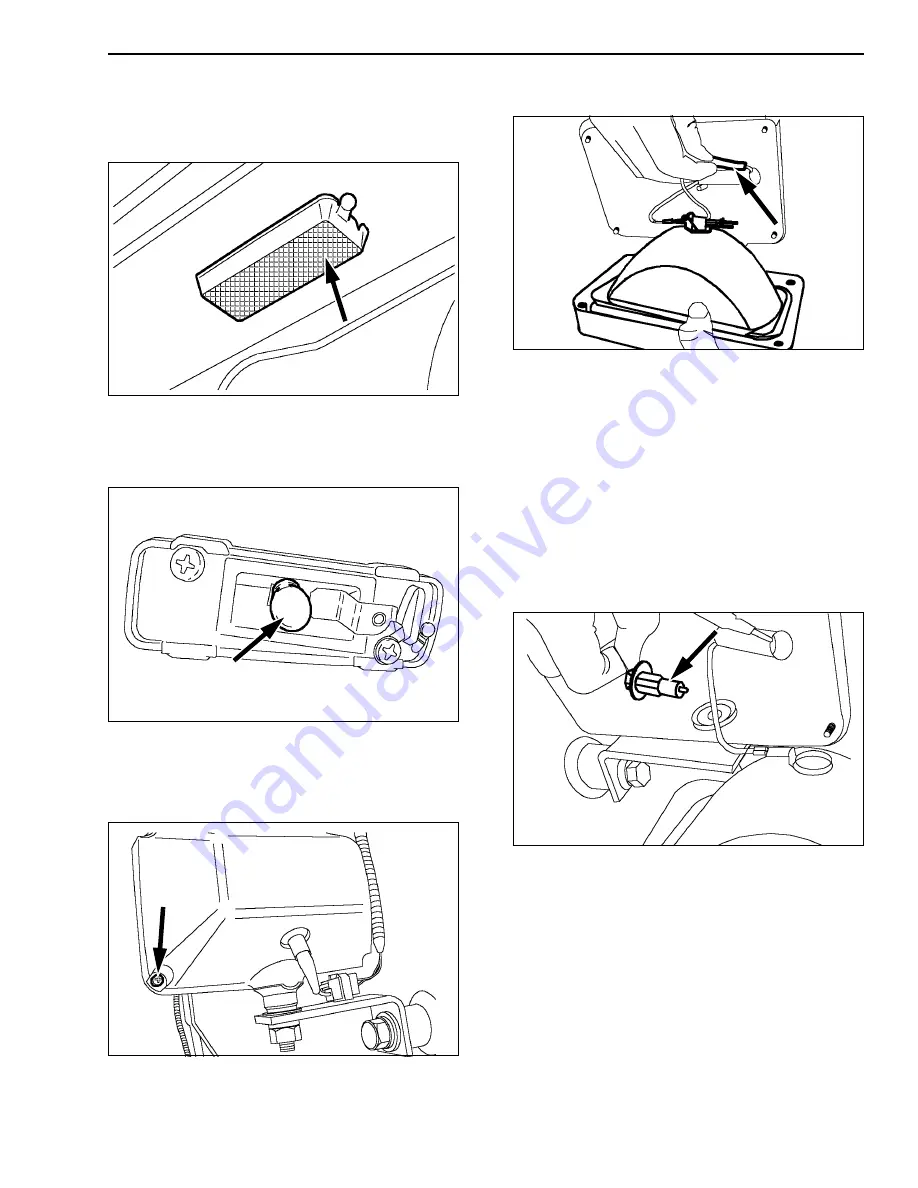
OPERATOR’S COMPARTMENT LIGHTING
1. Remove the cover.
CT02C058
Figure 16
2. Remove the bulb and install a bulb of the same
wattage (6 W).
3. Install the lens.
CT02D267
Figure 17
WORKING LIGHTS ON THE CAB AND ON THE
ATTACHMENT
1. Remove the 4 retaining screws.
CT02D261
Figure 18
2. Tilt the working light and disconnect the plug.
‘CT02D262
Figure 19
3. Pull the clip outwards, remove the bulb and
install a bulb of the same wattage:
CX75SR, CX80: 55 W for lights on the cab and
on the attachment.
CX135SR: 55 W for lights on the cab and 70 W
for light on the attachment.
IMPORTANT: Never put your fingers on a tungsten
iodide bulb.
4. Install the clip and reconnect the plug.
5. Put the working light back into position and install
the mounting screws.
CT02D263
Figure 20
Summary of Contents for CX135SR
Page 6: ...IV Issued 8 04 Bur 6 34551NA CHAPTER 9 INDEX...
Page 12: ...CHAPTER 1 GENERAL INFORMATION 1 6 Issued 8 04 Bur 6 34551NA NOTES...
Page 14: ...CHAPTER 2 SAFETY DECALS AND HAND SIGNALS 2 2 Issued 8 04 Bur 6 34551NA NOTES...
Page 60: ...CHAPTER 3 INSTRUMENTS AND CONTROLS 3 32 Issued 8 04 Bur 6 34551NA...
Page 62: ...CHAPTER 4 OPERATING INSTRUCTIONS 4 2 Issued 8 04 Bur 6 34551NA...
Page 82: ...CHAPTER 4 OPERATING INSTRUCTIONS 4 22 Issued 8 04 Bur 6 34551NA NOTES...
Page 132: ...CHAPTER 5 LUBRICATION FILTERS AND FLUIDS 5 50 Issued 8 04 Bur 6 34551NA NOTES...
Page 134: ...CHAPTER 6 MAINTENANCE AND ADJUSTMENTS 6 2 Issued 8 04 Bur 6 34551NA...
Page 152: ...CHAPTER 6 MAINTENANCE AND ADJUSTMENTS 6 20 Issued 8 04 Bur 6 34551NA NOTES...
Page 154: ...CHAPTER 7 ELECTRICAL 7 2 Issued 8 04 Bur 6 34551NA NOTES...
Page 164: ...CHAPTER 8 SPECIFICATIONS 8 2 Issued 8 04 Bur 6 34551NA...
Page 183: ...CHAPTER 8 SPECIFICATIONS 8 21 6 34551NA Issued 8 04 Bur NOTES...
Page 184: ...CHAPTER 8 SPECIFICATIONS 8 22 Issued 8 04 Bur 6 34551NA...


