6 - MAINTENANCE
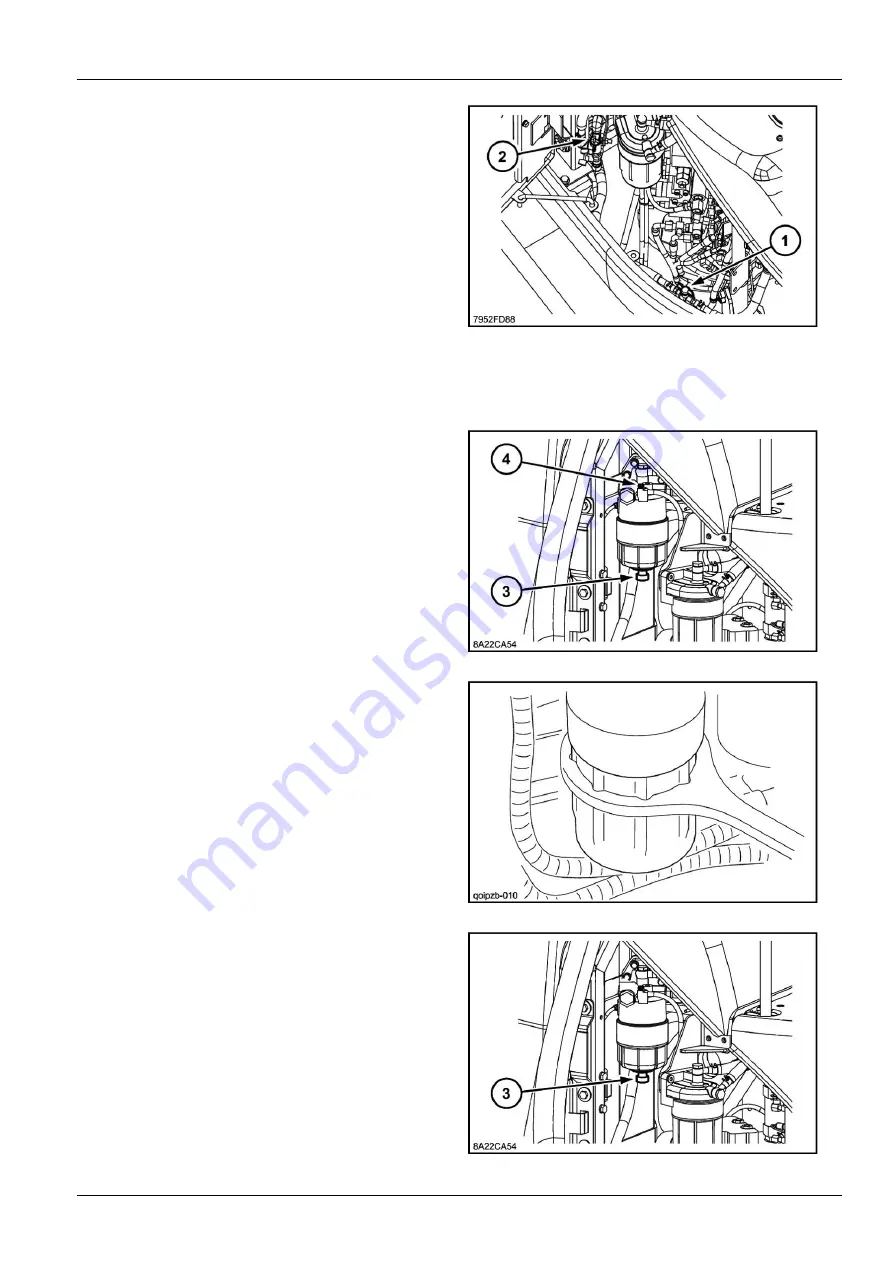
2. Close the valve
(1)
on the fuel tank line and close the
valve
(2)
on the engine line.
7952FD88
8
3. Clean around the fuel filter body.
NOTICE:
Never use the cleaner because that can
cause damage.
4. Loosen the drain plug
(3)
and the bleed screw
(4)
.
8A22CA54
9
5. Clean around the fuel filter body then remove it using
the wrench provided with the machine.
6. Install the new fuel filter element. Replace the fuel filter
body seal, then install the body, turning it until it is in
contact with the fuel filter head.
ATTENTION:
Do not fill the filter body with fuel before
installing.
7. Tighten the body using the wrench, the tightening
torque must be from
28 - 32 N·m
(
20.7 - 23.6 lb ft
).
NOTE:
Bind tight within regulation torque.
QOIPZB-010
10
8. Replace the drain plug
(3)
seal then install the drain
plug
(3)
; the tightening torque must be between
8 - 12
N·m
(
5.9 - 8.9 lb ft
)
ATTENTION:
Overtightening can damage the seal.
ATTENTION:
Never re-use the seal of the filter body
or the drain plug
(3)
; they must always be replaced
with new seal.
NOTE:
Bind tight within regulation torque.
8A22CA54A
11
6-33
Summary of Contents for CX145C SR
Page 6: ......
Page 18: ...1 GENERAL INFORMATION 1 12 ...
Page 29: ...2 SAFETY INFORMATION E5054225_TU 4 2 11 ...
Page 132: ...3 CONTROLS INSTRUMENTS 3 82 ...
Page 160: ...4 OPERATING INSTRUCTIONS 4 Operate the arm control to unhook the tool KKZVLU 024A 14 4 28 ...
Page 180: ...4 OPERATING INSTRUCTIONS 4 48 ...
Page 206: ...6 MAINTENANCE Offset boom pin 10 07C803C9 17 6 16 ...
Page 207: ...6 MAINTENANCE Arm backhoe bucket 375EFD72 18 AB1F527A 19 6 17 ...
Page 298: ...8 SPECIFICATIONS Offset maximum left EACB5F36 6 See next page for the value 8 14 ...
Page 300: ...8 SPECIFICATIONS 8 16 ...


