6 - MAINTENANCE
Replacing the hydraulic fluid
1. Release all pressure in the hydraulic reservoir. Refer
to page
6-32
.
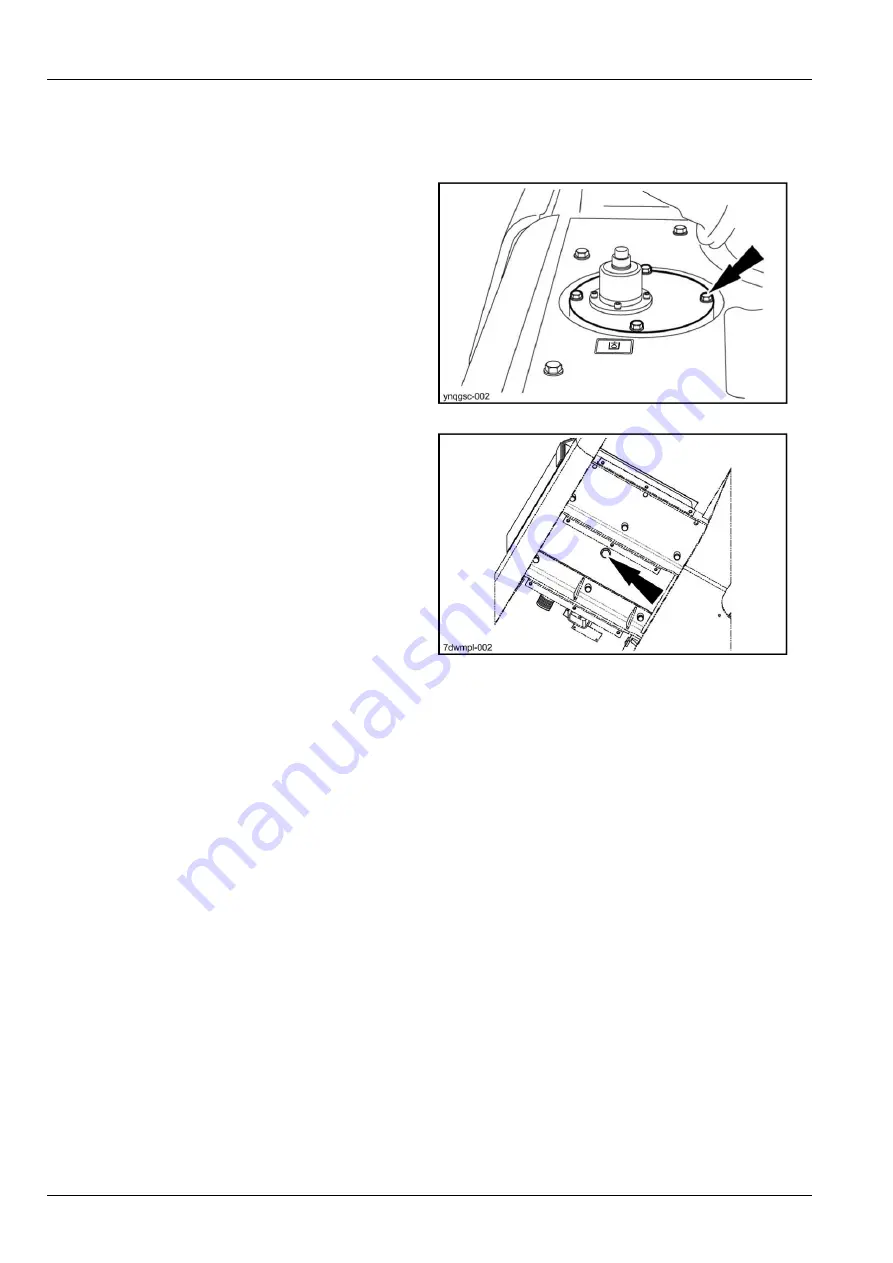
2. Remove the reservoir cover plate.
3. Using a pump, remove the fluid from the hydraulic
reservoir. Have a container with a suitable capacity
ready.
YNQGSC-002
12
4. Place a receptacle of a suitable capacity under the
reservoir drain plug, remove the reservoir drain plug
and allow the remainder of the fluid to flow out.
5. Change the suction filter and the return filter. See
"Cleaning and replacement of the suction filter" and
"Replacing the return filter".
6. Install the reservoir drain plug.
7. Fill the reservoir with new hydraulic fluid. See "Filling
the reservoir".
8. Replace the cover plate seal if required and install the
cover plate on the reservoir.
ATTENTION:
Before you start the engine, it is very impor-
tant that you bleed air from all the hydraulic components.
See "Bleeding air from the hydraulic components".
9.
Start and run the engine with no load for approxi-
mately five minutes.
10. Move each control several times to remove any air in
the system.
11. Swing the upperstructure evenly left to right two com-
plete turns or more.
12. Place the machine in position and then stop the en-
gine.
13. Check the oil level in the hydraulic reservoir and add
oil as required and check that there are no air bubbles
in the hydraulic reservoir.
7DWMPL-002
13
6-40
Summary of Contents for CX300C
Page 6: ......
Page 18: ...1 GENERAL INFORMATION 1 12...
Page 28: ...2 SAFETY INFORMATION QNTTT2 011B_TU 3 2 10...
Page 50: ...2 SAFETY INFORMATION 2 32...
Page 130: ...3 CONTROLS INSTRUMENTS 3 80...
Page 157: ...4 OPERATING INSTRUCTIONS 4 Operate the arm control to unhook the tool KKZVLU 024A 14 4 27...
Page 172: ...4 OPERATING INSTRUCTIONS 4 42...
Page 182: ...5 TRANSPORT OPERATIONS 5 10...
Page 272: ...6 MAINTENANCE 6 90...
Page 280: ...8 SPECIFICATIONS Working range 4M8ORU 002A 2 See next page for the values 8 6...
Page 282: ...8 SPECIFICATIONS 8 8...


