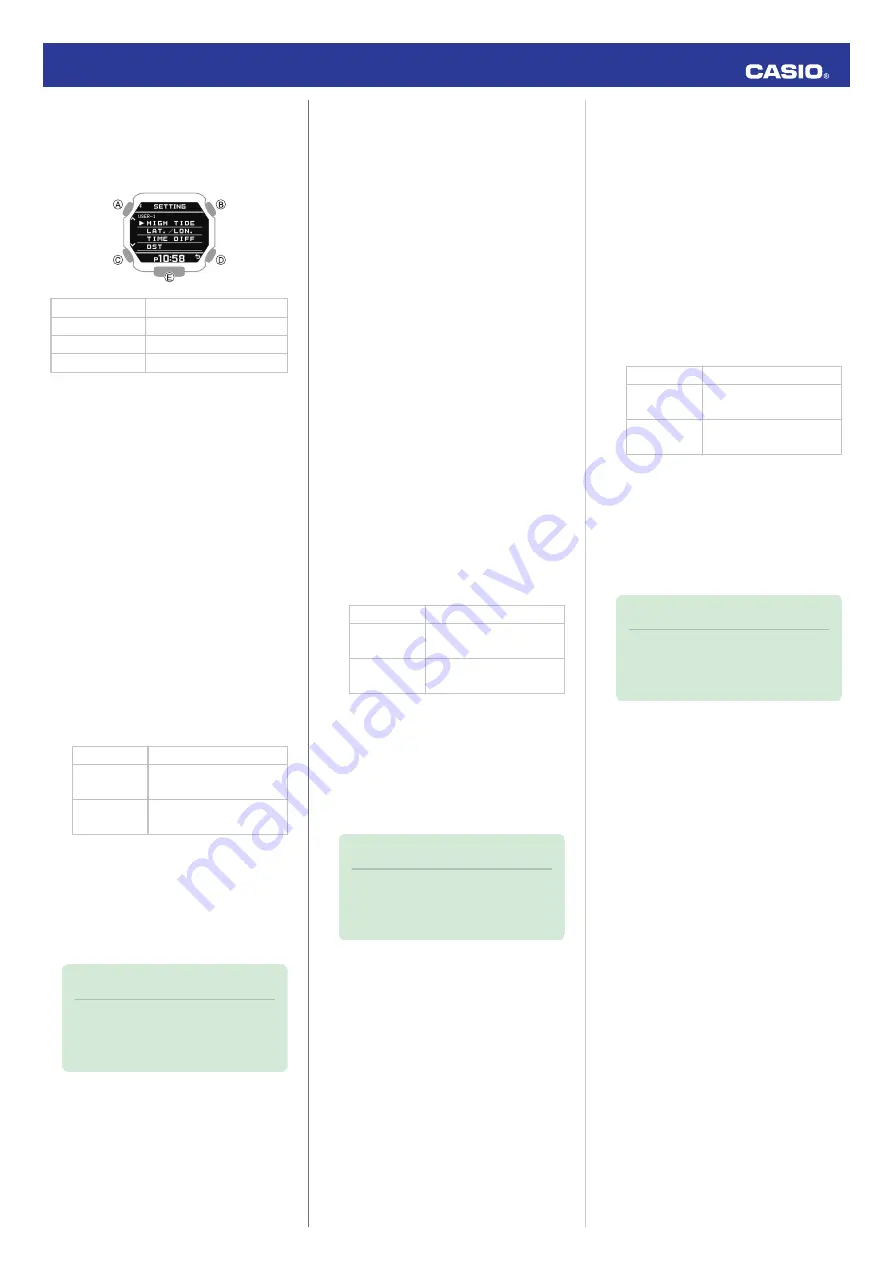
4.
Press (B).
●
This displays the custom point item
selection screen.
[HIGH TIDE]
High tide time
[LAT./LON.]
Latitude and longitude
[TIME DIFF]
Time offset
[DST]
Summer time
5.
Use (A) and (C) to move the pointer to the
item whose setting you want to change.
6.
Press (B).
7.
Specify the high tide time of the custom
point.
●
On the custom point item selection
screen, select [HIGH TIDE].
A
Use (A) and (C) to change the high
tide time hour setting.
B
Press (B).
C
Use (A) and (C) to change the high
tide time minute setting.
D
Press (B).
E
Use (A) and (C) to specify whether or
not you want to save the current input
values.
[YES]
Saves current settings.
[NO]
Discards current
settings.
[RETURN]
Returns to the high tide
time setting screen.
F
Press (B) to register the high tide time.
After registration of the information is
complete, [SETTING COMPLETED]
will appear for a few seconds, and
then the custom point item selection
screen will re-appear.
Note
●
To exit the high tide time setting
operation at any point, press (D) and
advance to step
E
.
8.
Specify the latitude and longitude of the
custom point.
●
On the custom point item selection
screen, move the pointer to [LAT./
LON.].
A
Use (A) and (C) to specify [N] (north)
or [S] (south) as the latitude direction.
B
Press (B).
C
Use (A) and (C) to specify a latitude
value.
D
Press (B).
E
Use (A) and (C) to specify [E] (east) or
[W] (west) as the longitude direction.
F
Press (B).
G
Use (A) and (C) to specify a longitude
value.
H
Press (B).
I
Use (A) and (C) to specify whether or
not you want to save the current input
values.
[YES]
Saves current settings.
[NO]
Discards current
settings.
[RETURN]
Returns to the hour
setting screen.
J
Press (B) to register your latitude and
longitude.
After registration of the information is
complete, [SETTING COMPLETED]
will appear for a few seconds, and
then the custom point item selection
screen will re-appear.
Note
●
To exit the latitude and longitude
setting operation at any point, press
(D) and advance to step
I
.
9.
Specify the UTC time offset of the custom
point.
●
On the custom point item selection
screen, move the pointer to [TIME
DIFF].
A
Use (A) and (C) to change the UTC
time offset.
B
Press (B).
C
Use (A) and (C) to specify whether or
not you want to save the current input
values.
[YES]
Saves current settings.
[NO]
Discards current
settings.
[RETURN]
Returns to the time
offset setting screen.
D
Press (B) to complete time offset
registration.
After registration of the information is
complete, [SETTING COMPLETED]
will appear for a few seconds, and
then the custom point item selection
screen will re-appear.
Note
●
To exit the time offset setting
operation at any point, press (D) and
advance to step
C
.
10.
Specify the DST on/off setting for the
custom point.
●
On the custom point item selection
screen, move the pointer to [DST].
A
Use (A) and (C) to specify [OFF]
(standard time display) or [ON]
(summer time display).
B
Press (B) to register the DST on/off
setting.
After registration of the information is
complete, [SETTING COMPLETED]
will appear for a few seconds, and
then the custom point item selection
screen will re-appear.
Operation Guide 3482
15


