


62
Viewing Photos
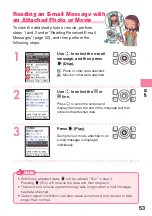
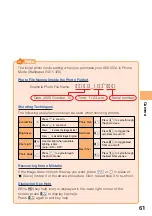
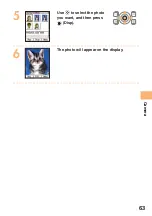
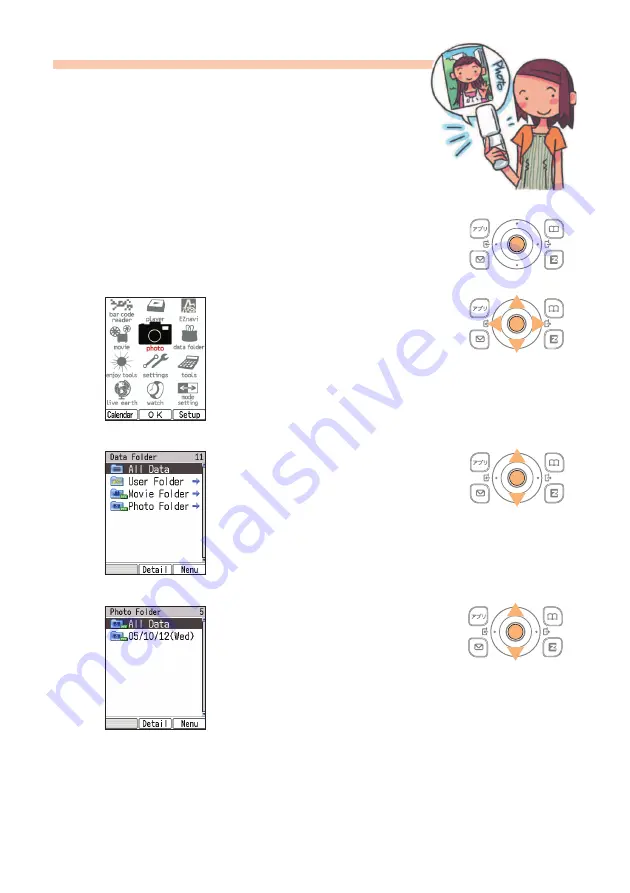
1
While the standby screen is displayed,
press
c
.
○
○
○
○
○
○
○
○
○
○
○
○
○
○
○
○
○
○
○
○
○
○
○
○
○
○
○
○
○
○
○
○
○
○
○
○
○
○
○
○
○
○
○
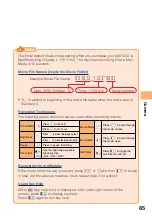
2
Use
a
to select “data
folder,” and then press
c
(OK).
○
○
○
○
○
○
○
○
○
○
○
○
○
○
○
○
○
○
○
○
○
○
○
○
○
○
○
○
○
○
○
○
○
○
○
○
○
○
○
○
○
○
○
3
Use
j
to select “Photo
Folder,” and then press
c
(Detail).
○
○
○
○
○
○
○
○
○
○
○
○
○
○
○
○
○
○
○
○
○
○
○
○
○
○
○
○
○
○
○
○
○
○
○
○
○
○
○
○
○
○
○
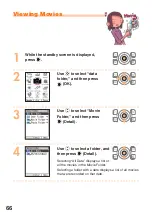
4
Use
j
to select a folder, and
then press
c
(Detail).
Selecting “All Data” displays a list
of all the photos in the Photo Folder.
Selecting a folder with a date displays a list of all photos
that were shot on that date.
○
○
○
○
○
○
○
○
○
○
○
○
○
○
○
○
○
○
○
○
○
○
○
○
○
○
○
○
○
○
○
○
○
○
○
○
○
○
○
○
○
○
○


