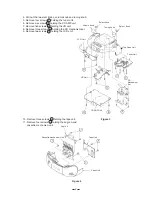
Select Knob
Select Knob
Volume Knob
Tuning Knob
LCD Unit
Tuner Unit
VR Unit
CD
Mechanism
Set
CD AMP Unit
Top Case Unit
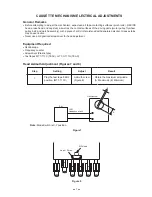
Figure 3
4. Pull out the two slect knobs, volume knob and tuning knob.
5. Remove four screws C holding the tuner unit.
6. Remove six screws D holding the CD AMP unit.
7. Remove five screws E holding the VR unit.
8. Remove three screws F holding the CD mechanism set.
9. Remove two screws G holding the LCD unit.
10. Remove three screws H holding the tape unit.
11. Remove four screws J holding the angle A and
cassette mechanism unit.
Angle A
Tape Unit
Case Unit
Cassette mechanism Unit
Figure 4
2
Summary of Contents for CD-311S
Page 1: ... without price CD 311S CD RADIO CASSETTE PLAYER INDEX Model C Europe Model E Other Countries ...
Page 22: ...PCB VIEWS 20 Tuner PCB Top View ...
Page 23: ...21 CD AMP PCB Top View Door Switch PCB Top View ...
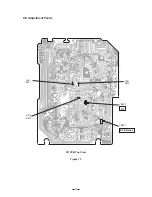
Page 24: ...22 VR PCB Top View ...
Page 26: ...24 Tape PCB Top View ...
Page 27: ...25 LCD PCB Top View ...
Page 34: ...32 IC801 TMP47C422F FR11 ...
Page 48: ...Cassette Mechanism 46 13 1 13 2 13 3 13 4 13 5 13 6 13 ...
Page 49: ...47 Case Unit 14 7 14 4 14 2 14 6 14 3 14 1 15 8 14 8 14 7 14 5 ...
Page 50: ...48 Top Case Unit 15 2 15 4 15 3 15 5 16 15 7 15 6 15 1 14 8 15 8 ...


