20060301
8-3-10
Editing Figures
(4) Tap the down arrow next to the measurement box to cycle through other
measurements.
• In the case of the line segment, for example, you can view its length, slope, direction,
and equation.
I
Specifying a Mea
s
urement of a Figure
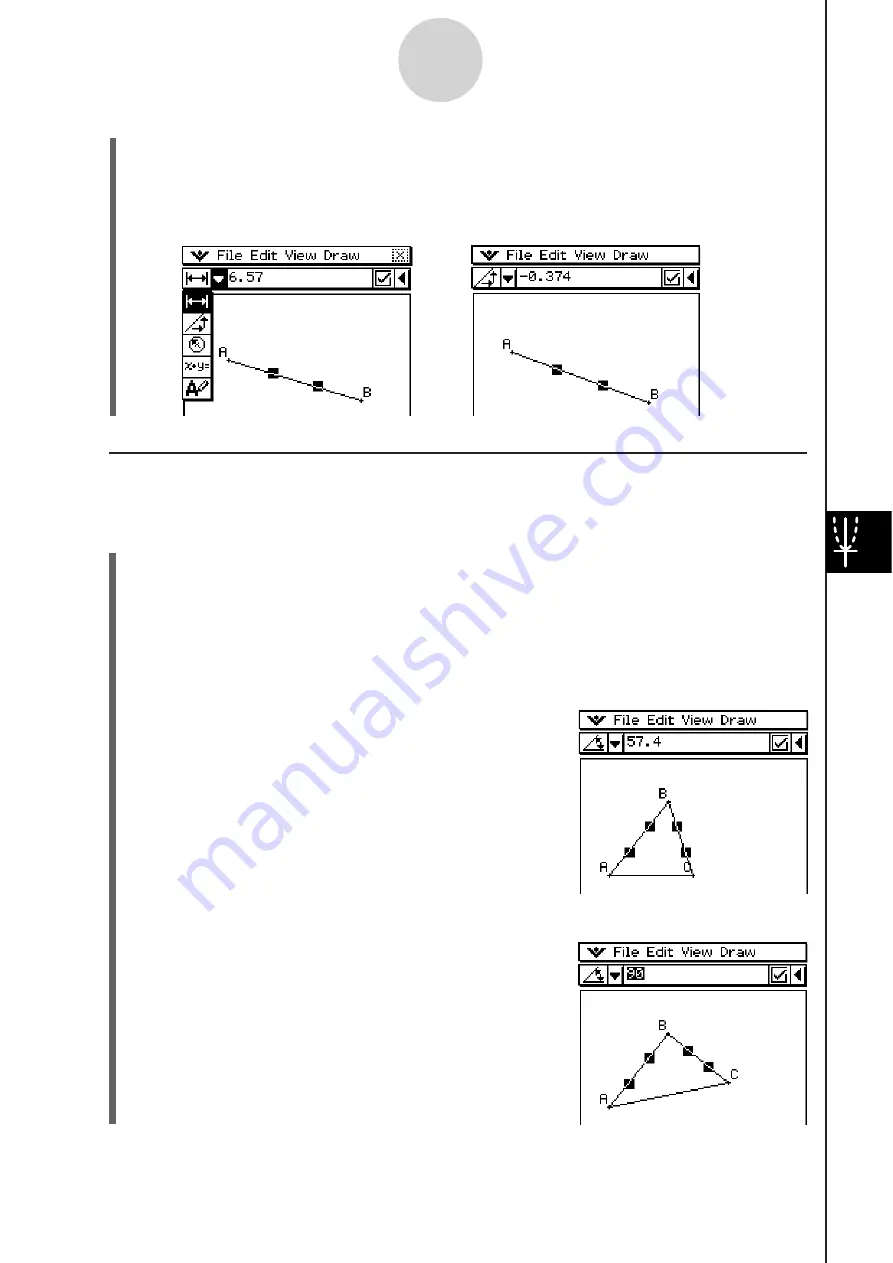
The following example shows how to specify an angle of a triangle.
S
To
s
pecify the angle of a triangle
(1) Check to make sure the [Measure Angle] setting of the Geometry Format dialog box is
set to “Degree” (see page 1-9-10 for more information).
(2) Draw the triangle.
• If you need to, select [Edit] and then [Clear All] before beginning this example.
(3)
Tap
5
on the toolbar to display the measurement box.
(4) Select side AB and then select side BC.
• This displays the measure of angle B in the
measurement box.
(5) Input the value you want to specify for angle B into the measurement box and press
.
• In this example, we input 90, which makes angle B
90 degrees.
Summary of Contents for ClassPad 330
Page 11: ...20060301 20090601 ClassPad 330 ClassPad OS Version 3 04 ...
Page 277: ...20060301 3 3 10 Storing Functions 3 Tap AND Plot OR Plot ...
Page 779: ...20090601 S Graph Line Clustered C S Graph Line Stacked E 13 9 2 Graphing ...
Page 780: ...20090601 S Graph Line 100 Stacked F S Graph Column Clustered G 13 9 3 Graphing ...
Page 781: ...20090601 S Graph Column Stacked I S Graph Column 100 Stacked J 13 9 4 Graphing ...
Page 782: ...20090601 S Graph Bar Clustered K S Graph Bar Stacked 9 13 9 5 Graphing ...


