20060301
P
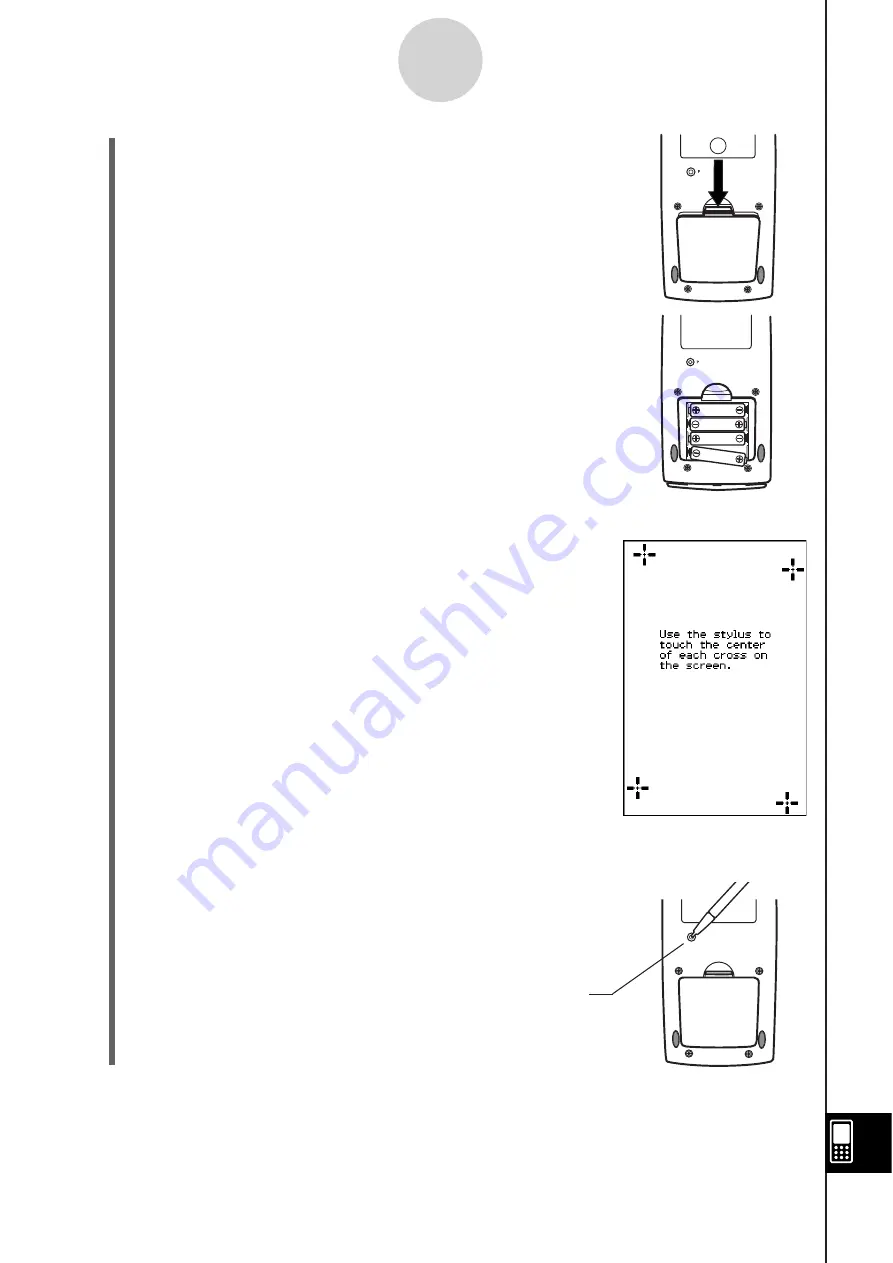
(3) Remove the battery cover from the ClassPad by
pulling with your finger at the point marked
.
(6) Replace the battery cover.
(7) Turn the ClassPad front side up and remove its front cover.
(8) Align the touch panel.
a. Your ClassPad should turn on automatically and display
the Touch Panel Alignment screen.
b. Tap the center of each of the four cross marks as they
appear on the display.
• If the Touch Panel Alignment screen does not appear,
use the stylus to press the P button on the back of the
ClassPad.
A
-3-3
Power Supply
P button
(4) Remove the four old batteries.
(5) Load a new set of four batteries, making sure that
their positive (+) and negative (–) ends are facing in
the proper directions.
• Be sure to replace all four batteries with new ones.
Important!
• It may take a little time for your ClassPad to start up after
you press the P button.
1
Summary of Contents for ClassPad 330
Page 11: ...20060301 20090601 ClassPad 330 ClassPad OS Version 3 04 ...
Page 277: ...20060301 3 3 10 Storing Functions 3 Tap AND Plot OR Plot ...
Page 779: ...20090601 S Graph Line Clustered C S Graph Line Stacked E 13 9 2 Graphing ...
Page 780: ...20090601 S Graph Line 100 Stacked F S Graph Column Clustered G 13 9 3 Graphing ...
Page 781: ...20090601 S Graph Column Stacked I S Graph Column 100 Stacked J 13 9 4 Graphing ...
Page 782: ...20090601 S Graph Bar Clustered K S Graph Bar Stacked 9 13 9 5 Graphing ...


