


73
Caring for the Printer
A dirty print head can make it impossible to obtain good printing results. Perform
the following steps to clean the print head when it becomes dirty.
Important!
•
Use only a cotton swab or some other soft material to clean the print head.
•
Note that you will not be able to open the disc tray or the front cover unless
the power cord, AC adaptor and USB cable are both connected to the printer.
Open the front cover before disconnecting cables. See page 21 for information
about opening the disc tray and front cover, and page 20 for information
about disconnecting cables.
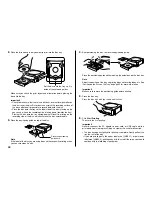
1.
Press the
Eject
button on the front of the printer or click the
button on
the main window.
This causes the disc tray to come out part way.
2.
Gently pull out the disc tray as far as it will go.
If there is a disc in the disc tray, remove it.
3.
Open the front cover.
If there is an ink ribbon cassette loaded in the printer, remove it.
4.
Unplug the USB cable from the PC and printer.
5.
Unplug the power cord from the wall outlet, and then unplug the AC adaptor
from the printer.
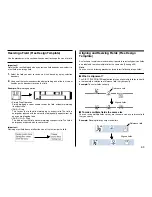
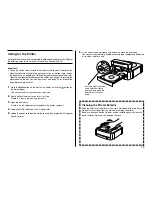
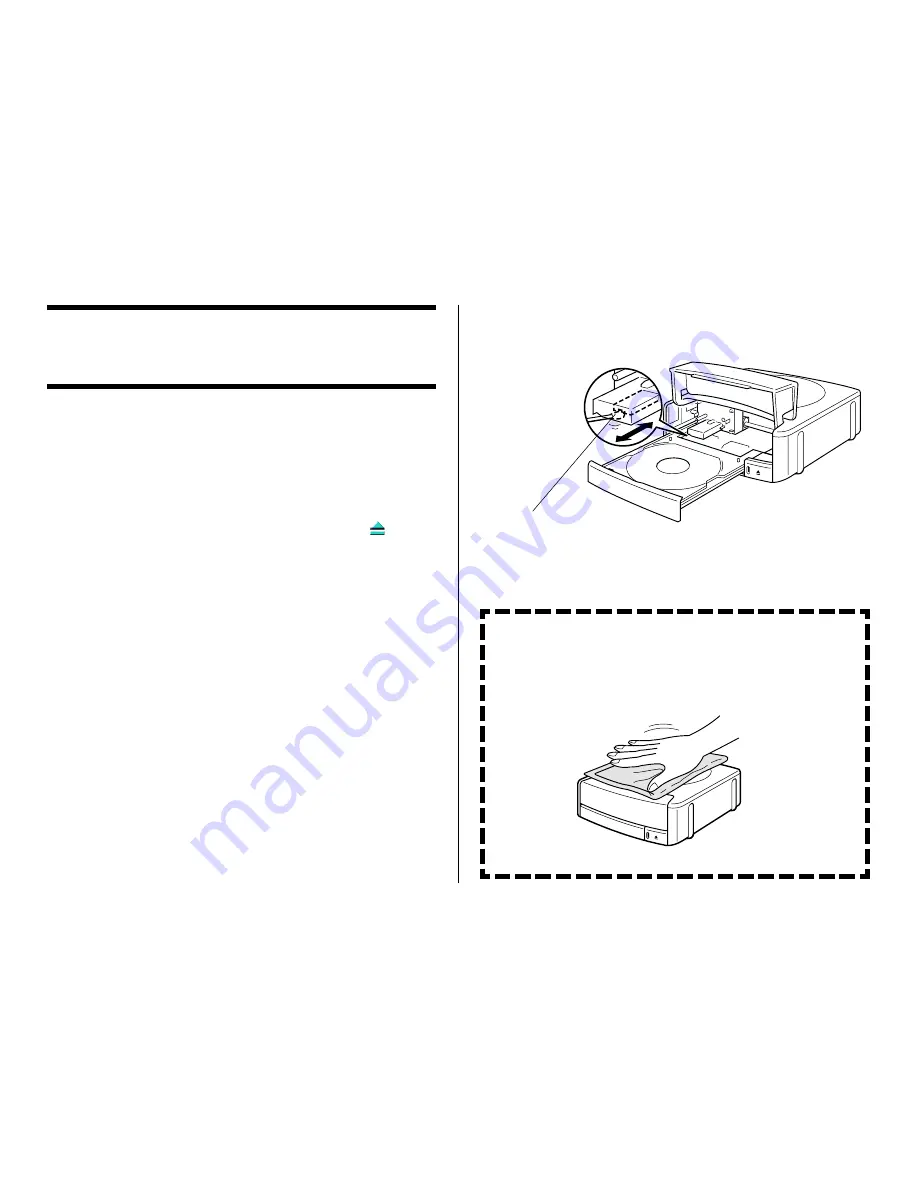
Insert the tip of the cotton
swab and slide it lightly
back and forth along the
depression in the print
head.
6.
Use a cotton swab moistened with alcohol to clean the print head.
You can use a commercially available cassette tape recorder head cleaning
kit to clean the print head.
Cleaning the Printer Exterior
Wipe the exterior of the printer with a cloth moistened with plain water.
Wring all excess liquid from the cloth before wiping the printer.
Never use benzene, alcohol, thinner, or other volatile agents to clean the
printer exterior. Doing so can damage the case.


