background image

143

Appendix

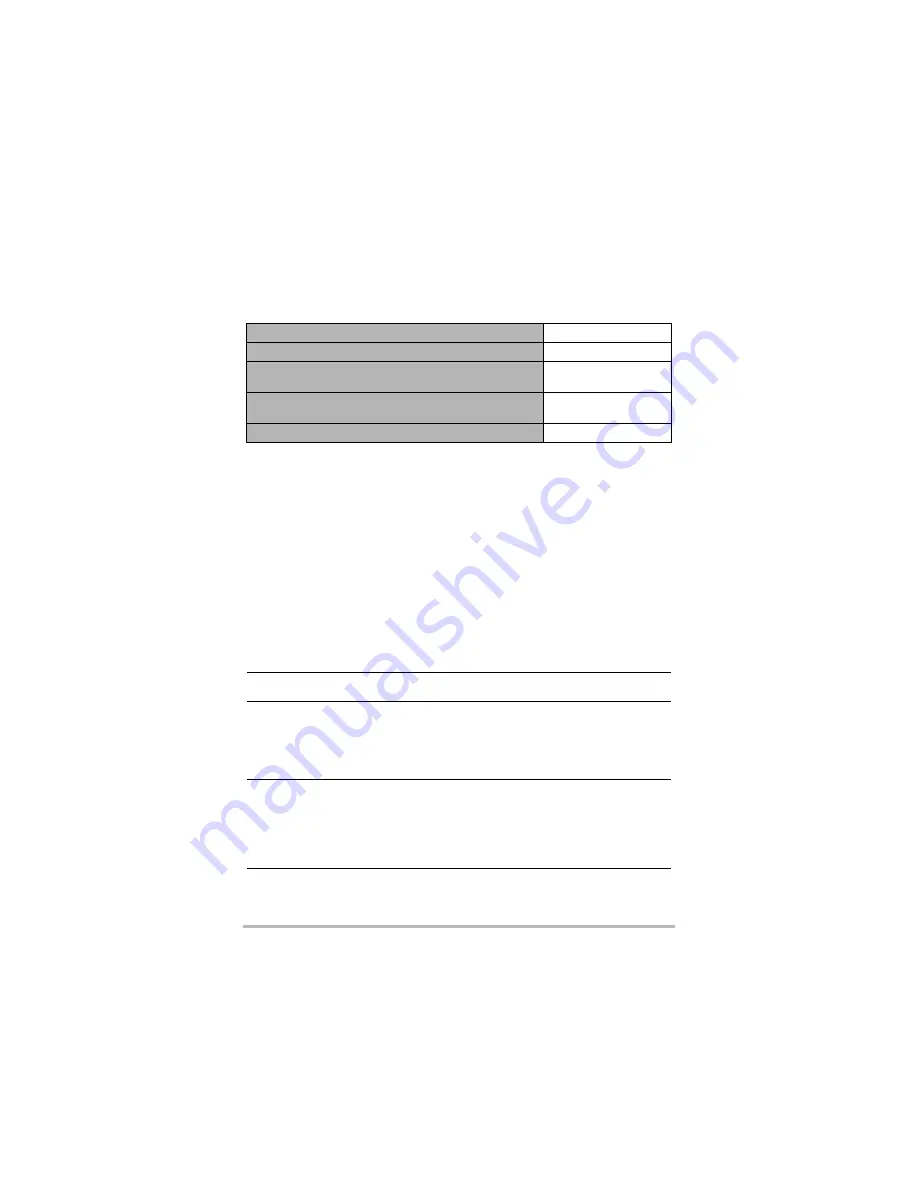
Approximate Battery Life

All of the values provided below represent the approximate amount of time under 
normal temperature (23°C (73°F)) before the camera turns off. These values are not 
guaranteed. Low temperatures shorten battery life.

• Temperature: 23°C (73°F)
• Battery: NP-150 (Rated Capacity: 950 mAh)
• Recording Medium: 16GB microSDHC memory card (SanDisk Corporation UHS-I 

series)

*1

In accordance with CIPA (Camera and Imaging Products Association) standards

*2

In accordance with CASIO standards

*3

One-image scroll approximately every 10 seconds

• The above values are based a new battery, starting from a full charge. Repeated 

charging shortens battery life.

• The above values are for reference only. They do not guarantee that the specified 

battery life will be attained under actual operating conditions.

• Frequency of Auto Focus and High Speed CS usage, configured settings, the 

amount of time the camera is left turned on, and ambient temperature in the area 
where the camera is used all greatly affect recording time and number of shots 
values.

Number of snapshots (Operating Time)

*

1

XXX shots

Actual movie recording time (Full HD movie)

*

1

XX minutes

Approximate continuous movie recording time 
(Full HD Movie)

*

2

X hour XX minutes

Approximate continuous movie recording time 
(High speed movie)

*

2

X hour XX minutes

Continuous Playback (Snapshots)

*

3

X hours XX minutes

Power Consumption

Camera: X V DC, Approximately X.X W
Controller: X V DC, Approximately X.X W

Dimensions

Camera: 60.9 (diameter) 

 33.3 (D) mm 

(2.4" (diameter) 

 1.3" (D)) (excluding hinge unit)

Controller: 59.2 (W) 

 86.7 (H) 

 19.4 (D) mm 

(2.3" (W) 

 3.4" (H) 

 0.76" (D)) (including hinge unit)

Combined: 60.9 (W) 

 154.8 (H) 

 38.7 (D) mm 

(2.4" (W) 

 6.1" (H) 

 1.5" (D)) (including hinge unit)

Weight

Camera:

Approximately 71 g (2.5 oz) (including memory card, not 
including hinge unit)

Controller: Approximately 102 g (3.6 oz)
Combined:

Approximately 207 g (7.3 oz) (including hinge unit and 
memory card)

Summary of Contents for EX-FR100CT

Page 1: ...CASIO product Before using it be sure to read the precautions contained in this User s Guide Keep the User s Guide in a safe place for future reference For the most up to date information about this product visit the official EXILIM Website at http www exilim com ...

Page 2: ... original retailer The shape of the power cord plug varies according to the country or geographic area where the camera is sold Accessories Camera EX FR100 Controller EX FR100CT Hinge Unit The hinge unit comes pre attached to the camera Tripod nut Carabiner strap USB AC adaptor AD C53U Power cord Micro USB cable Basic Reference ...

Page 3: ...held liable for any damages lost profits or claims by third parties arising out of the use of EXILIM Connect CASIO COMPUTER CO LTD shall not be held liable for any damages or lost profits caused by loss of memory contents due to malfunction repair or any other reason Note that the example screens and product illustrations shown in this User s Guide may differ somewhat from the screens and configur...

Page 4: ...e Camera 28 Preparing a Memory Card 30 Supported Memory Cards 30 To load a memory card 31 To format initialize a new memory card 32 To Shoot a Snapshot 33 Selecting an Auto Recording Mode 33 To shoot a snapshot 34 Viewing Snapshots 35 Deleting Snapshots and Movies 36 Snapshot Shooting Precautions 37 To configure REC mode settings 38 Selecting a Recording Mode 39 Shooting a Burst of Images High Spe...

Page 5: ...56 Selecting a Focus Mode Focus 57 Specifying the Number of CS Shots CS Shots 57 Self shooting Mirror 58 Reducing Wind Noise during Movie Recording Wind Noise Cut 58 Turning on Image Review Review 59 Displaying a Grid on the Monitor Screen Grid 59 Viewing Snapshots 60 Viewing a Movie 60 Viewing the Image Menu 62 Zooming an On screen Image 62 Creating a Time Lapse Movie Time Lapse 63 Creating a Col...

Page 6: ...guring Wireless Connection Settings 82 Sending Images from the Camera to a Smartphone as They are Recorded Auto Send 83 Specifying Images to be Sent by Auto Send Auto Send File Settings 84 Resizing Snapshots before Sending Them to a Smartphone Resize When Sending 84 Changing the Camera Password for Wireless LAN Connection WLAN password 84 Unpairing the Camera from a Smartphone Unpairing 85 Printin...

Page 7: ...Sleep State Trigger Time Sleep 99 Formatting Built in Memory or a Memory Card Format 100 Resetting the Camera to Factory Defaults Reset 100 Checking the Current Camera Firmware Version Version 101 Safety Precautions 102 Shock resistant Splashproof Dustproof 109 Precautions During Use 113 Power Supply 126 Charging 126 Battery Precautions 127 Using the Camera in another Country 127 Disposing of the ...

Page 8: ...1 Speaker Lens page 17 Microphone pages 17 49 Shutter button page 34 Movie page 47 FREE lever page 15 USB port pages 19 22 USB cover pages 19 22 Strap holes page 17 Controller USB cover pages 19 22 RELEASE button page 14 RESET button page 134 USB port pages 19 22 Carabiner strap attachment bar page 17 Strap holes page 17 Movie page 47 Shutter button page 34 Operation lamp pages 20 23 Power page 26...

Page 9: ...w to Change Them White Balance page 55 Focus mode page 57 Digital zoom page 46 Auto Send page 83 Remaining movie memory capacity page 139 Remaining snapshot memory capacity page 139 Snapshot image size page 53 Movie quality pages 47 54 ISO sensitivity page 56 Brightness page 54 Date Time pages 28 98 Camera battery level indicator page 25 Controller battery level indicator page 25 Communication sta...

Page 10: ...images High Speed CS page 40 Interval Shooting page 43 Folder name file name page 94 Snapshot image size page 53 Highlight Score page 69 Make up page 51 White Balance page 55 ISO sensitivity page 56 Brightness page 54 Shutter speed Image menu icon page 62 Camera battery level indicator page 25 Controller battery level indicator page 25 Date time pages 28 98 Communication status between camera and ...

Page 11: ...ge file in the folder named 100CASIO Movie Playback If you do not perform any operation for about three seconds during snapshot viewing or movie playback icons will become transparent Movie recording time page 60 Movie quality pages 47 54 Highlight Score page 69 Image menu icon page 62 Date time pages 28 98 Movie play icon page 60 Show Icons icon ...

Page 12: ... from your neck mount it on a tripod and select the shooting style that suits current conditions The camera can also be rotated 90 degrees which means you can change the orientation of a snapshot with little repositioning the camera Interval Shooting Shoot snapshots and or movies at fixed intervals It s a great way to chronicle a day s activities or changes over time Art Shot A variety of artistic...

Page 13: ...ly select snapshot and movie highlights and create a movie of them Time Lapse Creates a movies of images shot Wireless Connection Turns your smartphone into a camera remote controller and allows you to select one or more snapshot and or movie file in camera memory and send a copy to a smartphone See page 65 for more information See page 67 for more information See page 63 for more information See ...

Page 14: ...he camera Use a blower or other means to keep the lens and flash window free of dirt and dust and wipe gently with a soft dry cloth You can attach the controller to the camera and use the camera as a normal camera To attach the controller 1 With the camera lens pointed in the same direction as the controller s monitor screen slide the hinge unit into the controller s hinge unit slot 2 Push the hin...

Page 15: ...s operation lamp with the C mark on the hinge unit The indentations in the lens ring indicate the orientation of the long dimension of the image being shot To remove the hinge unit from the camera 1 While pulling down on the camera s FREE lever rotate the camera counterclockwise about 15 degrees until its operation lamp is aligned with the A mark on the hinge unit Hinge Unit Lens ring FREE lever I...

Page 16: ...e camera s operation lamp with the A mark on the hinge unit 2 Rotate the camera clockwise about 15 degrees until its operation lamp is aligned with the B mark on the hinge unit 1 Use the tripod nut to secure a tripod commercially available to the hinge unit Tripod nut A B Tripod commercially available Tripod nut ...

Page 17: ...ecure The carabiner strap is not intended for mountain climbing use It is designed only to support the camera When shooting hold the camera still Carefully press the shutter button and take care to avoid all movement as the shutter releases and for a few moments after it releases Take care that your fingers and the strap do not cover any of the areas indicated in the illustration Never swing the c...

Page 18: ...gainst the screen as you flick it up down left or right Use flick to scroll forward through images Spread Holding your thumb and forefinger against the screen as you spread them out Use spread to enlarge the screen image Squeeze Holding your thumb and forefinger against the screen as you bring them together Use squeeze to reduce the size of the screen image and to display multiple images Never use...

Page 19: ...omputer Using the included micro USB cable To charge with the USB AC adaptor While the camera and controller are turned off connect in the sequence shown below Charging time Approximately X hours XX minutes When disconnecting the USB AC adaptor from the camera be sure to disconnect from the camera first If you turn on the camera or controller while charging with the USB AC adaptor you will be able...

Page 20: ...r flashing In sleep state Charging High speed red green flashing Charging stopped due to abnormal ambient temperature USB AC adaptor problem battery problem page 126 timer operation Slow green flashing Charging complete Operation Lamp Status Meaning Lit red Charging Slow red amber flashing Charging sleep state High speed green amber flashing Charging stopped due to abnormal ambient temperature USB...

Page 21: ...ion The shape of the power plug depends on each country or geographic area If the operation lamp is not lit or flashing during charging check the orientation of the USB cable connectors Make sure that you insert the cable connector into the USB port until you feel it click securely into place Failure to insert the connector fully can result in poor communication or malfunction Note that even while...

Page 22: ...arging over a USB connection to a computer is in progress the camera will establish a USB connection with the computer Charging will continue Charging will also continue if you turn on the controller Note that certain types of computers or connection environments may stop charging if supply power is low Micro USB cable included with camera USB port USB port Computer power turned on When plugging i...

Page 23: ...g High speed red green flashing Charging stopped due to abnormal ambient temperature USB AC adaptor problem battery problem page 126 timer operation Lit green Charging complete Operation Lamp Status Meaning Lit amber Charging Slow red amber flashing Charging sleep state High speed green amber flashing Charging stopped due to abnormal ambient temperature USB AC adaptor problem battery problem page ...

Page 24: ...subject to fixed standards Use of an inferior device or a device that is not up to standard can cause malfunction and or failure of your camera Operation is not guaranteed in the case of a computer built or modified by you Even in the case of a commercially available computer certain USB port specifications may make it impossible to charge via the USB cable A battery that is still warm immediately...

Page 25: ...indicator may change when you switch between the REC mode and PLAY mode Leaving the camera for about 5 days with no power supplied while the battery is dead will cause its date and time settings to be cleared A message telling you to configure time and date settings will appear the next time you turn on the camera after restoring power When this happens configure date and time settings page 98 See...

Page 26: ...nd controller need to be turned on in order to use them Turning on the camera causes the camera and controller operation lamps to light green and automatically starts an operation to establish a Bluetooth wireless technology connection between the camera and controller An image appears on the controller and shooting is enabled The connection between the camera and controller is affected by their o...

Page 27: ...leep state The operation lamp slowly flashes green while the camera is in the sleep mode To restore the controller display press any controller button The Bluetooth wireless technology connection between the camera and controller is maintained even while they are in the sleep mode so they can quickly recover when you press a button If the distance between the camera and controller becomes to great...

Page 28: ...urning on power a language selection screen will appear If the screen does not appear check to make sure that the camera is turned on 2 Flick page 18 the controller screen upwards and downwards or touch until you find the language you want and then touch to select it 3 Touch the date display format you want Example July 10 2016 YY MM DD 16 7 10 DD MM YY 10 7 16 MM DD YY 7 10 16 To enter the PLAY m...

Page 29: ...he setting 5 When the date and time settings are the way you want touch Apply Each country controls its local time offset and the use of summer time and so they are subject to change If you make a mistake configuring display language date or time settings with the above procedure refer to the following pages for information about how to correct the settings Display language Page 99 Date and time P...

Page 30: ...following types and capacities microSD memory cards up to 2GB microSDHC memory cards greater than 2GB up to 32GB microSDXC memory cards greater than 32GB up to 2TB Note that the ability to use any particular card with this camera even if it satisfies the above capacity and type requirements is not guaranteed Memory Card Handling Precautions Certain types of memory cards can slow down processing sp...

Page 31: ...the camera slide it into the card slot all the way in until you hear it click securely into place 3 Close the CARD cover Never insert anything besides a supported memory card page 30 into the memory card slot Should water or any foreign object ever get into the card slot immediately turn off the camera and contact your retailer or nearest CASIO authorized service center To load a memory card Back ...

Page 32: ...les on it will delete its contents Normally you do not need to format a memory card again However if storing to a card has slowed down or if you notice any other abnormality re format the card Be sure to use the camera to format a memory card Formatting a card on a computer will result in a non SD standard format which can greatly slow down processing time and cause compatibility performance and o...

Page 33: ...ond icon from the right in the case of portrait display orientation Recording mode 4 Touch Auto or Premium Auto Pro to select the auto recording mode you want To Shoot a Snapshot Selecting an Auto Recording Mode Setting Description Auto This is the standard Auto recording mode Premium Auto Pro With Premium Auto Pro recording the camera automatically determines whether you are shooting a subject or...

Page 34: ...ng To stop movie recording press Movie again See page 47 for details You also touch a location on the screen to focus on it and then shoot the image page 51 You can specify the image size for snapshots See page 53 for more information Shooting with the Camera Alone You can use the camera in a stand alone configuration without turning on the controller or otherwise establishing a connection between...

Page 35: ...oot a series of CS images and merge them into a final image Take care to avoid any camera and subject movement until shooting of all of the CS images is complete Use the following procedure to view snapshots on the camera s monitor screen For information about how to play back movies see page 60 1 Touch PLAY to enter the PLAY mode This will display one of the snapshots currently stored in memory Y...

Page 36: ... file 1 Enter the PLAY mode 2 Touch Show Icons 3 Touch 4 Touch Delete 1 File 5 Flick the screen the left or right to scroll through images until the one you want to delete is displayed 6 Touch Delete This will delete the selected image To delete all files 1 Enter the PLAY mode 2 Touch Show Icons 3 Touch 4 Touch Delete All Files 5 Touch Delete This will cause the message There are no files to appea...

Page 37: ...o a high value This can cause the camera to take relatively longer to be ready to shoot again after you press the shutter button Do not perform any operation while the image recording operation is in progress Due to the characteristics of the imaging element used by the camera very fast moving objects in an image may appear distorted Auto Focus Restrictions Any of the following can make proper foc...

Page 38: ...the REC mode If the camera is in the PLAY mode touch REC to enter the REC mode 2 Touch Show Icons 3 Touch the item whose setting you want to change To configure REC mode settings Menu page 50 Recording mode page 39 Wireless mode page 74 Interval Shooting mode page 43 PLAY mode page 28 Depending on the recording mode some of the items on the menu that appears may not be usable Power ...

Page 39: ...g the camera automatically determines whether you are shooting a subject or scenery and other conditions Premium Auto Pro recording delivers higher image quality than standard Auto recording mode page 33 High Speed CS High Speed CS lets you shoot a burst of 30 images page 40 Triple Shot Triple Shot shoots a burst of three images and stores them in memory This feature is great for making sure you d...

Page 40: ...tton To stop the pre record operation of images touch 9 Press the shutter button This will store the current group of pre recorded images and start CS shooting of new images until the number of images you specified is reached If you are shooting with High Speed CS Prerecord the number images in the pre recorded group will be half the number specified by the CS Shots setting For example if you spec...

Page 41: ...era will start pre recording images at this time If you touch again before pressing the shutter button all of the images currently in the pre record buffer will be deleted 5 Press the shutter button to shoot This will shoot a burst of three images Touch Shooting settings are disabled when shooting with this mode Type 1 cannot be selected for the Review setting while shooting with this function If ...

Page 42: ...e shooting with this function Movie recording is disabled while shooting with Art Shot Sample images shown on Art Shot scene screens were not shot with this camera An image shot with an Art Shot scene cannot be converted to a normal image without the Art Shot effect Shooting with Artistic Effects Art Shot Scene Description Toy Camera Dark edges and altered hues make images look like they were shot...

Page 43: ...g an Interval Shooting scene will display detailed information about the scene To select a different scene touch the Scene icon 4 Touch 5 Touch an item and then change its setting 6 Touch the Back icon Shooting Scenes of an Activity at a Fixed Interval Interval Shooting Interval Specifies the shooting interval Shooting Style Snapshot Movie Shoots five snapshots followed by a five second movie Movi...

Page 44: ... using the supplied USB AC adaptor etc Anti shake is applied during movie recording with this function However image anti shake is not applied The current shooting setup including zoom cannot be changed while shooting with this function If the camera battery goes dead during an Interval Shooting operation the operation will terminate The controller battery going dead does not affect an ongoing ope...

Page 45: ...ages manually during an Interval Shooting operation You can shoot snapshots and movies manually even while an Interval Shooting operation is in progress 1 On the controller press any button to recover from the sleep state 2 Perform the required controller or camera operation to shoot the image you want You can also press the camera s shutter button or Movie button to shoot while the camera is in t...

Page 46: ...oto images are prone to blurring caused by camera movement when you press the shutter button Because of this stabilizing the camera by placing it on a level surface etc is recommended Zoom operations are disabled while shooting with Interval Shooting Zoom operations are disabled during high speed movie recording Perform the zoom operation before you start recording is displayed on the monitor scre...

Page 47: ...u screen touch or press the shutter button To record a movie Movie Quality Frame Rate Image Size Pixels Description Full HD 30fps 1920 1080 Select this setting to record full high definition Full HD movies The aspect ratio of movies recorded with this setting is 16 9 STD 30fps 640 480 Use this setting for standard movie recording Shooting is performed using an aspect ratio of 4 3 HS240 240fps 512 ...

Page 48: ...op movie recording Minimizing the Effects of Camera Movement during Movie Recording While the image quality setting is Full HD or STD you can reduce blur due to camera movement during movie recording by selecting the Standard or Strong setting for Movie Anti Shake page 52 Note however that image stabilization does not prevent image blur due to subject movement during movie recording Also image sta...

Page 49: ... recording to stop automatically If this happens stop recording and allow the camera to cool down which should cause normal operation to resume Use of the camera s built in memory or certain types of memory cards can slow down processing speeds In particular high quality movies may not be able to be stored correctly A slow memory card can take too much time to record data and result in breaks in t...

Page 50: ...and exit the menu touch or press the controller s shutter button 5 Touch the item 6 Configure the setting of the item in accordance with the screen contents To navigate back to the previous menu level touch Depending on the recording mode some of the items on the menu that appears may not be usable While Premium Auto Pro is in use only the menu items whose settings can be configured will be displa...

Page 51: ...ab Touch Shooting When you touch a location on the screen the camera focuses on that location and shoots When using Touch Shooting to focus select AF or Macro as the focus mode page 57 Recording Beautiful Portraits Make up Skin Tone Tan 6 to 0 Off to Light 6 Smooth Skin 0 Off to 12 Max Shooting by Touching the Monitor Screen Touch Shooting AF Shoot The camera performs Auto Focus at the spot you to...

Page 52: ...a to compose the image 3 When you are ready to shoot the image press the shutter button Focus lock also locks exposure AE Enter the REC mode MENU REC MENU Tab Movie Anti Shake You can reduce blur due to camera movement during movie recording by selecting the Standard or Strong setting However image anti shake is not used Also Anti Shake results in a narrower angle of view during movie recording Mo...

Page 53: ...r pixels when printing an image L size through a print service attaching an image to e mail when viewing the image on a computer etc The size of an image indicates how many pixels it contains and is expressed as horizontal pixels vertical pixels Note that larger images have more pixels so they take up more memory space For information about image size and number of images that can be stored see pa...

Page 54: ... remains in effect until you change it or turn off the camera which causes it to revert to 0 0 Exposure Compensation Range 2 0 EV to 2 0 EV Unit 1 3 EV To cancel exposure compensation change the EV value to 0 0 When shooting under very dark or very bright conditions you may not be able to obtain satisfactory results even after performing exposure compensation Movie Image Quality Settings Movie Qua...

Page 55: ...his happens select the white balance setting that matches your shooting conditions Daylight Overcast etc Adjusting White Balance White Balance Setting Description Auto WB Configures the camera to adjust white balance automatically Daylight For shooting outdoors on a clear day Overcast For shooting outdoors on an overcast rainy day in the shade etc Shade For shooting on a clear day in the shade of ...

Page 56: ...latively longer for the camera to finish recording an image after it is shot You will not be able to perform any operation while image recording is in progress Specifying ISO Sensitivity ISO Setting Description Auto Adjusts sensitivity automatically according to conditions ISO 80 Lower sensitivity Higher sensitivity Slow shutter speed Fast shutter speed Set for shooting in dimly lit areas Less noi...

Page 57: ... it was when recording started To focus an image half press the shutter button to focus before fully pressing the shutter button to start recording Enter the REC Mode MENU REC MENU Tab CS Shots When shooting with High Speed CS this setting specifies the number of images that will be in the resulting CS group See page 40 for details Selecting a Focus Mode Focus AF Auto Focus None Macro PF Pan Focus...

Page 58: ...ation not mirror imaged You can change an image displayed on the screen to a mirror image by flicking the image A indicator on the main screen indicates that the displayed image is a mirror image Enter the REC Mode MENU REC MENU Tab Wind Noise Cut Select On to reduce wind noise during movie recording Note however that this will also cause the sound quality to change Self shooting Mirror Reducing W...

Page 59: ...r screen The grid lines provide references that help you keep the camera vertically and horizontally straight Turning on Image Review Review Type 1 Displays a full screen view of the image for about one second Type 2 Displays a Review image in the upper left corner in the case of a portrait orientation image or the lower left corner in the case of a landscape orientation image of the monitor scree...

Page 60: ...ouch PLAY to enter the PLAY mode 2 Flick left or right across the screen image to scroll through the movies until the one you want is displayed 3 Touch Movie to start playback Viewing Snapshots Viewing a Movie Movie icon Movie recording time Image quality Playback in progress Playback paused Touch Touch Progress bar ...

Page 61: ...indicate any problem with the movie file Also playback on the camera uses a low frame rate Send the movie to a smartphone for better movie playback results Pause Play Touch pause or play Fast forward Fast reverse During playback touch fast reverse or fast forward To return to normal playback speed touch Stop playback During playback touch Mute During playback touch 1 frame forward back While playb...

Page 62: ...elow using the image menu Touch the icon of the function you want to use touch an image and then touch OK Delete an image Snapshots can be zoomed on the monitor screen up to 2X The actual available zoom factors depend on the size of the original image 1 In the PLAY mode flick left or right to display the image you want to view 2 Touch the center of the screen or spread your thumb and forefinger pa...

Page 63: ...u want touch Back to return to the screen in step 5 8 Use touch the up and down arrows to display the recording date or Interval Shooting of the images you want to use to create a Time Lapse Movie 9 Touch Yes This creates and displays the Time Lapse Movie Touching Cancel while creation of a Time Lapse Movie is in progress will cancel the creation process Creating a Time Lapse Movie Time Lapse Date...

Page 64: ... Time Lapse Movie When an Interval Shooting operation spans different days only the images on the specified recording date are included in the Time Lapse Movie Highlight Photos and Highlight Movies are not included in Time Lapse Movies The Time Lapse Movie operation may not be possible while battery power is low Time Lapse Movie generation may not be possible while battery power is low Also a fail...

Page 65: ... the Highlight Photo 4 Select how images should be chosen for conversion to a Highlight Photo 5 Touch to select the date or Interval Shooting for which you want to create a Highlight Photo 6 Touch to display the layout you want to use and then touch it 7 Touch Apply This displays the Highlight Photo and saves it in camera memory The screen that appears after the images is saved includes a Shuffle ...

Page 66: ...ight Movie generation operation cannot be stopped part way through once it is started When there are more than 9 999 snapshots shot on the same date stored on the memory card Highlight Photo will select photos from those numbered 1 to 9999 The Highlight Photo operation may not be possible while battery power is low ...

Page 67: ...touch Show Icons 2 Touch the Edit icon 3 Touch Highlight Movie icon Touching on the monitor screen and then touching will display detailed information about the Highlight Movie 4 Select how images should be chosen for conversion to a Highlight Movie 5 Touch 6 Touch an item and then change its setting 7 After settings are the way you want touch Back to return to the screen in step 5 8 Touch or to s...

Page 68: ... of more than 9 999 snapshot and movie files shot on the same date Highlight Movie will select photos and movies from the files numbered 1 to 9999 The Highlight Movie operation may not be possible while battery power is low Highlight Movie generation may not be possible while battery power is low Also a failed operation may result in work files remaining in camera memory Such files are those that ...

Page 69: ...creen left or right to scroll to another image and change its score as well 6 After changing the highlight score of the image touch to return to the main screen The highlight score function can be used only with snapshots and movies recorded with this camera Changing the Highlight Score of an Image Highlight Score Highlight Score Description No score assigned default An image with this score may b...

Page 70: ...and PLAY mode 3 Touch the tab where the menu item you want to configure is located 4 Touch the item whose setting you want to change 5 Configure the setting of the item in accordance with the screen contents To navigate back to the previous menu level touch Menu Operations in This Manual Menu operations are represented in this manual as shown below Touch the indicated icons and items and perform o...

Page 71: ... image you want to rotate 2 Touch This will rotate the image 90 degrees to the left 3 When the image is in the orientation you want touch Note that this procedure does not actually change the image data It simply alters how the image is displayed on the camera s monitor screen Rotating an Image Rotation ...

Page 72: ...etooth Smart device Your camera can connect using Bluetooth wireless technology with a smartphone that supports Bluetooth Smart Controlling Your Camera with a Smartphone With this function You can do this Auto Send Images can be automatically sent as they are shot to a smartphone that has been Bluetooth paired with the camera Shoot with phone Remotely control and shoot with the camera using a smar...

Page 73: ...to playback movies whose files have the file name extension MOV Depending on your movie player you may not be able to playback movies and or audio Images recorded on another manufacturer s camera cannot be sent using this function Attempting to use a memory card that includes a wireless function with this camera can cause abnormal operation Note that using wireless functions requires more battery ...

Page 74: ...ide in your native language please use a version in another language Your camera has a variety of different wireless modes Select the wireless mode that suits your specific requirements 1 Touch Show Icons 2 Touch the Wireless icon This will display the wireless mode screen 3 Touch the wireless mode you want To exit the wireless mode touch Using a Wireless Mode Send to phone Select to view images y...

Page 75: ...uarantees No guarantees are made concerning the ability to operate the EXILIM Connect app on any particular smartphone or tablet For information about operating system version supported by the app check the information on Google Play or the App Store App functions and the required operating environment are subject to change without notice Semi transparent Pairing is complete but there is no Blueto...

Page 76: ...ection Android terminal 1 Open Google Play 2 In the search field type EXILIM Connect 3 Install EXILIM Connect iPhone iOS 1 Open App Store 2 In the search field type EXILIM Connect 3 Install EXILIM Connect Installing the EXILIM Connect App on Your Smartphone ...

Page 77: ...he smartphone it is already paired with first unpair them and then pair again Re pairing the camera and smartphone will result in all pending unsent images to remain unsent Camera Controller Operation 1 Touch the Wireless icon This will display the wireless mode screen 2 Touch Pairing 3 Touch Start You can start pairing by performing an operation on the camera without using the controller Turn off...

Page 78: ...ch Start This will enable connection with a smartphone and the camera will display a screen for input of an SSID and password 4 For the smartphone Wi Fi setting input the camera SSID and Password When the message Start up the phone app appears on the camera s monitor screen it means that the smartphone has established a wireless connection with the camera Starting up EXILIM Connect will cause the ...

Page 79: ...ess LAN connection between the camera and a smartphone This problem may be caused when the smartphone is already wirelessly connected to one of the networks or devices below Go to your smartphone s Wi Fi settings and select this camera s SSID Household wireless LAN Public wireless LAN Portable wireless LAN device ...

Page 80: ...ect up to 100 files totaling no more than 500MB for a single send After sending an image to a smartphone you can then upload it to a social networking service 1 Touch the Wireless icon 2 Touch Send to phone 3 Touch Send Selected Image 4 Touch the image you want to send to the smartphone Selecting the image of a file causes its check box to become selected To exit the send image to smartphone opera...

Page 81: ... Fi settings so your camera is selected for connection page 77 After about 60 seconds the camera s monitor screen will go blank Touching the monitor screen will cause its image to reappear 4 On the smartphone start up its browser app The browser will automatically access the URL displayed by the camera in step 3 of this procedure and then display an image stored in camera memory If no camera image...

Page 82: ... button will return to the screen that was displayed before the wireless mode screen 2 Touch Wireless settings This will display the wireless setting screen 3 Touch the item you want to configure 4 Change the setting of the selected item 5 When the settings are the way you want touch OK Touching cancels the currently displayed settings and returns to the wireless mode screen Configuring Wireless C...

Page 83: ...size of the image sent to the smartphone using Resize When Sending page 84 You can use the smartphone apps below to view snapshots after sending them iPhone Camera Roll Android terminal Gallery Photo or another photo browser app Images shot while the Auto Send setting is On will be sent to the smartphone even if the Auto Send setting is changed to Off before they are sent When On is selected for A...

Page 84: ...ing a wireless LAN connection between the camera and a smartphone Before changing the wireless LAN password unpair the camera from its paired smartphone page 85 1 Touch the password digit you want to change 2 Touch or to change the currently selected digit Specifying Images to be Sent by Auto Send Auto Send File Settings Snapshots and movies are sent Only Only snapshots are sent Resizing Snapshots...

Page 85: ...network settings After deleting select the camera SSID again and input the new password Android terminal Tap the field where the SSID of the camera is displayed in the Wi Fi settings and select Forget Select the camera SSID again and input the new password Wireless Wireless settings Unpairing Unpairs the camera from a smartphone To use the camera with a different smartphone first unpair it from th...

Page 86: ...ter and Saving Files page 91 to store the image you want to print and then display the image on your Macintosh screen 2 Click File and then Print 3 Configure print settings and then click Print This will print the selected image Professional Print Service You can take a memory card that contains the images you want to print to a professional print service and have them printed Printing on a Home P...

Page 87: ...s 90 93 To edit movies use commercially available software as required Windows users should refer to Using the Camera with a Windows Computer on page 87 Macintosh users should refer to Using the Camera with a Macintosh on page 91 Using the Camera with a Windows Computer When you want to do this Operating System Version Required Software Save images to a computer and view them there manually Window...

Page 88: ... the color of its operation lamp changes from red to green or amber page 23 Note that in this case the monitor screen will remain blank The first time you connect the camera to your computer with the USB cable an error message may appear on your computer If this happens disconnect and then reconnect the USB cable 3 Windows 10 users Click Desktop and then Explorer Next in the sidebar click PC Windo...

Page 89: ...ntains into your Documents folder You now have a copy of the files that are in camera memory on your computer After copying images it is recommended that you right click the DCIM folder and change its name to something else 9 After you finish copying images disconnect the camera from the computer After the copy or read progress dialog on the computer s screen indicates that the process is complete...

Page 90: ...are recommended system environments Configuring one of these environments does not guarantee proper operation Certain settings and other installed software may interfere with proper playback of movies Movie Playback Precautions Be sure to move the movie data to the hard disk of your computer before trying to play it Proper movie playback may not be possible for data accessed over a network from a ...

Page 91: ...this Required Software Save images to your Macintosh and view them there manually OS X Installation not required 91 Save images to your Macintosh automatically Manage images OS X iPhoto which comes bundled with some Macintosh products Play movies OS X 10 6 or higher QuickTime Player installed on computer 93 Connecting the Camera to Your Computer and Saving Files Never use your computer to modify d...

Page 92: ...in the camera or the camera s built in memory if it does not have a memory card loaded as a drive The appearance of the drive icon depends on the Mac OS version you are using The first time you connect the camera to your Macintosh with the USB cable an error message may appear on your computer If this happens disconnect and then reconnect the USB cable 3 Double click the camera s drive icon 4 Drag...

Page 93: ...ystem requirements described below are necessary to play back movies recorded with this camera on a computer The above are recommended system environments Configuring one of these environments does not guarantee proper operation Certain settings and other installed software may interfere with proper playback of movies Movie Playback Precautions Proper movie playback may not be possible on some Mac...

Page 94: ...tails about how file names are displayed on the camera s monitor screen see page 10 The total number of folders and files allowed depends on the image size and quality and capacity of the memory card being used for storage Files and Folders Name and Maximum Number Allowed Example File Each folder can contain up to 9999 files named CIMG0001 through CIMG9999 The extension on the file name depends on...

Page 95: ...s DCF compliant When displaying an image recorded on another camera it may take a long time for the image to appear on this camera s monitor screen Built in Memory and Memory Card Data Handling Precautions Whenever copying memory contents to your computer you should copy the DCIM folder and all of its contents A good way to keep track of multiple DCIM folders it to change their names to dates or s...

Page 96: ...ion about menu operations see page 50 Adjusting Monitor Screen Brightness Screen Auto With this setting the camera detects available light levels and automatically adjusts the brightness of the monitor screen accordingly 2 Brightness that is greater than 1 which makes the screen easier to view This setting consumes more power 1 Bright setting for outdoor use etc Brightness that is greater than 0 0...

Page 97: ...controller will vibrate whenever any one of the events described below occurs When a preview of an image that what just shot appears on the controller screen When communication between the camera and controller is lost When an error occurs Locking the Camera or Controller Screen Orientation Rotation Lock Camera Off When shooting camera orientation is detected and the image will be stored in the sa...

Page 98: ...to 2049 To switch between 12 hour and 24 hour format touch the 12 24 hour switch icon Touching and holding or scrolls at high speed 3 Touch OK MENU Setup Tab Date Style You can select from among three different styles for the date Example July 10 2016 Setting the Camera s Clock Adjust Specifying the Date Style Date Style YY MM DD 16 7 10 DD MM YY 10 7 16 MM DD YY 7 10 16 12 24 hour switch icon ...

Page 99: ...ct it Camera models sold in certain geographic areas may not support display language selection MENU Setup Tab Sleep Use this function to specify how much time should be allowed to laps until the controller display goes blank and the controller enters the sleep state You can specify either 30 seconds 30 sec or 10 minutes 10 min Specifying the Display Language Language Specifying the Controller Sle...

Page 100: ... will delete all protected images stored there Check the battery level before starting a format operation and make sure it is not too low Formatting may not be performed correctly and the camera may stop operating normally if the camera powers down while formatting is in progress MENU Setup Tab Reset See page 132 for details about the camera s factory default settings The settings below are not re...

Page 101: ...of firmware installed on the camera and the camera s MAC address Note that the MAC address is fixed number that functions as the camera s network device identifier Check this screen after updating the camera s firmware to confirm that updating was actually performed Checking the Current Camera Firmware Version Version ...

Page 102: ...ol are specifically prohibited The example at left indicates that disassembly is prohibited The black dot means that the indicated action must be performed Indications within this symbol are actions that are specifically instructed to be performed The example at left indicates that the power plug must be unplugged from the electrical socket DANGER Built in Rechargeable Battery To charge the batter...

Page 103: ... on it etc and never apply solder to it Never place the battery into a microwave oven dehumidifier high pressure generating device etc Never remove the outer sticker from the battery Do not use or leave the battery under direct sunlight in an automobile parked in the sun or in any other area subject to high temperatures Doing so can damage the battery and cause deterioration of its performance and...

Page 104: ... or other vehicle or while walking Looking at the monitor while in motion creates the risk of serious accident USB AC Adapter Misuse of USB AC adapter creates the risk of fire and electric shock Be sure to observe the following precautions Use only the specified USB AC adapter Never use the USB AC adapter with another device Use a power outlet that matches the power supply specified for the USB AC...

Page 105: ...ut be sure to unplug the USB AC adapter from the power outlet and put in a place away from objects used by animals and pets An animal or pet chewing on the power cord can cause it short leading to the risk of fire Water and Foreign Matter Water other liquids or foreign matter especially metal getting inside the camera creates the risk of fire and electric shock Immediately perform the following st...

Page 106: ...e radio interference or other problems on other devices is being caused while using this product do not use the wireless functions of this product Use of wireless functions creates the risk of radio interference and abnormal operation of other devices When in a medical facility or aircraft comply with instructions of personnel in charge Electromagnetic waves and other signals emitted by the camera...

Page 107: ...ot end normally within the specified charging time stop charging anyway and contact your local CASIO authorized service center Continued charging creates the risk of battery overheating fire and explosion Be sure to read the user documentation that comes with the camera before using or charging the battery Store batteries in a location that cannot be reached by infants and young children When usin...

Page 108: ...ct Doing so can cause the display panel glass to crack and lead to personal injury Should the monitor screen ever become cracked never touch any of the liquid inside the monitor screen Doing so creates the risk of skin inflammation Should monitor screen liquid ever get into your mouth immediately rinse your mouth out and contact your physician Should monitor screen liquid ever get into your eyes o...

Page 109: ...ons defined by CASIO 5 Use during high speed travel on water during motor sports while riding a personal watercraft etc is not supported Dustproof Corresponds to IEC JIS Protection Class 6 IP6X dustproofing The shock resistance splashproofing and dustproofing of this product are based on CASIO test results and do not constitute any guarantee that the product will perform will not be damaged or wil...

Page 110: ...utions during Underwater Use The camera is designed for use at depths no greater than 1 5 meters 4 92 feet and at water temperatures within the range of 0 C to 40 C 32 F to 104 F Do not leave the camera submerged for more than 60 minutes When repeatedly immersing the camera for underwater user allow at least 15 minutes to elapse between immersions Never open the CARD cover or USB cover while the c...

Page 111: ... strongly running water to clean the camera Doing so creates the risk of leaking and malfunction Never swing the camera around to remove water and never use a dryer or other intense heat to dry it Never place the camera in a washing machine to wash it Precautions after Use Do not leave the camera in an area exposed to extreme heat 40 C 104 F or greater or cold 10 C 14 F or lower Doing so can cause...

Page 112: ...tions Should water ever leak into the camera and cause malfunction due to improper use CASIO COMPUTER CO LTD will not be held liable for any damage to internal components battery recording media etc loss of recorded data or any expenses incurred to shoot lost images CASIO COMPUTER CO LTD shall not be held liable for any accident that may occur while the camera is being used underwater CASIO COMPUT...

Page 113: ...place the camera in any of the following locations In an area exposed to direct sunlight or large amounts of moisture dust or sand Near heating or cooling devices or in other areas subjected to extreme changes in temperature or humidity Inside of a motor vehicle on a hot day or in an area subjected to strong vibration Condensation Sudden and extreme temperature changes such as when the camera is m...

Page 114: ... touch the lens with your fingers Finger smudges dirt and other foreign matter on the lens can interfere with proper operation of the camera Use a blower or other means to keep the lens and flash window free of dirt and dust and wipe gently with a soft dry cloth To clean the camera wipe it with a soft dry cloth Closing the camera s CARD cover or USB cover When closing a cover press down with your ...

Page 115: ...ception may be poor in certain environments Also note that other devices using the same 2 4GHz band used by this product may cause reduced processing speeds in both devices Connection to a public LAN This product does not support wireless LAN connection over a public wireless LAN environment Intended Areas of Use 1 The wireless functions of this camera are provided for use in the countries and geo...

Page 116: ... LLC Windows Windows Vista Windows 7 Windows 8 Windows 8 1 and Windows 10 are registered trademarks or trademarks of Microsoft Corporation in the United States and other countries Macintosh Mac OS QuickTime iPhoto and iPhone are trademarks of Apple Inc Adobe and Reader are either registered trademarks or trademarks of Adobe Systems Incorporated in the United States and or other countries Android a...

Page 117: ...117 Appendix Open Source Software This product includes software that is licensed under the license conditions below ...

Page 118: ...118 Appendix ...

Page 119: ...119 Appendix ...

Page 120: ...120 Appendix ...

Page 121: ...121 Appendix ...

Page 122: ...122 Appendix ...

Page 123: ...123 Appendix ...

Page 124: ...124 Appendix ...

Page 125: ...125 Appendix ...

Page 126: ...timer will terminate it automatically even if the battery is not fully charged If the battery has not been used for a very long time charging may terminate automatically after only about 60 minutes 1 Using a battery that has not been used for a long time Disconnect and then reconnect the USB cable to resume charging 2 Insufficient power supply when connected to computer The camera can be charged o...

Page 127: ... some time fully use up its charge before storing it To prevent over discharging of an unused battery fully charge it and then load it in the camera and fully use up the charge about once every six months Precautions during Use The bundled USB AC adaptor is designed for operation with any power supply in the range of 100V to 240V AC 50 60Hz Note however that the shape of the power plug depends on ...

Page 128: ...r to have the battery replaced Make sure that the camera is turned off before removing the battery The edges of the back cover are sharp Take care not to cut your fingers when removing it When removing screws use a precision Phillips tip screwdriver Camera 1 Remove the four screws that secure the back of the camera 2 Remove the back cover 3 Hook your fingertip at the location indicated in the illu...

Page 129: ...ction of the arrow to remove the cover 3 Rotate the cover on the end of the controller in the direction indicated by the arrow to remove it 4 Remove the six screws that secure the back of the controller 5 Holding the monitor screen at the circled location in the nearby illustration swing it upwards in the direction indicated by the arrow to remove it ...

Page 130: ...indicated in the illustration and lift the battery up to remove it Old Rechargeable Battery Handling Precautions Insulate the positive and negative terminals with tape etc Do not peel the covering off of the battery Do not try to take the battery apart ...

Page 131: ...se of this periodic re formatting of a memory card is recommended Electrostatic charge electrical noise and other phenomena can cause data to become corrupted or even lost Make sure that you always back up important data on other media CD R CD RW hard disk etc Memory Card Handling Precautions Certain types of memory cards can slow down processing speed Whenever possible use an Ultra High Speed Typ...

Page 132: ...ing Some menu items may not be available depending on the recording mode being use REC Menu Default setting depends on country or geographic region PLAY Menu Reset Initial Default Settings Make up Level Skin Tone Smooth Skin Touch Shooting AF Shoot Movie Anti Shake Off Self timer Off Image Size 12M Movie Quality Full HD Brightness 0 0 White Balance Auto WB ISO Auto Focus AF CS Shots 30 Mirror Imag...

Page 133: ... Auto Send Off Auto Send File Settings Only Resize When Sending 3M WLAN password Unpairing Screen Auto Info Off Rotation Lock Camera Off Controller Off Camera Sound HIGH Vibration On Adjust Date Style Language Sleep 10 min Format Reset Version ...

Page 134: ...ct your retailer or a CASIO authorized service center Power will not turn off Nothing happens when a button is pressed Use a thin object to press the RESET buttons page 8 near the camera s memory card slot and controller s USB port to turn the camera off and then turn on the camera again Charging The operation lamp does not light red and the battery won t charge 1 Unplug the USB cable from the cam...

Page 135: ...ki area Sunlight reflected by water sand or snow can cause underexposure of images Adjust Brightness to the side page 54 The image is out of focus during movie recording 1 Focusing may not be possible because the subject is outside the focus range Shoot within the allowable range 2 The lens may be dirty Clean the lens page 114 3 Focus is fixed during movie recording so the image can go out of focu...

Page 136: ... Movie as you hold down the shutter button and Power for about six seconds to return the SSID and password to their initial defaults For information about the initial default SSID and password settings see page 78 Bluetooth wireless technology A connection cannot be established between the camera and controller 1 The camera cannot connect with a smartphone if they are too far apart from each other...

Page 137: ...y be a problem with the camera s memory data If this is the case perform the reset operation to initialize the camera s setup page 100 After that configure each setting If the language selection screen does not re appear when you turn the camera on it means that the camera s memory management data has been restored If the same message appears after you turn power back on contact your retailer or a...

Page 138: ...not be created You are trying to record a file while there are already 9999 files stored in the 999th folder If you want to record more delete files you no longer need page 36 Memory Full Memory is full with images you recorded and or files saved by editing operations Delete files you no longer need page 36 Overheating Power will turn off The camera protection function may have activated because c...

Page 139: ...Movies Number of Snapshots Movie Recording Time Image Size Pixels Approximate File Size Built in Memory 1 Recording Capacity microSD Memory Card 2 Recording Capacity 12M 4000 3000 X XX MB X XXXX 5M 2560 1920 X XX MB XX XXXX ...

Page 140: ... card pages 30 49 Snapshot and movie recording capacity values are approximate and intended for reference only Actual capacity depends on image contents File size and data rate values are approximate and intended for reference only Actual values depend on the type of image being shot When using a memory card with a different capacity calculate the number of images as a percentage of 16GB The time ...

Page 141: ... Total Pixels 12 76 Megapixels Lens Focal Distance FX X f X XX mm equivalent to XX mm in XX mm format Zoom Up to 4 0X when Digital zoom is used Focusing Contrast Detection Auto Focus Focus Modes Auto Focus Macro Focus Pan Focus AF Area Multi Intelligent AF area used when Premium Auto Pro is selected Approximate Focus Range Snapshot From Lens Surface Auto Focus 10 cm to 3 9 to Macro Focus 3 cm to 5...

Page 142: ...cy range 1 to 11ch Encryption WPA2 Communication Controller Bluetooth Communication standard Bluetooth ver2 1 EDR Output class Class 2 Monitor Screen Controller 3 0 inch TFT color LCD Super Clear LCD 921 600 dots Capacitive type touch panel External connection terminal Camera Micro USB port Hi Speed USB compliance USB charging USB powered operation External connection terminal Controller Micro USB...

Page 143: ...Speed CS usage configured settings the amount of time the camera is left turned on and ambient temperature in the area where the camera is used all greatly affect recording time and number of shots values Number of snapshots Operating Time 1 XXX shots Actual movie recording time Full HD movie 1 XX minutes Approximate continuous movie recording time Full HD Movie 2 X hour XX minutes Approximate con...

Page 144: ...plied The power cord used must comply with relevant national and or international standards Input 100 to 240 V AC 50 60 Hz 100 mA Output 5 0 V DC 650 mA Operating Temperature Requirements 5 to 35 C 41 to 95 F Dimensions 53 W 21 H 45 D mm 2 1 W 0 83 H 1 8 D excluding projections Weight Approximately 37 g 1 3 oz ...

Page 145: ...8 Norderstedt Germany declares that this Digital Camera Model EX FR100 EX FR100CT is in compliance with the essential requirements and other relevant provisions of Directive 1999 5 EC CAUTION Risk of explosion if battery is replaced by an incorrect type Dispose of used batteries according to the instructions ...

Page 146: ...dard conformity mark in the United States Caution Exposure to radio frequency radiation This device complies with FCC radiation exposure limits set forth an uncon trolled environment and it also complies with Part 15 of the FCC RF Rule ...

Page 147: ... MA1510 A M29 ...

Reviews: