20
EN
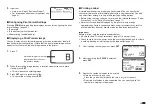
4.
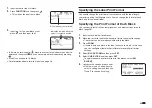
Press the arrow key.
5.
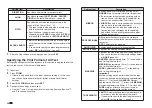
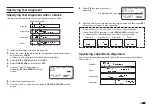
Specify a cut mode.
•
Cut modes are explained in the table below.
Select this mode:
To do this:
CONT. HALF CUT
Print without cutting the backing paper
between labels.
FULL + HALF CUT
Cut between labels.
FULL CUT
Print on iron-on transfer tape.
UNCUT
Print on refl ective tape, magnetic tape or iron-
on fabric tape.
Here, we will specify
CONT. HALF CUT
.
6.
Press
SET
.
•
This starts printing.
•
The backlight will be unlit while printing is in progress.
•
To interrupt printing part way through, press
ESC
.
Affi xing a Label to a Surface
1.
If required, use scissors or some other implement to trim the label to the
desired size or shape.
2.
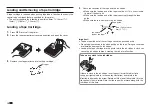
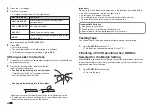
Peel off the backing of the label and affi x the
label to the desired surface.
•
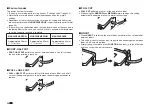
Peeling off the backing of a half cut label
Carefully twist at the half cut point and then
peel the backing from the label.
•
Peeling off the backing of a full cut label
HAPPY!
PPY!
Bending a corner of the label makes the backing easier to peel off.
•
Removing a label from a surface where it was affi xed may cause
adhesive residue to remain on the surface.
Important!
Do not try to affi x a label to the objects or in the locations described below.
•
On a surface exposed to direct sunlight or rain
•
On the body of a person or animal
•
On a utility pole, on a fence or structure not owned by you, etc.
•
On a container used for heating in a microwave oven
Incompatible Surfaces
•
Rough or grainy surfaces
•
Wet, oily, dusty, or otherwise soiled surfaces
•
Special plastic (silicon, polypropylene, etc.) surfaces
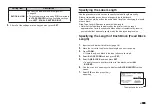
Feeding Tape
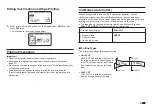
You can perform a tape feed operation either before or after printing.
1.
Press
FUNCTION
and then
.
•
This feeds the tape approximately 21mm (
13
/
16
").
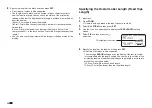
Finalizing a Print Operation when NONE is
Selected for the Margin Setting
When
NONE
is specifi ed for the margin setting, the printer does not cut the
tape automatically at the end of a print operation. In this case, perform the
operation below to cut the tape.
1.
Press
FUNCTION
and then
.
•
This cuts the tape.
Summary of Contents for KL-G2
Page 1: ...User s Guide KL G2 EN RJA532734 001V02 Supported Tape Widths 6 mm 9 mm 12 mm 18 mm 24 mm ...
Page 2: ...Important Be sure to keep all user documentation handy for future reference ...
Page 60: ...58 EN 7 8 9 10 11 12 13 14 15 16 17 18 19 20 WORK 1 2 3 4 5 6 7 8 9 10 ATTENTION 1 2 3 4 5 6 ...
Page 63: ...APP 1 Appendix Accented Characters A C D E G H I J K L N O R S T U Y Z ...
Page 64: ...APP 2 a c d e g h i j k l n o r s t u y z ...
Page 65: ...APP 3 GREEK RUSSIAN SUPER SUB Symbols SYMBOL DINGBAT NUMBER ...
Page 66: ...APP 4 Illustrations ILLUST 1 ILLUST 2 ...
Page 67: ...APP 5 Frames ...
Page 68: ...APP 6 ...

