54
EN
•
The printer doesn't print.
•
Power turned off during printing.
•
Batteries are dead or you are using the wrong type of batteries.
•
You are using the wrong type of AC adaptor.
→
Use the specifi ed AC adaptor or replace the batteries with new ones (sold
separately).
•
The print head is very hot.
→
Wait for some time and then try performing the operation again.
•
The printer won't connect with a computer.
•
The printer is not in the communication mode.
→
Press
PC LINK
to enable connection with a computer.
•
The USB cable is not connected correctly.
→
Make sure that the USB cable is connected correctly.
•
Printer power is turned off.
→
Press
ON
to turn on power.
•
The USB driver is not installed on the computer.
→
Install the USB driver on your computer from the CD-ROM that comes
with the printer.
If the above steps don't solve the problem, try connecting the USB cable to
a different USB port on the computer or try using a different USB cable.
•
No tape comes out when I press
.
•
The tape compartment cover is not closed securely.
→
Close the cover securely. (page 17)
•
The cartridge is out of tape.
→
Replace the tape cartridge with a new one (sold separately). (page 17)
•
Tape is jammed.
→
Remove the tape cartridge from the printer and pull out the jammed tape
with your fi ngers. Use scissors to trim off the tape you pulled out.
Next, correctly load the cartridge back into the printer. (page 17)
•
Ink ribbon is coming out of the tape outlet along with the tape.
•
The tape cartridge was loaded while there was slack in the ink
ribbon.
→
Remove the tape cartridge from the printer. After checking to make sure
the ink ribbon is not broken, take up any slack in it. After taking up ink
ribbon slack, load the tape cartridge back into the printer. (page 16)
Important!
•
Be sure to always take up any slack in the ink ribbon before loading a
tape cartridge.
•
If the ink ribbon is broken, replace the tape cartridge with a new one (sold
separately).
•
The printer does not cut the tape.
•
Tape is jammed in the tape outlet.
→
Turn off power, remove the tape cartridge, and clear the jammed tape.
•
The print format margin setting is NONE.
→
Specify
NARROW
,
MEDIUM
, or
WIDE
for the margins. (page 30)
•
The label is short as defi ned by the following: approximately 28mm
(1
1
/
8
") or less with NARROW margins; approximately 35mm (1
3
/
8
") or
less with MEDIUM margins; approximately 44mm (1
3
/
4
") or less with
WIDE margins.
→
After printing, use scissors or some other implement to cut the tape.
•
The printer does not half cut the tape.
•
The label is short as defi ned by the following: approximately 28mm
(1
1
/
8
") or less with NARROW margins; approximately 35mm (1
3
/
8
") or
less with MEDIUM margins; approximately 44mm (1
3
/
4
") or less with
WIDE margins.
→
After printing, use scissors or some other implement to cut the tape.
•
The label does not stick to the intended surface.
•
The surface or object is inappropriate.
→
A label cannot be affi xed to a surface that is rough, wet, oily, dirty, etc.
(page 20)
Summary of Contents for KL-G2
Page 1: ...User s Guide KL G2 EN RJA532734 001V02 Supported Tape Widths 6 mm 9 mm 12 mm 18 mm 24 mm ...
Page 2: ...Important Be sure to keep all user documentation handy for future reference ...
Page 60: ...58 EN 7 8 9 10 11 12 13 14 15 16 17 18 19 20 WORK 1 2 3 4 5 6 7 8 9 10 ATTENTION 1 2 3 4 5 6 ...
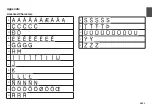
Page 63: ...APP 1 Appendix Accented Characters A C D E G H I J K L N O R S T U Y Z ...
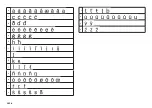
Page 64: ...APP 2 a c d e g h i j k l n o r s t u y z ...
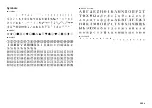
Page 65: ...APP 3 GREEK RUSSIAN SUPER SUB Symbols SYMBOL DINGBAT NUMBER ...
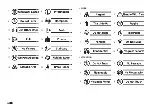
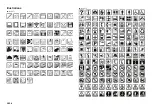
Page 66: ...APP 4 Illustrations ILLUST 1 ILLUST 2 ...
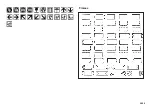
Page 67: ...APP 5 Frames ...
Page 68: ...APP 6 ...

