background image

E-2

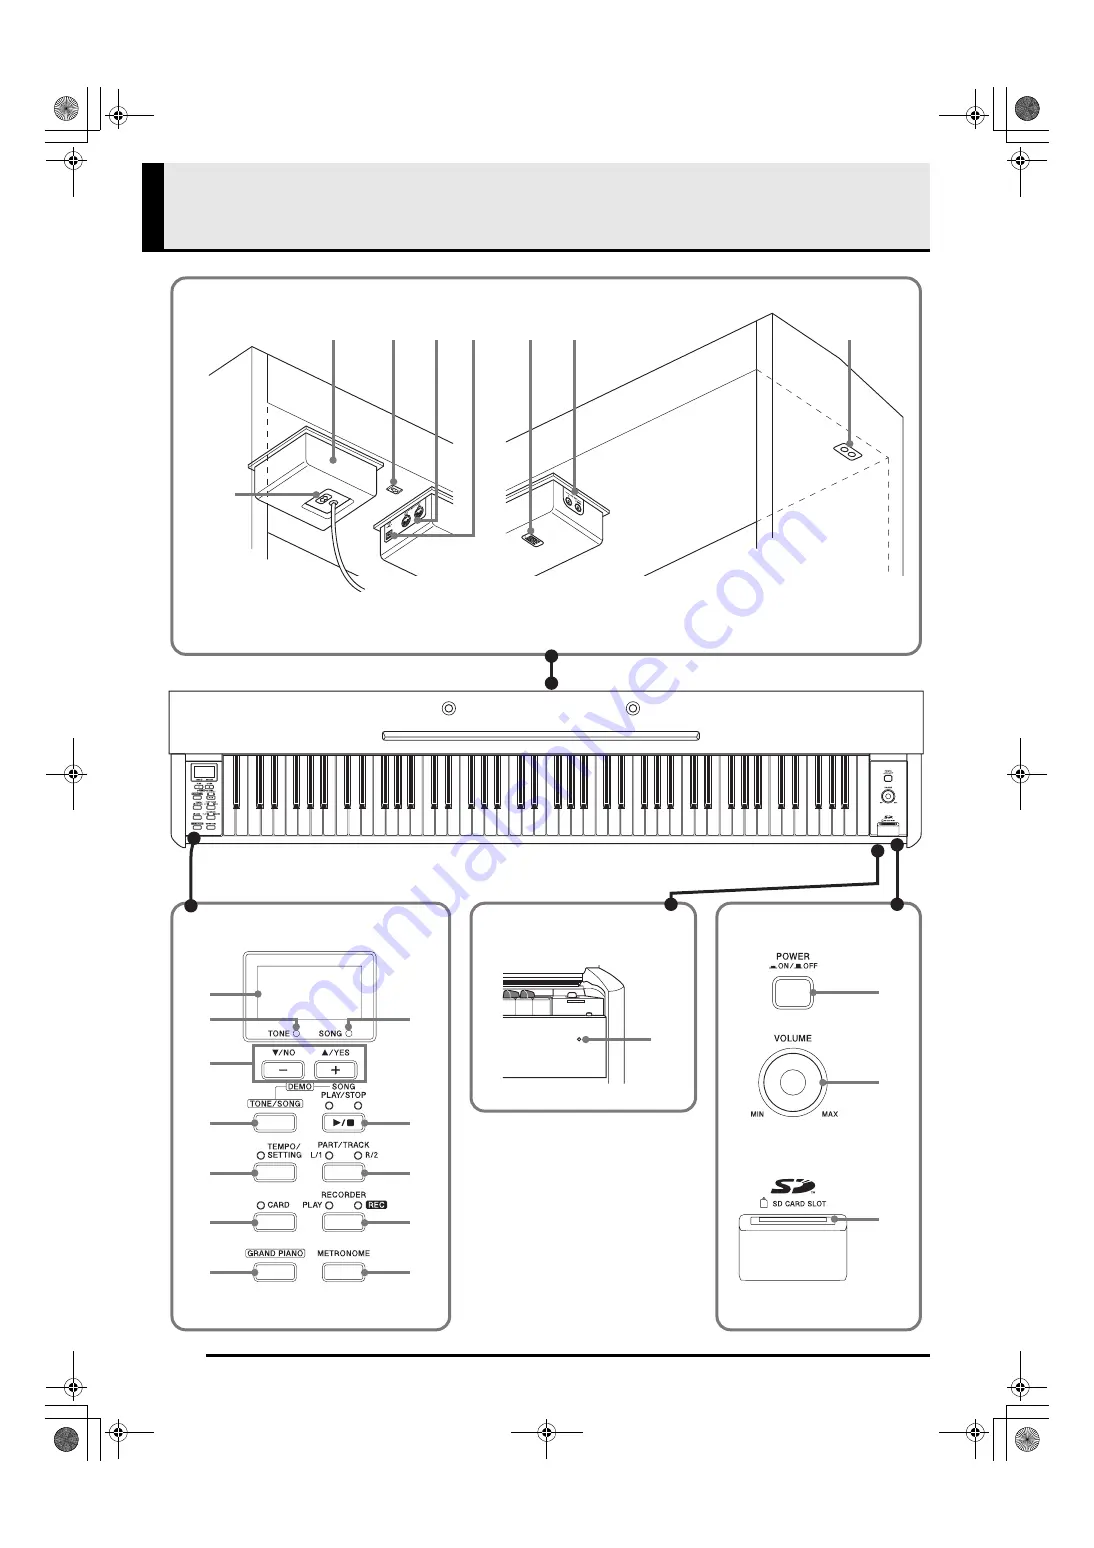
General Guide

8

ck

bm

bo

bq

bs

bl

9

bn

bp

br

bt

cl

bk

cn

cm

1

-1

2

6

7

5

3 4

1

-2

*

Front

Bottom

*

The power cord of the PX-800 is hard-wired to the digital piano.

PX800_e.book  2 

ページ


2006年10月12日 木曜日 午後12時5分

Summary of Contents for Privia PX-800

Page 1: ...reference Guarde toda informaci n para tener como referencia futura Safety Precautions Before trying to use the piano be sure to read the separate Safety Precautions Precauciones de seguridad Antes de...

Page 2: ...spilled or objects have fallen into the apparatus the apparatus has been exposed to rain or moisture does not operate normally or has been dropped The apparatus shall not be exposed to dripping or spl...

Page 3: ...e is no guarantee that interference will not occur in a particular installation If this equipment does cause harmful interference to radio or television reception which can be determined by turning th...

Page 4: ...this manual may be registered trademarks of others This mark applies in EU countries only CASIO Europe GmbH Bornbarch 10 22848 Norderstedt Germany This mark applies to the PX 800V only Please keep all...

Page 5: ...E 20 Configuring Settings with the Keyboard E 21 Keyboard Keys Used for Configuring Settings E 21 To configure settings with the keyboard E 22 To configure a setting using the TUNE OTHERS key E 22 To...

Page 6: ...E 2 General Guide 8 ck bm bo bq bs bl 9 bn bp br bt cl bk cn cm 1 1 2 6 7 5 3 4 1 2 Front Bottom The power cord of the PX 800 is hard wired to the digital piano PX800_e book 2...

Page 7: ...pply box 1 2 AC power jack 2 Pedal connector 3 MIDI OUT IN terminals 4 USB port 5 Speaker connector 6 LINE OUT R L MONO jacks 7 PHONES jack 8 Display 9 TONE lamp bk SONG lamp bl T T T T NO button S S...

Page 8: ...ard Keys on page E 8 z See the Keyboard Keys Used for Configuring Settings on page E 21 for details about the various settings that can be selected using TEMPO SETTING button and keyboard key combinat...

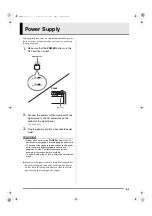
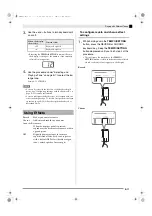
Page 9: ...t the POWER button is the OFF position before plugging in or unplugging the power cord The shape of the power cord plug and household power outlet receptacle differ according to country and geographic...

Page 10: ...feature also affects the sound output from the LINE OUT R and L MONO jacks Connecting Audio Equipment Figure 1 R Right is the right channel and L MONO Left is the left channel Use commercially availa...

Page 11: ...tone name in the Tone List on page A 1 and note its tone number Example To select Tone Number 07 Harpsichord Use the and buttons to change the displayed tone number until it matches the one you want...

Page 12: ...e Keyboard Keys 1 While holding down the TEMPO SETTING button press the keyboard key that corresponds to the tone you want to select This will cause the lamp above the button to flash and the tone num...

Page 13: ...ounds See page A 2 for information about the drum sounds that are assigned to each of the keyboard keys 1 While holding down the TEMPO SETTING button press the BRILLIANCE keyboard key Keep the TEMPO S...

Page 14: ...something on the keyboard 5 To unlayer the keyboard select another tone by pressing the GRAND PIANO button or by using the procedure under Selecting a Tone Using the Keyboard Keys page E 8 NOTE You c...

Page 15: ...s described above Reverb Makes your notes resonate Chorus Adds more breadth to your notes Acoustic Resonance When the damper pedal is pressed reproduces the harmonic resonance within a grand piano DSP...

Page 16: ...ressed until you finish step 2 of this procedure This will cause the lamp above the TEMPO SETTING button to flash and the currently selected acoustic resonance or DSP setting to appear on the display...

Page 17: ...the keyboard after the pedal was pressed and makes them sound softer z z z z Sostenuto Pedal Only the notes of the keys that are depressed when this pedal is pressed are sustained until the pedal is r...

Page 18: ...ding down the TEMPO SETTING button press the METRONOME VOLUME keyboard key Keep the TEMPO SETTING button depressed until you finish step 2 of this procedure This will cause the lamp above the TEMPO SE...

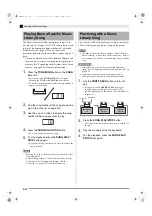
Page 19: ...olding down the TONE SONG button press the SONG PLAY STOP button This will start sequential playback from keyboard tone demo tune t 01 up to the last Music Library song L 60 You can play along with a...

Page 20: ...the and buttons at the same time will select song number 01 You can change tempo volume and pre count settings for playback See Configuring Settings with the Keyboard on page E 21 for more informatio...

Page 21: ...power fail during recording all of the data in the track you are recording will be deleted You can save memory data to external media if you want See Using an SD Memory Card on page E 29 for more inf...

Page 22: ...and effects you want to use in your recording and set the tempo you want Tone page E 7 After selecting the tone you want press the TONE SONG button one more time so the SONG lamp is lit Effect page E...

Page 23: ...ress the RECORDER button so the PLAY lamp is lit 2 Use the and buttons to display a song number 1 to 5 NOTE When a song has something recorded in both tracks you can turn off one track and play back j...

Page 24: ...it 2 Use the and buttons to display the number of the song 1 to 5 that contains the track you want to track 3 Press the RECORDER button so the REC lamp is flashed 4 Use the PART TRACK button to select...

Page 25: ...ure explained under To configure settings with the keyboard on page E 22 can be used for all settings The only difference is the keyboard key that you press See the Keyboard Setting Reference on page...

Page 26: ...setting Example Lower the TRANSPOSE by one semitone by changing the displayed value to 1 4 Release the TEMPO SETTING button to complete the setting procedure This causes the indicator lamp above the b...

Page 27: ...ys Key of the keyboard TRANSPOSE 6 to 0 to 5 Raises or lowers the tuning of the digital piano in semitone steps NOTE Using TRANSPOSE to raise the key of the digital piano can cause notes at the highes...

Page 28: ...page E 12 Acoustic Resonance EFFECT on On oFF Off See page E 12 Display Settings A B C D E F G F I 3 B i 5 To change this setting Use this keyboard key Settings Description Tempo TEMPO 20 to 255 Speci...

Page 29: ...DI OTHERS L on On L oF Off When Local Control is turned on pressing the keyboard s keys plays the notes using the currently selected built in tone and also sends the applicable MIDI messages out the M...

Page 30: ...tal piano onto a computer equipped with a USB port After that you can connect the digital piano to your computer and run commercially available MIDI software on your computer to exchange MIDI data wit...

Page 31: ...requirements for running the USB MIDI driver z z z z Universal IBM AT or compatible computer USB port that provides normal operation under Windows CD ROM drive for installation At least 2MB of free ha...

Page 32: ...guage folder on the CD ROM For information about using SMF Converter double click index html in the help folder which was created when you installed SMF Converter You can also access user documentatio...

Page 33: ...y card in the following types of areas Such conditions can corrupt data stored on the memory card Areas subjected to high temperature high humidity and corrosive gas Areas subjected to strong electros...

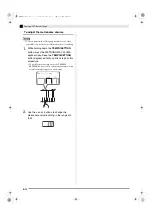
Page 34: ...into the slot and then release it This will cause the memory card to disengage and eject partially 2 Pull the memory card out of the slot Playback of SMF format data and song data converted using SMF...

Page 35: ...from an SD memory card to the digital piano user area 1 Press the TONE SONG button so the SONG lamp is lit 2 Use the and buttons to display the number of the user area song Music Library song number...

Page 36: ...S S YES button You can save song data that you recorded on the digital piano to an SD memory card as SMF Format 0 data or CASIO CSR data PREPARATION Insert an SD memory card that has been formatted on...

Page 37: ...u want to completely delete all of the data on the card format it on you computer or using some other device PREPARATION Insert the SD memory card you want to format into the digital piano s SD memory...

Page 38: ...on was in progress Never remove a card from the card slot while a card access operation is in progress Attempt to overwrite the song data file that is read only Save the file to a different SD memory...

Page 39: ...your hands and fingers Take care that you do not pinch your fingers between parts when assembling them When placing the digital piano on the floor be sure to place it on something soft a blanket cush...

Page 40: ...packing material available for some reason use a magazine or some other thick item 1 Attach side panels A and B to the digital piano Secure the side panels using four screws D 2 Plug the speaker box C...

Page 41: ...at you partially tightened You can also install the speaker box C so it faces towards the back of the stand 4 After ensuring that all of the screws are fully tightened remove the packing material and...

Page 42: ...ll Leaving the anti tipping brackets in their original orientation insert the pedal unit brackets between the anti tipping brackets and the edges of the side panels 8 Secure the corner brackets to the...

Page 43: ...m the screw hole on the other side Forcibly tightening a screw while it is not engaged properly can strip the threads of the screw and joint connector making them unusable 9 Securely tighten the screw...

Page 44: ...lable The power cord of the PX 800 is hard wired to the digital piano CAUTION The screws of the stand can work loose due to the effects of temperature and humidity changes vibration etc Because of thi...

Page 45: ...he same 2 Adjust the volume and expression settings of the external sound source E 25 External sound source user s guide No sound is produced when playing MIDI data from a computer The USB cable is no...

Page 46: ...Next restart the MIDI software and then try playing back the song again E 26 E A appears on the display immediately after power is turned on Built in flash memory is corrupted Contact your nearest CA...

Page 47: ...cording playback Number of Songs 5 Number of Tracks 2 Capacity Approximately 50 000 notes total Up to approximately 10 000 notes per song Recorded Data Protection Built in flash memory Pedals Damper s...

Page 48: ...d Lines Lines may be visible on the exterior of the product These are weld lines that result from the plastic molding process They are not cracks or scratches Musical Instrument Etiquette Always be aw...

Page 49: ...9 GM ORGAN 3 18 0 64 040 GM PIPE ORGAN 19 0 64 041 GM REED ORGAN 20 0 128 042 GM ACCORDION 21 0 64 043 GM HARMONICA 22 0 128 044 GM BANDONEON 23 0 64 045 GM NYLON STR GUITAR 24 0 128 046 GM STEEL STR...

Page 50: ...0 128 No N Tone Name Nombre de tonos Program Change Cambiode programa BankSelect MSB MSB de selecci n de banco Maximum Polyphony Polifon a m xima DSP Drum Assignment List Lista de sonidos de bater a S...

Page 51: ...ina Op 36 1 1st Mov 26 Sonatine Op 20 1 1st Mov 27 Sonate K 545 1st Mov 28 Sonate K 331 3rd Mov Turkish March 29 Rondo K 485 30 F r Elise 31 Marcia alla Turca 32 Sonate Op 13 Path tique 1st Mov 33 Son...

Page 52: ...OMNI OFF POLY Mode 2 OMNI ON MONO Mode 4 OMNI OFF MONO O Yes X No O O O O O O O O O O O O O O O O O O O O O O O O O O X O X X X X X X X O O O X X X X X X X X X X X O 4 5 MIDI Implementation Chart 1 D...

Page 53: ...t the packaging conforms to the environmental protection legislation in Germany Esta marca de reciclaje indica que el empaquetado se ajusta a la legislaci n de protecci n ambiental en Alemania MA0706...

Reviews: