background image

English

Getting Ready

EN-57

You can connect audio equipment or a music amplifier 
to the Digital Piano and then play through external 
speakers for more powerful volume and better sound 
quality.

IMPORTANT!

• The Digital Piano automatically adjusts sound output 

to optimize for headphone output (when headphones 
are connected) or built-in speaker output (when 
headphones are not connected). This also will cause 
a change in the output quality from the Digital 
Piano’s 

LINE OUT R and L/MONO jacks.

• Whenever connecting a device to the Digital Piano, 

first use the 

VOLUME controller to set the volume to 

a low level. After connecting, you can adjust the 
volume to the level you want.

• Whenever you connect any device to the Digital 

Piano, be sure to read the user documentation that 
comes with the device.

Connecting to Audio Equipment 

1

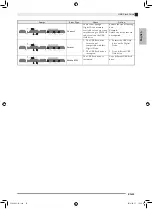
Use commercially available cables to connect the 
external audio equipment to the Digital Piano’s 

LINE 

OUT

 jacks as shown in Figure 

1

LINE OUT R

 jack 

output is right channel sound, while 

LINE OUT L/

MONO

 jack output is left channel sound. It is up to 

you to purchase connecting cables like the ones shown 
in the illustration for connection of audio equipment. 
Normally in this configuration you must set the audio 
equipment’s input selector to the setting that specifies 
the terminal (such as AUX IN) to which the piano is 
connected. Use the Digital Piano’s 

VOLUME

 controller 

to adjust the volume level.

Connecting to a Musical Instrument 
Amplifier 

2

Use commercially available cables to connect the 
amplifier to the Digital Piano’s 

LINE OUT

 jacks as 

shown in Figure 

2

LINE OUT R

 jack output is right 

channel sound, while 

LINE OUT L/MONO

 jack 

output is left channel sound. Connecting to the 

LINE 

OUT L/MONO

 jack only outputs a mixture of both 

channels. It is up to you to purchase connecting cable 
like the one shown in the illustration for connection of 
the amplifier. Use the Digital Piano’s 

VOLUME


controller to adjust the volume level.

IMPORTANT!

• When using the 

LINE OUT jacks, also connect 

headphones to the 

PHONES jack. This will switch 

the LINE OUT output to appropriate sound quality.

Use only accessories that are specified for use with this 
Digital Piano.
Use of unauthorized accessories creates the risk of fire, 
electric shock, and personal injury.

NOTE

You can get information about accessories that are 

sold separately for this product from the CASIO 

catalog available from your retailer, and from the 

CASIO website at the following URL.

http://world.casio.com/

Connecting Audio Equipment 

or an Amplifier

INPUT 1

INPUT 2

Guitar amplifier

Keyboard amplifier, etc.

Standard plug

To either of the Digital Piano’s 

LINE OUT jacks

RIGHT (Red)
LEFT (White)

Audio amplifier AUX IN jack, etc.

Pin plug

Bundled and Optional 

Accessories

PX860-ES-1A.indd   59

2014/06/27   12:26:18

Summary of Contents for Privia PX-860BK

Page 1: ...fety Precautions Precauciones de seguridad Antes de intentar usar el piano asegúrese de leer las Precauciones de seguridad separadas English Español PX 860 This recycle mark indicates that the packaging conforms to the environmental protection legislation in Germany Esta marca de reciclaje indica que el empaquetado se ajusta a la legislación de protección ambiental en Alemania MA1406 A Printed in ...

Page 2: ... or has been dropped The apparatus shall not be exposed to dripping or splashing and that no objects filled with liquids such as vases shall be placed on the apparatus The power indicator being unlit does not mean the apparatus is completely disconnected from the MAINS When you need to have the apparatus completely disconnected from the MAINS you must unplug the power cord For that purpose locate ...

Page 3: ...r EN 30 Tone selection EN 30 Chorus CHORUS EN 30 Brilliance BRILLIANCE EN 30 Layer balance EN 30 Duet pan EN 30 Bass damper effect EN 30 Damper noise EN 30 Music Library song select MUSIC LIBRARY SELECT EN 31 Tempo TEMPO EN 31 Beat BEAT EN 31 Metronome tempo METRONOME TEMPO EN 31 Metronome beat METRONOME BEAT EN 31 Concert Play song Play Stop CONCERT PLAY a EN 31 Listen LISTEN EN 31 Lesson LESSON ...

Page 4: ... 42 Simple Play Back of a Song on a USB Flash Drive EN 43 Error Indicators EN 44 Connecting to a Computer EN 46 Minimum Computer System Requirements EN 46 Connecting the Digital Piano to Your Computer EN 46 Using MIDI EN 47 Transferring Song Data with a Computer EN 47 Reference EN 58 Troubleshooting EN 58 Product Specifications EN 60 Operating Precautions EN 61 Appendix A 1 Tone List A 1 Concert P...

Page 5: ...EN 4 General Guide 2 1 3 4 5 6 8 9 7 bk bq bp bl bm bn bo Front Bottom Rear PX860 ES 1A indd 6 2014 06 27 12 26 09 ...

Page 6: ...tone on page EN 7 NOTE For details about operations and settings see Configuring Settings with the Keyboard on page EN 27 Your Digital Piano lets you save its current settings and lock its buttons to protect against operation errors For details see Parameter List on pages EN 30 EN 34 FUNCTION Button Saving Settings and Using Operation Lock 1 P POWER button 2 VOLUME controller 3 AUDIO RECORDER FUNC...

Page 7: ...procedure below to temporarily suspend Auto Power Off To disable Auto Power Off 1 While the Digital Piano is turned on press the P POWER button to turn it off 2 While holding down the FUNCTION button press the P POWER button to turn on the Digital Piano Auto Power Off will be disabled at this time NOTE Turning off the Digital Piano after performing the above steps will re enable Auto Power Off Per...

Page 8: ...g and Playing a Tone START STOP a FUNCTION METRONOME ELEC PIANO 1 GRAND PIANO VOLUME z To select GRAND PIANO CONCERT or MODERN or ELEC PIANO 1 Press one of the GRAND PIANO buttons CONCERT or MODERN or the ELEC PIANO 1 to select the one you want The button lamp of the selected tone will light z To select one of the other tones While holding down the FUNCTION button press the keyboard key that corre...

Page 9: ... select BASS when recording to Track 2 You can configure settings to sustain reverberation of the BASS LOWER tone while the damper pedal or sostenuto pedal is pressed For more information see Bass damper effect page EN 30 Tone Name Characteristics CONCERT A full concert grand piano tone that uses Linear Morphing for dynamic and natural tone changes This tone is designed to reproduce damper resonan...

Page 10: ...e while the second tone will be the layered tone 1 While holding down the FUNCTION button press down the keyboard key for the first tone you want to layer and then the key for the second tone Example First press the GRAND PIANO BRIGHT key and then the STRINGS 1 key 2 To unlayer the keyboard select another tone by pressing the GRAND PIANO button or by using the procedure under Selecting and Playing...

Page 11: ...keyboard key that corresponds to the hall simulator name you want to select C1 C2 C3 C4 C5 C6 C7 C8 Initial default Center Volume of the main tone First tone you selected Volume of the layered tone Second tone you selected Using Effects Hall simulator Makes your notes resonate Chorus Adds more breadth to your notes Hall simulator Name Description DUTCH CHURCH Amsterdam church with acoustics that a...

Page 12: ...stained continue to play longer When GRAND PIANO is selected as the tone using this pedal generates harmonic and other resonance just like the damper pedal on an acoustic grand piano z Soft Pedal Pressing this pedal while playing suppresses notes played on the keyboard after the pedal was pressed and makes them sound softer z Sostenuto Pedal Only the notes of the keys that are depressed when this ...

Page 13: ...e output enabled 1 Press the METRONOME button This starts the metronome The lamp above the START STOP a button flash in time with the metronome beat 2 While holding down the FUNCTION button press the METRONOME BEAT keyboard key Keep the FUNCTION button depressed as you advance to step 3 3 With the FUNCTION button still depressed from the previous step press one of the BEAT keyboard keys 0 to 9 to ...

Page 14: ...ile recording will return the tempo value to 120 To adjust the metronome volume You can perform the following procedure at any time regardless of whether or not the metronome is sounding 1 While holding down the FUNCTION button use the Metronome Volume keys to specify a volume value in the range of 0 to 42 For details about using the keyboard keys for settings see Keyboard Keys Used for Configurin...

Page 15: ... example if the initial default range is not enough when one person is playing the left hand part and another person is playing the right hand part 1 While holding down the FUNCTION and METRONOME buttons press the keyboard C key that you want located at C4 middle C of the left keyboard Keep FUNCTION and METRONOME depressed as you advance to step 2 below This will sound the note assigned to C4 and ...

Page 16: ... stop 1 While holding down the FUNCTION button press the START STOP a button This will start Concert Play playback from song 1 Songs are played in their Concert Play number sequence You can play along with a song on the keyboard as it is playing The tone assigned to the keyboard is the one that is preset for the song that is playing 2 To change demo playback to a different song hold down the FUNCT...

Page 17: ...breath sounds and performance noises To listen to a Concert Play song LISTEN 1 While holding down the FUNCTION button use the CONCERT PLAY SELECT and keyboard keys to scroll song numbers in sequences from 1 to 10 For information about Concert Play songs see the Concert Play List on page A 1 2 While holding down the FUNCTION button press the LISTEN keyboard key This enters the Listen Mode for liste...

Page 18: ...ng down the FUNCTION button press the CONCERT PLAY a keyboard key This starts playback without the part you turned off in step 1 4 Play the missing part on the keyboard 5 To stop playback hold down the FUNCTION button as you press the CONCERT PLAY a keyboard key again To play along with the orchestra accompaniment PLAY 1 While holding down the FUNCTION button press the PLAY keyboard key This will ...

Page 19: ...Pressing the and keys at the same time will select song number 1 You also can adjust the playback tempo and volume of the song See Configuring Settings with the Keyboard on page EN 27 for more information You can turn off the left hand part or right hand part of a song and play along on the Digital Piano NOTE The Music Library includes a number of duets While a duet is selected you can turn off th...

Page 20: ...rive port 1 Press the AUDIO RECORDER button Note that you should press the button and immediately release it Do not hold it down This causes the two START STOP a button indicator lamps to light 2 Press the SONG RECORDER button so its lamp is lit 3 Hold down the FUNCTION button as you use the MUSIC LIBRARY SELECT keyboard keys to select the song you want Pressing the plus key scrolls forward throug...

Page 21: ...tomatically if the number of notes in memory exceeds the maximum Recorded Data Keyboard play Tone used Pedal operations Hall simulator and chorus settings Track 1 only Tempo setting Track 1 only Layer setting Track 1 only Split setting Track 1 only Octave shift setting Track 1 only Recording Data Storage Starting a new recording deletes any data that was previously recorded in memory Should power ...

Page 22: ...mp Track 2 R lamp Example Track 1 selected 3 Select the tone and effects Track 1 only you want to use in your recording Tone page EN 7 Effects page EN 10 NOTE If you want the metronome to sound while you are recording configure the beat and tempo settings and then press the METRONOME button See Using the Metronome on page EN 12 for more information 4 Start playing something on the keyboard Recordi...

Page 23: ... as you record to Track 2 5 Select the tone and effects Track 1 only you want to use for your recording 6 Press the START STOP a button or play something on the keyboard This will start both playback of the recorded track and recording to the other track 7 To stop recording press the START STOP a button Playing Back from Digital Piano Memory 1 Press the SONG RECORDER button so its lamp is lit NOTE...

Page 24: ...k data stored in song memory the memory playback and your keyboard play are both recorded to USB flash drive Linear PCM 16bit 44 1 kHz Stereo Recording Capacity 99 files No 01 to No 99 Approximately 25 minutes maximum recording per file Recorded Data Anything played on the Digital Piano is recorded Individual part recording is not supported Recording Data Storage Each new recording of audio data t...

Page 25: ... Playing Back Data Recorded on a USB Flash Drive page EN 25 To exit the audio record playback operation press the AUDIO RECORDER button Recording Digital Piano Play as Data Recorded in Song Memory Plays Back Audio Recorder 1 Press the AUDIO RECORDER button Note that you should press the button and immediately release it Do not hold it down This causes the two START STOP a button indicator lamps to...

Page 26: ...crolls forward You also can use the number keyboard keys 0 through 9 to inputting a file number 1 to 99 and directly select a file TAKE01 WAV TAKE02 WAV etc The keyboard will beep if there is no file on the USB flash drive that corresponds to the number you input 4 To stop playback of the song press the START STOP a button Adjusting the Audio Recorder Volume Level You can use the procedure below t...

Page 27: ...verse chronological order Press the plus keyboard to key scrolls forward You also can use the number keyboard keys 0 through 9 to inputting a file number 1 to 99 and directly select a file TAKE01 WAV TAKE02 WAV etc The keyboard will beep if there is no file on the USB flash drive that corresponds to the number you input 4 Hold down the SONG RECORDER button until both the L and R lamps flash 5 Once...

Page 28: ...find the location on the keyboard for configuring the setting you want 3 While holding down the FUNCTION button press the keyboard key for the setting you want to configure The Digital Piano will sound an operation tone after it configures the setting Example To lower the transpose setting by one semitone 4 Release the FUNCTION button to complete the setting procedure NOTE You can configure the Di...

Page 29: ... Piano will beep to let you know which setting is selected A long beep indicates that the applicable setting is turned off Example While chorus is turned off pressing the CHORUS keyboard key twice will cause the Digital Piano to beep twice which indicates that the Medium Chorus setting is selected NOTE You can find out what operation type applies to each setting by checking the Operation Type in t...

Page 30: ...t dnUSB flash drive mode doFormat dpSave dqLoad drDelete 1USB device mode bnConcert Play song select bpHall simulator boConcert Play volume 7Metronome tempo 8Metronome beat bqTone selection bmPlay blLesson 9Concert Play song Play Stop bkListen bqTone selection brChorus dmOperation lock bsTouch response btBrilliance ckKeyboard key Transpose clMusic Library volume ML Volume cmMetronome volume cnLaye...

Page 31: ...and at the same time cn Layer balance 24 to 0 to 24 Default 10 B Specifies the volume balance between the main tone and the layered tone page EN 9 To return the setting to its initial default 10 press and at the same time cr Duet pan Off OFF On ON Default Off D When turned on outputs the left side keyboard tone from the left speaker and the right side keyboard tone from the right speaker while due...

Page 32: ...ONCERT PLAY a Play Stop D Toggles a Concert Play song between play and stop page EN 16 This setting cannot be changed while recording bk Listen LISTEN A Enters the Concert Play Listen Mode page EN 16 This setting cannot be changed while recording This setting cannot be changed while Music Library playback is in progress bl Lesson LESSON A Enters the Concert Play Lesson Mode page EN 17 This setting...

Page 33: ...er 3 5 Werckmeister 6 Mean Tone 7 Rast 8 Bayati 9 Hijaz 10 Saba 11 Dashti 12 Chahargah 13 Segah 14 Gurjari Todi 15 Chandrakauns 16 Charukeshi Base notes C C 0 D 1 Eb 2 E 3 F 4 F 5 G 6 Ab 7 A 8 Bb 9 B This setting cannot be changed while Concert Play playback is in progress bs Touch response TOUCH RESPONSE Off OFF 1 to 3 Default 2 D Specifies the relative touch of the keyboard keys Setting a smalle...

Page 34: ...ume level cannot be adjusted while recording dk Operation tone Off On Default On D Selecting Off disables sounding of the operation tone whenever a keyboard key is pressed while the FUNCTION is depressed This setting is retained even when the Digital Piano is turned off The operation tone setting cannot be changed while Concert Play or Music Library playback is in progress while the metronome is s...

Page 35: ... Formats a USB flash drive dp Save Off On Default Off Stores data to a USB flash drive dq Load Off On Default Off Loads data from a USB flash drive to Digital Piano song memory dr Delete Off On Default Off Deletes USB flash drive data Parameter Settings Operation Type page EN 28 Description Remarks PX860 ES 1A indd 36 2014 06 27 12 26 14 ...

Page 36: ...lash drive See Storing Standard Audio Data WAV Files to a USB Flash Drive page EN 36 and Playing Back Audio Data Stored on a USB Flash Drive page EN 19 z Using the Song Recorder to save recorded song MID data to a USB flash drive See Saving a Recorded Song to a USB Flash Drive page EN 39 z Loading of song MID CM2 data stored on a USB flash drive to a Digital Piano user song number See Loading Song...

Page 37: ...and change the names of audio data WAV files to the format TAKEXX WAV and move them to the AUDIO folder Then you will be able to play them back on the Digital Piano XX 01 to 99 For information about playback see Playing Back Audio Data Stored on a USB Flash Drive page EN 19 Data Type Description File Name Extension Supported Operations Save to USB flash drive Load from USB flash drive User songs p...

Page 38: ...ng sequence is being performed The Digital Piano s L R lamps flash while the mounting process is in progress It may take up to 10 or 20 seconds or even longer for a USB flash drive to be mounted Do not attempt to perform any operation on the Digital Piano while a mounting sequence is in progress while L R lamps are flashing A USB flash drive needs to be mounted each time it is connected to the Dig...

Page 39: ...lash Driver Folder Structure Diagram Formatting a USB flash drive on the Digital Piano will automatically create the folders shown in the diagram below 1 Insert the USB flash drive you want to format into the Digital Piano s USB flash drive port 2 While holding down the FUNCTION button press the keyboard key that corresponds to the USB flash drive mode This will cause the L R lamps to flash 3 Whil...

Page 40: ...yboard key that corresponds to the USB flash drive mode This will cause the L R lamps to flash 3 While holding down the FUNCTION button press the save keyboard key This will cause the GRAND PIANO CONCERT button lamp to light To exit the data save operation hold down the FUNCTION button as you press the USB flash drive mode key 4 Hold down the FUNCTION button as you use the MUSIC LIBRARY SELECT key...

Page 41: ...ital Piano s Music Library song numbers 61 to 70 After that you can play back the user song or use it for lesson play NOTE Loading song data from a USB flash drive assigns it to the corresponding user song number Loading song data 61 from a USB flash drive for example will assign it to user song number 61 in Digital Piano memory Then you will be able to select the song by selecting user Music Libr...

Page 42: ...N button as you use the MUSIC LIBRARY SELECT keyboard keys to select a song number 61 to 70 The Digital Piano will emit a short beep if you specify a correct song number and a long beep if the song number is not correct Selecting song number 00 will batch load the 10 files from 61 through 70 to the Digital Piano s song memory 6 Press the START STOP a button This starts loading of the data to the M...

Page 43: ...light To exit the data delete operation hold down the FUNCTION button as you press the USB flash drive mode key 4 Hold down the FUNCTION button as you use the MUSIC LIBRARY SELECT keyboard keys to select a song number 61 to 70 The Digital Piano will emit a short beep if you specify a correct song number and a long beep if the song number is not correct 5 Press the START STOP a button This starts d...

Page 44: ...he FUNCTION button press the keyboard key that corresponds to the USB flash drive mode This will cause the L R lamps to flash 4 Press the START STOP a button This will start playback of the song data Press the START STOP a button again to stop playback 5 To change to another song hold down the FUNCTION button as you use the MUSIC LIBRARY SELECT plus and minus keyboard keys to select the song you w...

Page 45: ... something before performing a save operation Read Only A read only file with the same name you are trying to use is already stored on USB flash drive Change the name and then save the new data Remove the read only attribute from the existing USB flash drive file and overwrite it with the new data Use a different USB flash drive Media Full There is not enough space available on the USB flash drive...

Page 46: ...g data Example Delete any tracks that are not required Format 1 The USB flash drive format is not compatible with this Digital Piano 1 Format the USB flash drive on the Digital Piano 2 The USB flash drive is corrupted 2 Use a different USB flash drive Media R W The USB flash drive is corrupted Use a different USB flash drive Lamps Error Type Cause Action PX860 ES 1A indd 47 2014 06 27 12 26 16 ...

Page 47: ... If this is the first time you are connecting the Digital Piano to your computer the driver software required to send and receive data will be installed on your computer automatically 4 Start up commercially available music software on your computer 5 Configure the music software settings to select one of the following as the MIDI device For information about how to select the MIDI device see the ...

Page 48: ...n normal for the Digital Piano to power up the next time you turn it on page EN 6 1 Perform steps 1 through 3 of the procedure under Connecting the Digital Piano to Your Computer on page EN 46 2 Change the Digital Piano s USB device mode to storage While holding down the FUNCTION button press the keyboard key that corresponds to the USB device mode After this setting is changed the GRAND PIANO CON...

Page 49: ... show file name extensions under Windows Vista or Windows 7 To show file name extensions under Windows 8 or Windows 8 1 To load a song into user song memory Music Library 61 to 70 Data Type Folder Name File Name and Extension User songs MUSICLIB MID SMF format data format 0 1 CM2 CASIO original format data Recorder memory data RECORDER BIDREC01 CSR CASIO original format data RECORDER MUSICLIB 70 6...

Page 50: ...USICLIB into user song memory and the contents of RECORDER into Recorder memory IMPORTANT A data conversion error is indicated when both of the START STOP a button lamps and the GRAND PIANO CONCERT MODERN and ELEC PIANO 1 button lamps are all lit and all other lamps are unlit Copyrights The rights of creators and copyright holders of music images computer programs databases and other data are prot...

Page 51: ...and close during assembly creating the risk of personal injury to your hands and fingers Take care that you do not pinch your fingers between parts when assembling them Be sure to insert felt or other material between the rubber feet and flooring Do not allow direct contact between them Some types of flooring material may become discolored or damaged by direct contact with the rubber feet When pla...

Page 52: ...nels A and B Remove the two screws one on the outside of each side panel that hold the brackets and then slide the brackets as shown in the illustration After extending the anti tip brackets reinstall the screws that secure them in place but do not tighten the screws fully at this time Inside of side panels 3 2 If you plan to locate the piano and stand against a wall loosen the two screws one on t...

Page 53: ...s H which you installed in step 5 above 7 Mount brackets L onto both ends of the pedal unit E 8 Use the screws F to securely fix the brackets L to the pedal unit E 9 After adjusting the position height of pedal unit E fully tighten the screws that you temporarily tightened in step 5 above 10 Secure the back board K to the back board C Screw the screws M into the four holes in the back board K H E ...

Page 54: ... fall off the stand IMPORTANT After mounting the piano onto the stand check to make sure the sides of the piano and the side panels of the stand are position relative to each other as shown in the nearby illustration 13 Use the screws J to securely fix the brackets at the top of side panels A and B to the bottom of the piano 14 After checking to make sure the six screws that secure side panels A a...

Page 55: ...e Digital Piano into its power terminal DC 24V 3 Plug the power cord of the AC adaptor that comes with the Digital Piano into a household power outlet as shown in the illustration below 1 Install the music stand by inserting its pegs into the holes in the top of the piano 16 1 Insert the headphones hook O into the two holes on the bottom of the piano 16 2 Use the screw P to secure the headphones h...

Page 56: ... support bracket indicated by the star in the illustration attached to its inside surface Check to make sure that the support bracket is standing up fully To close the lid 1 Carefully lift up slightly on the lid 2 Use the fingers of your left hand to press back on the support bracket as you slowly and carefully lower the lid Protective tape is affixed to the front edges of the keyboard keys to pro...

Page 57: ...o is turned off before plugging in or unplugging the AC adaptor The AC adaptor will become warm to the touch after very long use This is normal and does not indicate malfunction Use the AC adaptor so its label surface is pointed downwards The AC adaptor becomes prone to emitting electromagnetic waves when the label surface is facing upwards Connect commercially available headphones to the PHONES j...

Page 58: ...s the terminal such as AUX IN to which the piano is connected Use the Digital Piano s VOLUME controller to adjust the volume level Connecting to a Musical Instrument Amplifier 2 Use commercially available cables to connect the amplifier to the Digital Piano s LINE OUT jacks as shown in Figure 2 LINE OUT R jack output is right channel sound while LINE OUT L MONO jack output is left channel sound Co...

Page 59: ...trange Turning power off and then back on again does not eliminate the problem Example Note intensity does not change even though I alter key pressure The Back up feature is turned on Turn off Back up Next turn power off and then back on again EN 33 I cannot transfer data after connecting the Digital Piano to a computer 1 Check to make sure that the USB cable is connected to the Digital Piano and ...

Page 60: ...the same time while using layer using the Duet Mode playing back a built in tune recording etc Pressing a button when one of these conditions exists will cause the effect setting that is built into the tone to change automatically which causes notes to cut out momentarily or causes a slight change in how effects are being applied There are knots saw blade marks and or other marks on the finish of ...

Page 61: ...y Audio Recorder Real time recording and playback to USB flash drive Linear PCM 16bit 44 1 kHz stereo WAV format Songs 99 files Approximately 25 minutes maximum recording per file Audio Recorder Volume Level Adjustable Pedals Damper with half pedal operation Soft Sostenuto Other Functions Touch Select 3 types Off Transpose 2 octaves 12 to 0 to 12 Tuning 415 5Hz to 440 0Hz to 465 9Hz variable Tempe...

Page 62: ...using this product Be especially careful when playing late at night to keep the volume at levels that do not disturb others Other steps you can take when playing late at night are closing the window and using headphones Any reproduction of the contents of this manual either in part or its entirety is prohibited Except for your own personal use any other use of the contents of this manual without t...

Page 63: ...electrical load output to exceed the label rating 12 Make sure the surrounding area is dry before plugging into a power source 13 Make sure the product is oriented correctly 14 Unplug the product during lightning storms or when you do not plan to use it for a long time 15 Do not allow product ventilation openings to become blocked Install the product in accordance with the manufacturer s instructi...

Page 64: ...ilitaire 1 Duet 13 Frühlingslied Lieder Ohne Worte Heft 5 14 Fröhlicher Landmann Album für die Jugend 15 Von fremden Ländern und Menschen Kinderszenen 16 Träumerei Kinderszenen 17 Tambourin 18 Menuet BWV Anh 114 Clavierbüchlein der Anna Magdalena Bach 19 Inventio 1 BWV 772 20 Inventio 8 BWV 779 21 Inventio 13 BWV 784 22 Praeludium 1 BWV 846 Das Wohltemperierte Klavier 1 23 Le Coucou 24 Gavotte 25 ...

Page 65: ...e OFF Mode Mode 3 X Mode 3 X Default Messages Altered 0 32 1 5 6 38 7 10 11 16 17 18 19 64 65 66 67 Bank select Modulation Portamento Time Data entry LSB MSB 2 Volume Pan Expression DSP Parameter0 2 DSP Parameter1 2 DSP Parameter2 2 DSP Parameter3 2 Damper Portamento Switch Sostenuto Soft pedal O O O O O O O O O O O O O O O O X X X O X X X X X X O X O O Model PX 860 Version 1 0 1 Depends on tone 1...

Page 66: ...ssion DSP Parameter0 2 DSP Parameter1 2 DSP Parameter2 2 DSP Parameter3 2 Damper Portamento Switch Sostenuto Soft pedal Vibrato rate Vibrato depth Vibrato delay DSP Parameter4 2 DSP Parameter5 2 DSP Parameter6 2 DSP Parameter7 2 Portamento Control High resolution velocity prefix 3 Reverb send 4 Chorus send RPN LSB MSB 2 All sound off Reset all controller Mode 1 OMNI ON POLY Mode 3 OMNI OFF POLY Mo...

Page 67: ...fety Precautions Precauciones de seguridad Antes de intentar usar el piano asegúrese de leer las Precauciones de seguridad separadas English Español PX 860 This recycle mark indicates that the packaging conforms to the environmental protection legislation in Germany Esta marca de reciclaje indica que el empaquetado se ajusta a la legislación de protección ambiental en Alemania MA1406 A Printed in ...

Reviews: