— 19 —
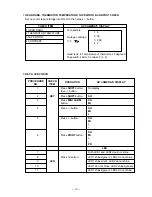
8. KEY & LED CHECK
PROCEDURE
CHECK
NO.
ITEM
1
Press SHIFT button,
No display
then
+
button.
2
KEY
Press SHIFT button.
SH
3
Press MINI LABEL
SH
button.
MI
4
Press
+
button.
SH
MI
+
5
Press
-
button.
SH
MI
+
-
SH
6
Press PRINT button.
MI
+
-
PR
LED
7
Both LED1 and LED2 does not shine.
8
Press no button.
LED1 shines(green). LED2 do not shine.
9
LED
LED1 shines(red). LED2 do not shine.
10
LED1 do not shines. LED2 shines(green).
11
LED1 shines(green). LED2 do not shine.
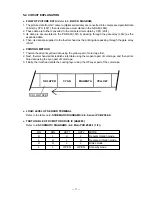
7. HEAD RANK, THERMISTOR TEMPERATURE, TAPE WIDTH & CONTRST CHECK
Set any color tape cartridge into QG-100, then press
-
button.
CHECK ITEM
QV CAMERA'S DISPLAY
1 HEAD RANK
For example,
2 THERMISTOR TEMPATURE
3 TAPE WIDTH
No tape cartridge
4 CONTRAST
➝
3
Head rank: 6, Temperature of thermistor: 28 degree C
Tape width: 46mm, Contrast: 2 (1~5)
1 6
2 28
3 C46
4 2
OPERATION
QV CAMERA'S DISPLAY
Summary of Contents for QG-100
Page 1: ...JULY 1996 without price QG 100 ZX 568 ...
Page 4: ... 2 3 BLOCK DIAGRAM ...
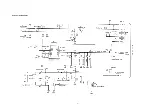
Page 5: ... 3 4 SCHEMATIC DIAGRAMS 4 1 Wiring Diagram ...
Page 6: ... 4 4 2 Main PCB Z568 1 1 2 ...
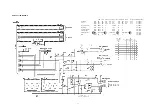
Page 7: ... 5 4 3 Main PCB Z568 1 2 2 ...
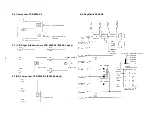
Page 8: ... 6 4 4 Power PCB Z568 S1 ...
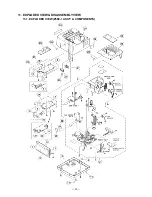
Page 32: ... 30 11 EXPLODED VIEW DISASSEMBLY VIEW 11 1 EXPLODED VIEW Z568 1 ASS Y COMPONENTS ...
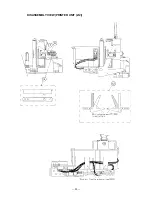
Page 34: ... 32 11 2 DISASSEMBLY VIEW PRINTER UNIT 1 2 ...
Page 35: ... 33 DISASSEMBLY VIEW PRINTER UNIT 2 2 ...
Page 37: ... 35 11 3 DISASSEMBLY VIEW CHASSIS UNIT 1 2 ...
Page 38: ... 36 DISASSEMBLY VIEW CHASSIS UNIT 2 2 ...
Page 40: ... 38 11 4 DISASSEMBLY VIEW CHASSIS ASS Y 1 2 ...
Page 41: ... 39 DISASSEMBLY VIEW CHASSIS ASS Y 2 2 ...
Page 43: ... 41 11 5 DISASSEMBLY VIEW HEAD HOLDER ASS Y 1 2 ...
Page 44: ... 42 DISASSEMBLY VIEW HEAD HOLDER ASS Y 2 2 ...
Page 46: ... 44 11 6 DISASSEMBLY VIEW PLATEN ASS Y ...
Page 48: ... 46 11 7 DISASSEMBLY VIEW CASSEETTE CASE ASS Y ...
Page 50: ... 48 11 8 DISASSEMBLY ASS Y MOTOR CHASSIS ASS Y ...
Page 51: ......
Page 52: ...MA0900461A ...


