Step 3:
Install the props –
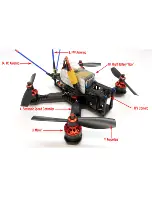
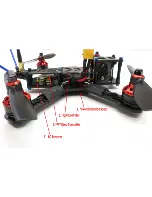
Use an 8mm socket head driver and install the props such that rotation is per the graphic
below. Tighten the props while holding the motor with your hand. Do not use a tool to hold the motors or you will
damage them. Please be aware your motors may come with either right hand or left hand threaded props shafts.
Please take note of which direction each motor has. You need to remember which direction is correct when taking the
nut off the motor. A CCW motor has a right hand threaded prop shaft and requires the nut to be rotated CCW to
remove the nut. A CW motor has a left hand threaded prop shaft and requires the nut to be rotated CW to remove
the nut.
Step 4:
Power up the system –
Go outside. Find a location that is free of obstacles, people, bodies of water, trees,
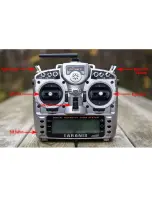
shrubs, cars, etc. An ideal location is an open park, baseball field, or soccer field. Turn on your Taranis. Verify all
switches are facing up and away from you. Verify the throttle stick is set to zero “all the way down”. Verify the flight
mode is set to “Beginner Line of Sight”
.
Set the craft on the ground and plug in the lipo. Step back to a safe distance.
Step 5:
Get air born –
Flip the motor arm switch towards you. This will cause the motors to begin spinning at a low RPM.
The craft will not gain altitude until you give some throttle input. Increase throttle until you are airborn!
Summary of Contents for 210-R
Page 2: ...Section 1 Warnings and Warranty...
Page 5: ...Section 2 Controls...
Page 6: ......
Page 10: ...Section 3 Steps to Get in the Air...
Page 11: ......
Page 12: ......
Page 13: ......
Page 22: ...Section 4 Taranis Binding and Setup BNF 210 R...
Page 27: ...Section 5 Troubleshooting...
Page 31: ...goggles with a good 5 8 Ghz receiver is very important...

