background image

EN

G

LIS

H

EXTERNAL EQUIPOTENTIAL

Earthing Terminal 

(export only)

Equipment has secondary earthing terminal. Terminal provides external earthing connection used in addition to 

 earthing prong on plug. Located on outside of oven back, terminal is marked with symbol shown below.

CLEANING INSTRUCTIONS 

Always keep the oven clean

1. 

Cleaning the glass viewing window, the inner door panel and oven front face.  

For best performance and to maintain the high degree of safety, the inner door panel and oven front 

face should be free of food or grease build-up. Wipe these parts with a mild detergent, rinse and wipe 

dry. Never use abrasive powders or pads.

2. 

Cleaning the control panel and plastic parts.  

Do not apply a detergent or an alkaline liquid spray to the control panel and plastic parts, as this may 

cause damage to these parts. Use a dry cloth (not a soaked cloth) to clean these parts. 

3. 

Cleaning the oven interior  

After use be sure to clean up spilled liquids, spattered oil and food debris as quickly as possible. If the 

oven is used when dirty, efficiency drops and the dirt gets stuck on the oven surface and may cause 

bad odours. Clean the interior with a cloth soaked in luke-warm water with a mild detergent dissolved 

in it, then rinse the soap off with a damp cloth.

CAUTION: 

Do Not wipe plastic and painted sections of the oven with bleach, thinners or other cleaning agents,  

as this may cause these parts to dissolve or change sharp.

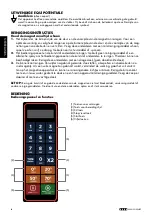
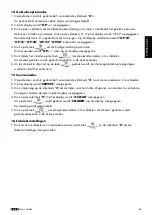
OPERATION

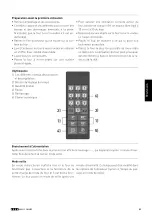
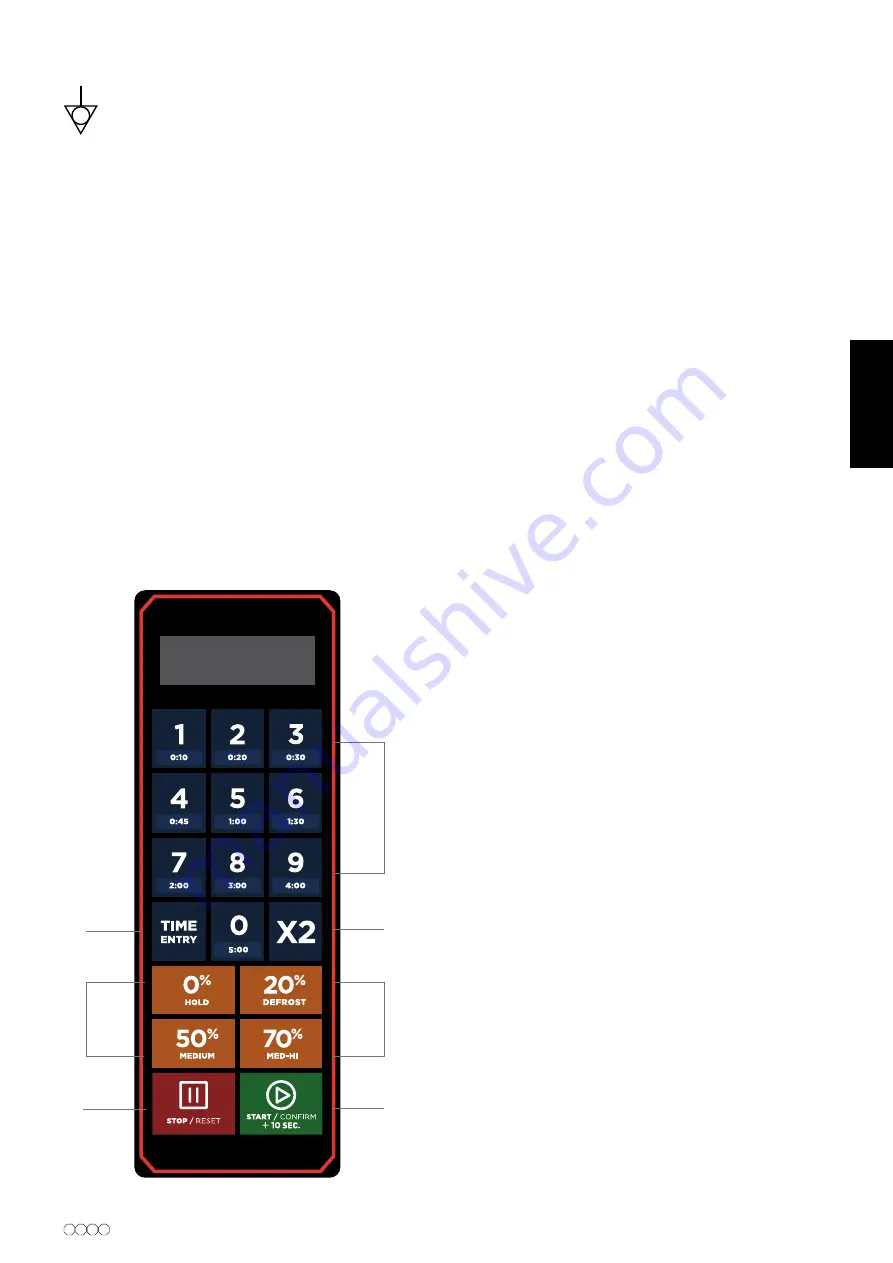
Control Panel and Features

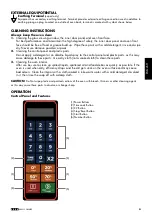
(1)

(2)

(4)

(3)

(5)

(6)

(1)

(1) Power Buttons

(2) Time cook Button 

(3) X2 Button 

(4) Stop/Reset Button 

(5) Start Button

(6) Number Button


688213 G20NEF

 21

Summary of Contents for 688.213

Page 1: ...NEDERLANDS p 2 14 ENGLISH p 15 26 FRAN AIS p 27 37 MAGNETRON MICROWAVE OVEN FOUR MICRO ONDES Model 688 213 688213 G20NEF 1...

Page 2: ...che schok brand persoonlijk letsel of blootstelling aan schadelijke microgolven tijdens het gebruik van het apparaat te verminderen moeten onder meer de volgende algemene veiligheidsvoorschriften in a...

Page 3: ...tot verslechtering van het oppervlak wat een ongunstige invloed kan hebben op de levensduur en mogelijk kan leiden tot een gevaarlijke situatie 22 Om verbranding te voorkomen dient de inhoud van babyf...

Page 4: ...er kunnen struikelen REINIGING Controleer of de stekker van het apparaat uit de contactdoos is gehaald 1 Reinig na gebruik de magnetronruimte met een licht vochtige doek 2 Reinig de accessoires op de...

Page 5: ...ten en alleen een korte kooktijd Bakpapier Te gebruiken als afdekking om spatten te voorkomen of als een afdekking voor het dampen Plastic Alleen voor magnetron geschikt serviesgoed Volg de aanwijzing...

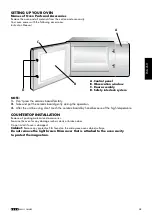
Page 6: ...wordt geleverd met de volgende accessoires Gebruiksaanwijzing A Control panel B Observation window C Door assembly D Safety interlock system B A C D OPMERKING 1 Druk niet met kracht op de keramische...

Page 7: ...tussenafstand van 30 cm zijn Verwijder nooit de voetjes van het apparaat en blokkeer nooit de openingen voor de luchttoevoer en luchtafvoer De linkerzijde moet open zijn 1 Door het blokkeren van de o...

Page 8: ...geen reinigingsmiddel of een alkalische spray om het bedieningspaneel en de kunststof onderdelen te reinigen Hierdoor kunnen ze beschadigd raken Reinig deze onderdelen met een droge doek geen doordre...

Page 9: ...tbereiding OP 50 Instantbereiding uitschakelen OP 51 Instantbereiding inschakelen 6 Deurreset OP 60 Deurreset uitschakelen OP 61 Deurreset inschakelen 7 Maximale tijd OP 70 Maximale bereidingstijd 60...

Page 10: ...ringestelde bereidingscyclus uitgevoerd wordt gaat de magnetron in de pauzemodus In alle overige gevallen gaat de magnetron in de opendeurmodus als gebruiksoptie OP 61 ingesteld is Op het display weer...

Page 11: ...s van meerfasige bereiding geeft de totale resterende bereidingstijd niet de bereidingstijd van een bepaalde fase aan 3 Als het bereidingsprogramma voltooid is gaat de magnetron in de modus voor einde...

Page 12: ...n wordt het opgeslagen programma niet gewist 2 Herhaal de bovenstaande stappen als het programma gereset moet worden 3 Als bij de laatste stap op de toets gedrukt wordt gaat de magnetron terug in de o...

Page 13: ...ordt gaat de magnetron in de actieve modus 6 Als bij de laatste stap niet op de toets gedrukt wordt kan het programma niet opgeslagen worden en blijft het zoals het is 15 Servicemodus 1 Open de deur e...

Page 14: ...Op een koele plaats zoals de magnetrondeur kan enige con dens ontstaan Dit is normaal De magnetron is per ongeluk gestart zonder voedsel De magnetron mag niet gebruikt worden zonder dat er voedsel in...

Page 15: ...asic precautions including the following 1 Warning Liquids and other foods must not be heated in sealed containers since they are liable to explode 2 Warning It is hazardous for anyone other than a co...

Page 16: ...ns 23 Microwave heating of beverages can result in delayed eruptive boiling therefore care must be taken when handling the container 24 The appliance is not intended for use by persons including child...

Page 17: ...ape over the counter top or tabletop where it can be pulled on by children or tripped over unintentionally CLEANING Be sure to unplug the appliance from the power supply 1 Clean the cavity of the oven...

Page 18: ...g and absorbing fat Use with supervision for a short term cooking only Parchment paper Use as a cover to prevent splattering or a wrap for steaming Plastic Microwave safe only Follow the manufacturer...

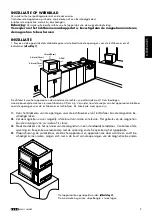
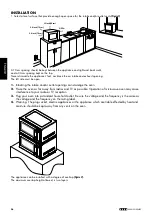
Page 19: ...cibly 2 Take and put the ceramic board gently during the operation 3 After the unit be using don t touch the ceramic board by hand because of the high temperature COUNTERTOP INSTALLATION Remove all pa...

Page 20: ...outlet openings can damage the oven 2 Place the oven as far away from radios and TV as possible Operation of microwave oven may cause interference to your radio or TV reception 3 Plug your oven into...

Page 21: ...y a detergent or an alkaline liquid spray to the control panel and plastic parts as this may cause damage to these parts Use a dry cloth not a soaked cloth to clean these parts 3 Cleaning the oven int...

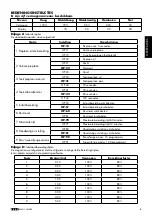
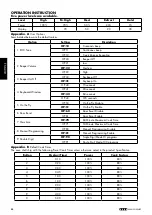
Page 22: ...nds 5 On the Fly OP 50 On the Fly Disable OP 51 On the Fly Enable 6 Door Reset OP 60 Door Reset Disable OP 61 Door Reset Enable 7 Max time OP 70 60 Minute Maximum Cook Time OP 71 10 Minute Maximum Coo...

Page 23: ...s closed if User Option OP 60 is selected and the oven was running a manual or preset cook cycle the oven shall enter Pause Mode In all other cases the oven shall be put to Door Open Mode with User Op...

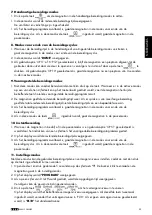
Page 24: ...er this mode the oven will enter Pause Mode 10 On the Fly Cooking 1 While the oven is cooking or under Pause Mode if User Option OP 51 is selected press number buttons the preset cooking program will...

Page 25: ...e set at most under cooking mode or memory mode After setting the power and time for the first stage press to set the second stage And the same step to set the third stage 3 When setting the second or...

Page 26: ...ut some may accumulate on cool place like oven door It is normal Oven started accidentally with no food in It is forbidden to run the unit without any food inside It is very dangerous Trouble Possible...

Page 27: ...688213 G20NEF 27 FRAN AIS...

Page 28: ...28 688213 G20NEF FRAN AIS...

Page 29: ...688213 G20NEF 29 FRAN AIS...

Page 30: ...30 688213 G20NEF FRAN AIS...

Page 31: ...688213 G20NEF 31 FRAN AIS...

Page 32: ...32 688213 G20NEF FRAN AIS...

Page 33: ...688213 G20NEF 33 FRAN AIS...

Page 34: ...34 688213 G20NEF FRAN AIS...

Page 35: ...688213 G20NEF 35 FRAN AIS...

Page 36: ...36 688213 G20NEF FRAN AIS...

Page 37: ...688213 G20NEF 37 FRAN AIS...

Reviews: