background image


56


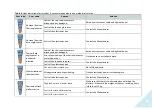
Error code 

Error name


Reason 

Solution 


The joystick is not 
calibrated 

Calibration data is corrupted or not set 

Contact the 

Manufacturer


Fault of the remote controller 


No signal from the 
joystick 

Poor contact between remote controller board 
and joystick 

Contact the 

Manufacturer


Fault of the joystick 


No signal from the 
Main board 

Poor contact between remote controller and 
electronics box 

Check the connection between the electronics box and the 
remote controller 

Fault of the remote controller 

Contact the 

Manufacturer


Fault of the electronics box 


Left drive not 
connected 

Left reducer transferred to the idle mode 

Turn the gearbox lever, restart the remote controller 

Sensor wire disconnected 

Connect the wire and tighten the nuts 

Fault of the sensor 

Contact the 

Manufacturer


Right drive not 
connected 

Right reducer transferred to the idle mode 

Turn the gearbox lever, restart the remote controller 

Sensor wire disconnected 

Connect the wire and tighten the nuts 

Fault of the sensor 

Contact the 

Manufacturer


Summary of Contents for GTS 4WD

Page 1: ...Caterwil LLC www caterwil com instruction version 2 0 7 from 05 07 2021...

Page 2: ...Storage 22 6 Service 23 6 1 Adjustment options 23 6 1 1 Adjusting the wheelchair backrest 23 6 1 2 Armrest height adjustment 24 6 1 3 Headrest height adjustment 25 6 1 4 Adjusting the position of the...

Page 3: ...3 12 5 Cleaning 60 13 Legal Notice 61 13 1 Service life 61 13 2 Responsibility 61 13 3 Warranty conditions 61 13 4 Warranty obligations 62 14 Warranty card 63...

Page 4: ...or the people around him Particular attention should be focused on the chapter Safety 1 2 Product purpose The Product is designed for persons with disabilities have problems with the musculoskeletal s...

Page 5: ...weight physical and mental condition user age living conditions ambient conditions 1 4 Service Only qualified personnel instructed by the Manufacturer carry out maintenance and repair of the Products...

Page 6: ...to the user Risk of accident or injury due to improper use of the Product The Product should only be used for its intended purpose The Product can be operated only after instruction Risk of burns whe...

Page 7: ...nd faults and problems with the product it is necessary to stop using it as this can be dangerous both for the user and for the people around Risk of accident or injury due to improper sit in the chai...

Page 8: ...help from others the Product can be controlled in manual mode the control system must not be de energized Driving in manual mode ignores the sensor values and allows you to reach your destination des...

Page 9: ...hair Overcoming obstacles descents and climbs is allowed only with the vertical position of the backrest Overcoming obstacles such as steps and curbs is possible only on tracks In this case the obstac...

Page 10: ...10 Fig 2 2 Schematic image of wheelchair overcoming obstacle of the step type on the tracks Fig 2 3 Schematic image of wheelchair overcoming single obstacle on the tracks...

Page 11: ...11 Fig 2 4 Schematic image of wheelchair overcoming single obstacle on the wheels Fig 2 5 Maximum angles of climb and despent of Products at movement on wheels...

Page 12: ...12 Fig 2 6 Schematic image of the direction of movement of the wheelchair on the stairs Fig 2 7 Visual demonstration of the safety angle of stair slope...

Page 13: ...d only be replaced by a qualified specialist The battery must be charged exclusively with the battery charger included in the kit with the Product Damage to electronic equipment due to water penetrati...

Page 14: ...atigue under the influence of alcohol or medications is not allowed The user should not suffer from mental disorders influencing the ability to navigate in space when operating Product 2 6 Safety feat...

Page 15: ...ped its own control system Depending on the model and individual wishes of the user the Product can be completed with a conventional remote controller as well as a remote controller with LCD display T...

Page 16: ...stable Lower leg length mm 380 540 Adjustable Weight with accumulator batteries kg 115 98 114 98 Max load capacity kg 100 115 100 115 Front wheel size mm 200 100 For the GTS 4WD the diameter of the ad...

Page 17: ...motors voltage V 24 Charger power requirements V 220 Nominal charging current A 5 Wheelchair protective system IP54 Lighting equipment None Front and rear lights Front wheel type Foamed core Pneumatic...

Page 18: ...series with main components Charger Operating instructions Options see chapter 9 The dealer delivers the Product in a ready to use condition Individual adjustments for a particular user must be carri...

Page 19: ...19 Fig 4 1 Wheelchair front view 1 headrest 2 seat 3 remote controller 4 armrest 5 legrest Fig 4 2 Wheelchair back view 6 assistants handle 7 pocket 8 battery module...

Page 20: ...h turns off the wheelchair in case of short circuit of overload To turn on the wheelchair you must turn the automatic switch to the working position Make sure the emergency stop button is pressed see...

Page 21: ...aircraft luggage space the drive wheels should be set to idle mode see fig 7 13 If the Product is supposed to be transported in the luggage compartment of the aircraft the drive wheels should be set t...

Page 22: ...the Product is rarely used is idle for a long time or is not used for several days then it is necessary to provide the wheelchair with a supporting surface or a substrate where it can be installed Ot...

Page 23: ...ckrest The backrest tilt mechanism has a similar design to the mechanisms that are installed on modern cars This design allows you to adjust the backrest position in the range from 90 to 180 degrees i...

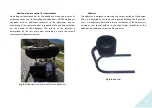
Page 24: ...armrests To adjust loosen the thumbscrew on the chair frame and set the armrest to the required height then the thumbscrew back fig 6 2 If it is necessary to pull out the armrest it can be removed af...

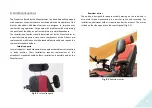
Page 25: ...tched Bends and clamps must also be avoided Removing the remote controller You can remove the remote controller by unscrewing the thumbscrew located on the backside of the remote controller fig 6 4 po...

Page 26: ...l as rotate around its axis fig 6 5 After adjustment the thumbscrew must be screwed Transferring the remote control Transposition of the remote controller should only be carried out by a qualified tec...

Page 27: ...emove fig 6 6 To install the footrest in place install the tapered guide in the hole Fig 6 6 dotted arrow press the lock lever and lower the footrest until it stops Fig 6 6 Removing the footrest Lengt...

Page 28: ...28 Adjusting the angle footrest Loosen the adjusting screw set the footrest to the required angle tighten the screw Fig 6 8 Fig 6 8 Adjusting the angle footrest...

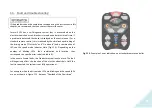
Page 29: ...button Chair up and down buttons Moves chair up or down in On wheel mode for adjusting chair angle Driving mode buttons Switch the wheelchair to On Tracks or On Wheels mode Additional functions butto...

Page 30: ...s the direction and speed of travel Battery Capacity LED indicator The LEDs show the battery charge Speed Level LED indicator The LEDs show the currently selected speed level Driving Mode Indicators S...

Page 31: ...nts in the upper LED display field and displays the current charge level of the battery When the battery is fully charged all 5 LED segments light up If the segments of the LED indication turn off one...

Page 32: ...dinal tilt angle of the wheelchair and much more The remote control has language support From the remote control you can adjust the sensitivity of the joystick the mode of operation of the headlights...

Page 33: ...will go to the main screen fig 7 4 the wheelchair will move only in Manual mode You can return to the Movement type selection menu by pressing the Mode button Fig 7 3 Fig 7 3 LCD mode selection Main...

Page 34: ...e inclination of the chair Select Back to exit the menu Wheelchair tilt In this menu you can get data about the position of the wheelchair relative to the horizon Fig 7 7 This can be useful for determ...

Page 35: ...een types of movement on wheels on tracks Manual mode allows movement ignoring the software protection system Time setting In this menu you can adjust the time shown on the display It has two availabl...

Page 36: ...the required level and press Select Joystick sensitivity affects acceleration deceleration and cornering harshness Select Back to exit the menu Error information This menu item will display informatio...

Page 37: ...ture character movement often maneuvering and braking reduce the range features of the terrain and the nature of the ground user weight use of electrical options 7 3 Switching on and off By pressing t...

Page 38: ...ce the speed of movement of the wheelchair depending on the angle of inclination for example change to 1st gear The maximum height of obstacles that can be overcome by the Product on wheels is 50 mm W...

Page 39: ...cause the wheelchair to move uncontrollably If the control system fails or the battery is low the wheelchair can be moved by pushing To do this the brake must be released The brake release mechanism i...

Page 40: ...acity 33 A h Number of cell 6 Weight 11 5 kg Dimensions height x length x width 195x130x168 mm Working temperature 20 60 C Charge temperature 10 60 C Storage temperature 20 60 C Self discharge per mon...

Page 41: ...cement and disposal of batteries should only be performed by a qualified technician If the battery fails it is replaced completely Sequence of operations when removing or installing batteries 1 Loosen...

Page 42: ...hours to charge The charger should then be disconnected to avoid damage to the battery With daily use wheelchairs is recommended to connect the charger overnight to ensure full capacity of the batter...

Page 43: ...uring operation Do not use the battery charger near various heat sources and heating elements If the battery charger overheats 70 C sparks fires etc turn it off immediately Charging the Product Insert...

Page 44: ...he wheelchair should be parallel to the flight of stairs Switch the wheelchair to the On tracks mode according to chapter 7 After the wheelchair is completely transferred to the tracks a signal will s...

Page 45: ...chair to the On tracks mode according to chapter 7 After the wheelchair is completely transferred to the tracks a signal will sound and the wheelchair will enter the automatic mode of holding the hori...

Page 46: ...ded at the front of the wheelchair In this case the front wheels are detached from the surface but continue to rotate while driving In front wheel drive mode the wheelchair has the following advantage...

Page 47: ...ts of the Product are replaced with modified ones with extended functionality and require the removal of standard holders Lateral supports Lateral supports standard option for people with problems of...

Page 48: ...ttendant The priority of the remotes is determined by the first press after switching on while the second remote control becomes inactive Fig 9 3 Additional remote control for the attendant Abductor T...

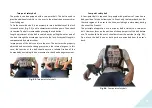
Page 49: ...properly adjusted and not create strong pressure on the internal organs In this case the tension of the belt should ensure a reliable fixation of the human body excluding its free movement in the cha...

Page 50: ...l be useful for users with high sensitivity and to reduce the possibility of sunstroke or heatstroke Fig 9 7 Roof from sun and rain High capacity battery The range and operating time of the Product ca...

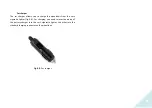
Page 51: ...charge the wheelchair from the car s cigarette lighter fig 9 9 For charging you need to insert one plug of the battery charger into the car s cigarette lighter the other into the standard charging con...

Page 52: ...Automatic stop of the wheelchair when the control panel is disconnected or broken 6 Motors load control If motors are overloaded systems stops automatically 7 Monitor of contact In case of break or di...

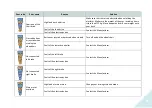
Page 53: ...ing of the driving mode On tracks and On wheels and a combination of LEDs on the speed mode indicator scale Fig 11 1 Depending on the number of blinking LEDs their combination and location they corres...

Page 54: ...damaged Reconnect the sensor cable and tighten the nut Error of positioning of the chair angle sensor or electronics box Fix the sensor in its standard place Fault of the chair angle sensor Contact t...

Page 55: ...tronics box Pressed buttons or joystick when starting the wheelchair Buttons or joystick are pressed when started Turn off and on the wheelchair Fault of the remote controller Contact the Manufacturer...

Page 56: ...nection between the electronics box and the remote controller Fault of the remote controller Contact the Manufacturer Fault of the electronics box Left drive not connected Left reducer transferred to...
Page 57: ...es not move in the holders The armrest is not damaged Drive wheels Wheels should rotate freely and without axial runout Wheelchair moves in a straight line Tires Tire pressure corresponding to the rec...

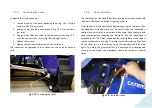
Page 58: ...5 3 atm If the pressure differs from this value then correct it to the required Fig 12 1 Tightening the drive wheel screws 12 2 Steering wheel service To check the condition of the wheel 1 Put the wh...

Page 59: ...on the drive chains loses its properties when mixed with road dust Additional lubrication is required with use Clean the chain with paper towels before renewing the lubricant Then the wheelchair is tr...

Page 60: ...en cleaning the electric wheelchair do not use aggressive cleaning agents or solvents Do not use pressurized water devices to clean the wheelchair Depending on the intensity of use and the degree of s...

Page 61: ...duct only if it is used in the specified conditions and in accordance with its intended purpose The manufacturer recommends to use the Product properly to carry out its care and maintenance in accorda...

Page 62: ...capacity is less than 60 of the nominal d The frame is subject to warranty replacement within one year if it is severely deformed or welded joints are broken e Tires tracks seat and other similar ite...

Page 63: ..._____________________________________ Manufacturing date _________________________________________ Date of sale ________________________________________________ Caterwil LLC Phone 7 383 312 1632 Addre...

Reviews: