Cateye Ergociser EC-5000 Service Manual
38
ES-9
Replacing the Control Unit
ES-9
Replacing the Control Unit
REMOVAL
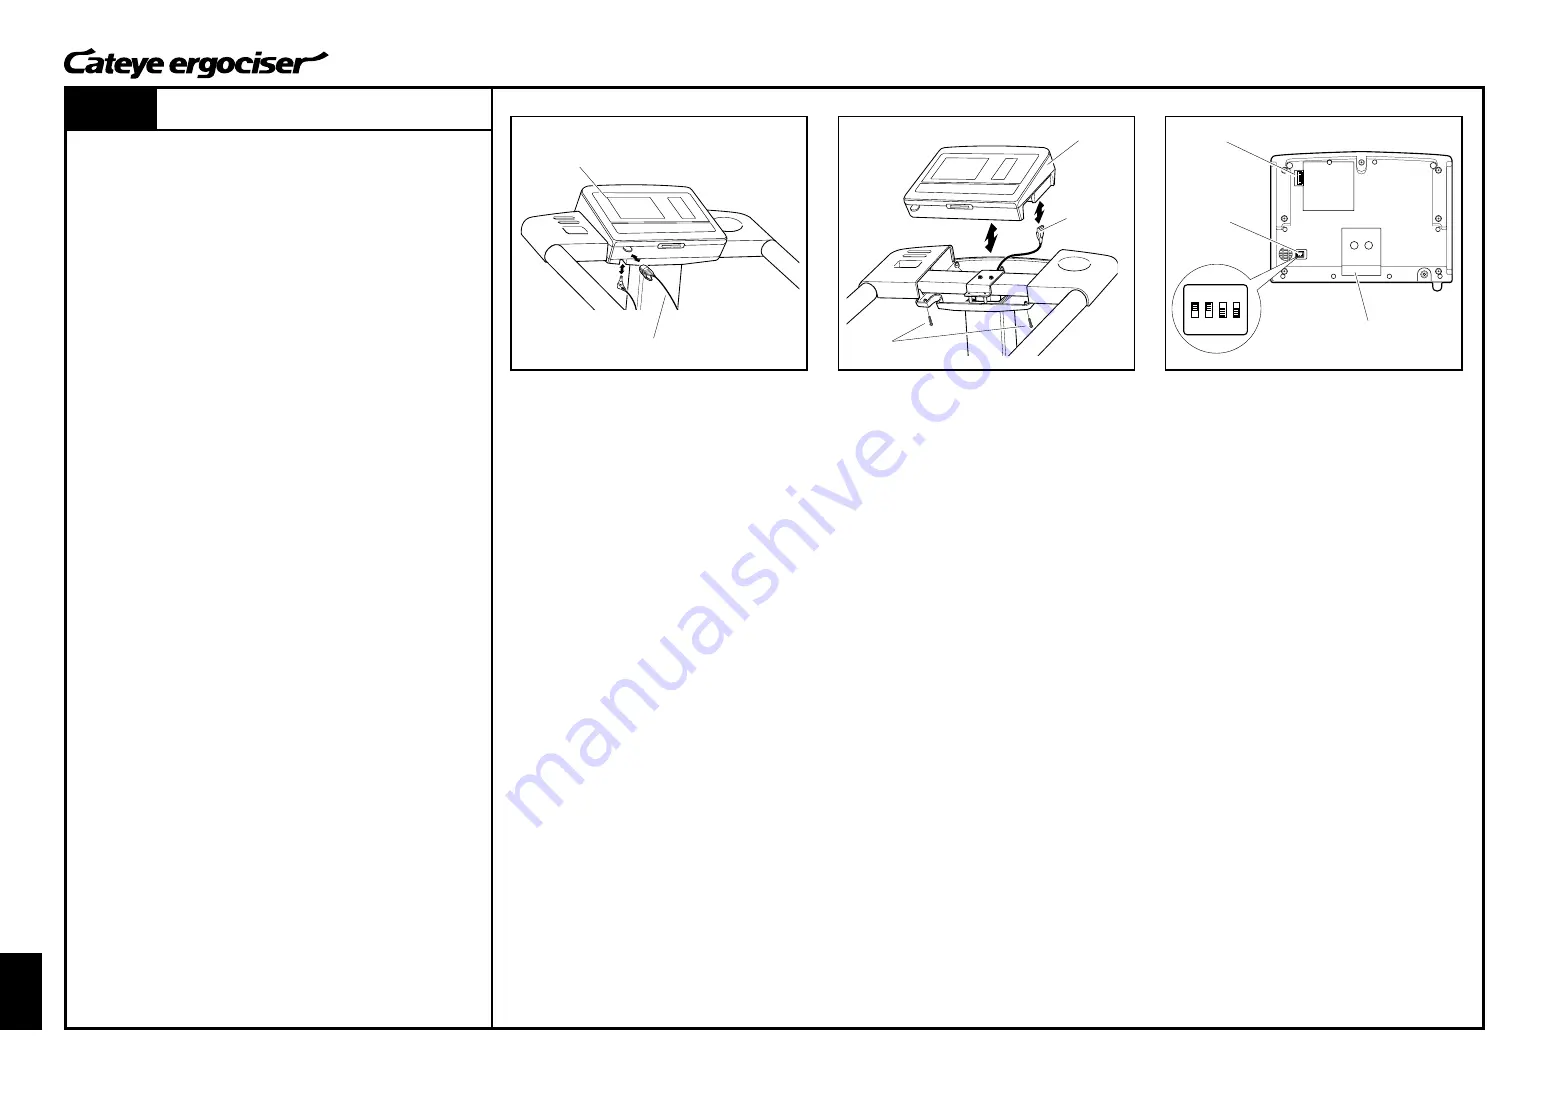
1. Remove the pulse rate sensor from the control unit. (Fig. 1)
2. Remove seven tapping screws from the control unit cover, and
then remove the control unit. (Fig. 2)
3. Disconnect the cable connector, which is at the end of the 5P
cable, through the cable inlet at the back of the control unit.
(Fig. 2)
ASSEMBLE
1. In case the Wireless Chestbelt Pulse Sensor is used and the
control unit is going to be replaced with a new control unit, the
receiver board should be detached from the previous control
unit and mounted on the new control unit.
(See Operating Instructions for Wireless Chestbelt Pulse
Sensor Kit.)
2. Check that the select switches at the back of the control unit
should be set to the positions that reflect desired display. (Fig.
3)
[Unit Display]
• m/kg
1 : ON
• feet/lb
1 : OFF
[Display Language]
• Japanese
2 : ON
3 : OFF
4 : OFF
• English
2 : OFF
3 : OFF
4 : OFF
• German
2 : OFF
3 : ON
4 : OFF
• French
2 : ON
3 : ON
4 : OFF
3. Firmly insert the cable connector, which is at the end of the 5P
cable, to the cable inlet at the back of the control unit. (Fig. 2)
4. Put the control unit on the control unit cover, and fix the unit
with seven tapping screws from beneath the cover. (Fig. 2)
5. Mount the pulse rate sensor to the control unit. (Fig. 1)
Fig.1
1
2
3
4
ON
MD
1
2
3
4
ON
Tapping Screw
Cable Inlet
Select Switch
Control Unit
Cable
Connector
Control Unit
Pluse Sensor
Control Unit (under)
Fig.2
Fig.3


