background image

CONTACT

G R I L L

GR

8011

Instructions 

for use

Summary of Contents for GR 8011

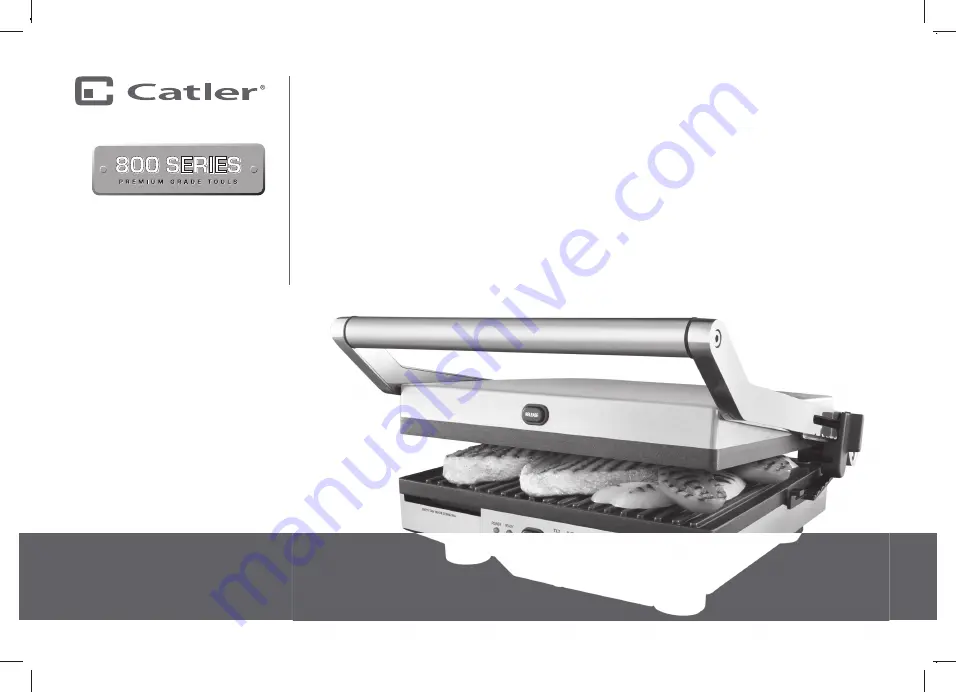
Page 1: ...CONTACT G R I L L GR 8011 Instructions for use...

Page 2: ...CONTACT G R I L L...

Page 3: ...ing your Contact Grill GR 8011 7 To use as a grill 8 To use as a sandwich press 9 Using the plate release feature 9 Releasing the grill plates 10 Using the adjustable grilling height control feature 1...

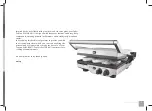
Page 4: ...Congratulations on the purchase of your new Contact Grill GR 8011 2 CONGRATULATIONS...

Page 5: ...rmance and healthy tasty meals and snacks In developing this booklet our goal was to provide you with the essential point from which you can start exploring the practical and everyday ways to make the...

Page 6: ...sed when in use and when stored AlwaysswitchtheContactGrilloffatthepower outlet thenunplugandallowtocool ifappliance isnotinuse beforecleaning beforeattempting tomovetheappliance disassembling assembl...

Page 7: ...y metal arm 2200 watt of power Quantanium non stick scratch resistant surface Removable drip tray Plate release buttons for easy removal Extendable non skid rear feet Plate Tilt control function Varia...

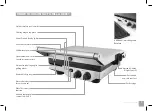
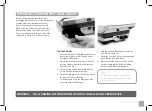
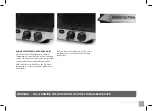
Page 8: ...Operating...

Page 9: ...riable temperature control to Sear for fast heat up 7 Allow the Contact Grill to preheat until the green Ready light illuminates 8 Place meat or foods to be cooked on the bottom cooking plate Refer to...

Page 10: ...green READY light illuminates 8 During this time prepare the sandwich and place it onto the base cooking plate Always place sandwiches towards the rear of the bottom cooking plate 9 Close the top coo...

Page 11: ...can then be released individually See Fig 3 3 Once released hold the plates and remove See Fig 4 WARNING ALWAYS ALLOW THE CONTACT GRILL PLATES TO COOL DOWN BEFORE RELEASING AND REMOVING FULLY UNWINDTH...

Page 12: ...UNWINDTHE CORD FROMTHE CORD STORAGE FACILITY BEFORE USE USING THE ADJUSTABLE GRILLING HEIGHT CONTROL FEATURE Your Contact Grill features an Adjustable Grilling Height Control feature which allows you...

Page 13: ...ty of foods to be cooked Just select a temperature suited to the foods which are being cooked With the dial set on Steak Sear see Fig 6 the temperature is correctly suited to grill meats or other food...

Page 14: ...help break down the connective tissue It is not recommended to cook items with thick bones such as T bone steaks Do not salt meat before cooking Salt will draw out the juices toughening the meat If us...

Page 15: ...steak hamburger patties 3 minutes for medium rare 5 6 minutes for well done 1 2 minutes 4 6 minutes Pork loin steaks fillet 4 6 minutes Lamb loin cutlets leg steaks 3 minutes 4 minutes 4 minutes Chick...

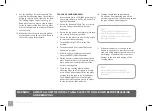
Page 16: ...Cleaning...

Page 17: ...oapy water Avoid the use of scouring pads or harsh detergents as they may damage the surface Rinse and dry thoroughly with a clean soft cloth and replace QUANTANIUM SCRATCH RESISTANT COATING Your Cont...

Page 18: ...ol Slide towards the front handle to the LOCK position so that the top and bottom cooking plates are locked together 4 Click the removable drip tray into place 5 Wrap the cord in the cord storage area...

Page 19: ...venting the potential negative impact on the environment and human health which could be caused as a result of improper liquidation of waste Please ask your local authorities or the nearest waste coll...

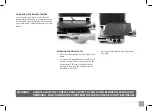
Page 20: ...18 Recipes...
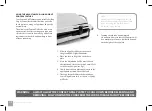
Page 21: ...R2 CONTENTS R3 Beef meals R4 Lamb meals R5 Chicken meals R6 Fish and seafood meals R8 Vegetable meals R9 Sandwiches CONTENTS...

Page 22: ...SALAD WITH CASHEWS Serves 4 500g rump or sirloin steak 3 mild red chillies chopped 2 tablespoons soy sauce 1 teaspoon crushed ginger 1 2 teaspoon crushed garlic Salad greens To serve 1 2 cup chopped c...

Page 23: ...freshly ground black pepper 1 4 teaspoon crushed garlic To serve Steamed green beans Preheat Contact Grill until the green Ready light illuminates 1 Place steaks in a shallow dish Combine rosemary win...

Page 24: ...green vegetables Preheat Contact Grill until the green Ready light illuminates 1 Slice chicken into thin strips and thread onto 8 skewers Place skewers on pre heated lower grill and lower top plate A...

Page 25: ...e sweet chilli sauce juice and zest of 1 lime 1 teaspoon minced garlic To garnish Lime wedges Coriander sprigs To serve Lightly steamed vermicelli noodles Preheat Contact Grill until the green Ready l...

Page 26: ...s soaked in water To serve Steamed jasmine rice Saut ed chinese broccoli Preheat Contact Grill until the green Ready light illuminates 1 Thread prawns onto soaked wooden skewers approx 4 per skewer 2...

Page 27: ...ll until the green Ready light illuminates 1 Discard outer leaves of bok choy and halve the bok choy wash well Preheat Grill to medium heat 2 Turn the Base Plate Tilt Dial to flat open the grill and c...

Page 28: ...untill the green Ready light illuminates 1 Lightly spread bagels with butter or margarine Arrange half the turkey slices in bagels Spread the cranberry sauce Top with snow pea sprouts then camembert s...

Page 29: ...ct Grill on Sandwich setting untill the green Ready light illuminates 1 Place lavosh bread flat on work surface Spread with mayonnaise then keeping all ingredients on one end of bread divide prawns be...

Page 30: ...rkish bread in pre heated grill and allow grill to gently rest on bread 4 Allow to cook until Turkish bread is lightly browned and cheese has melted slightly TURKISH BREAD WITH SALAMI BOCCONCINI AND P...

Page 31: ...NOTE...

Page 32: ...A T L E R E U CONTACT G R I L L Due to continued product improvement the products illustrated photographed in this brochure may vary slight ly from the actual product CUSTOMER SERVICE I N F O C A T L...

Reviews: