Cattron™ MP96/48 Series Portable Remote Control Systems
User Manual
85
68C-MP96/48-RD-EN
Version 006
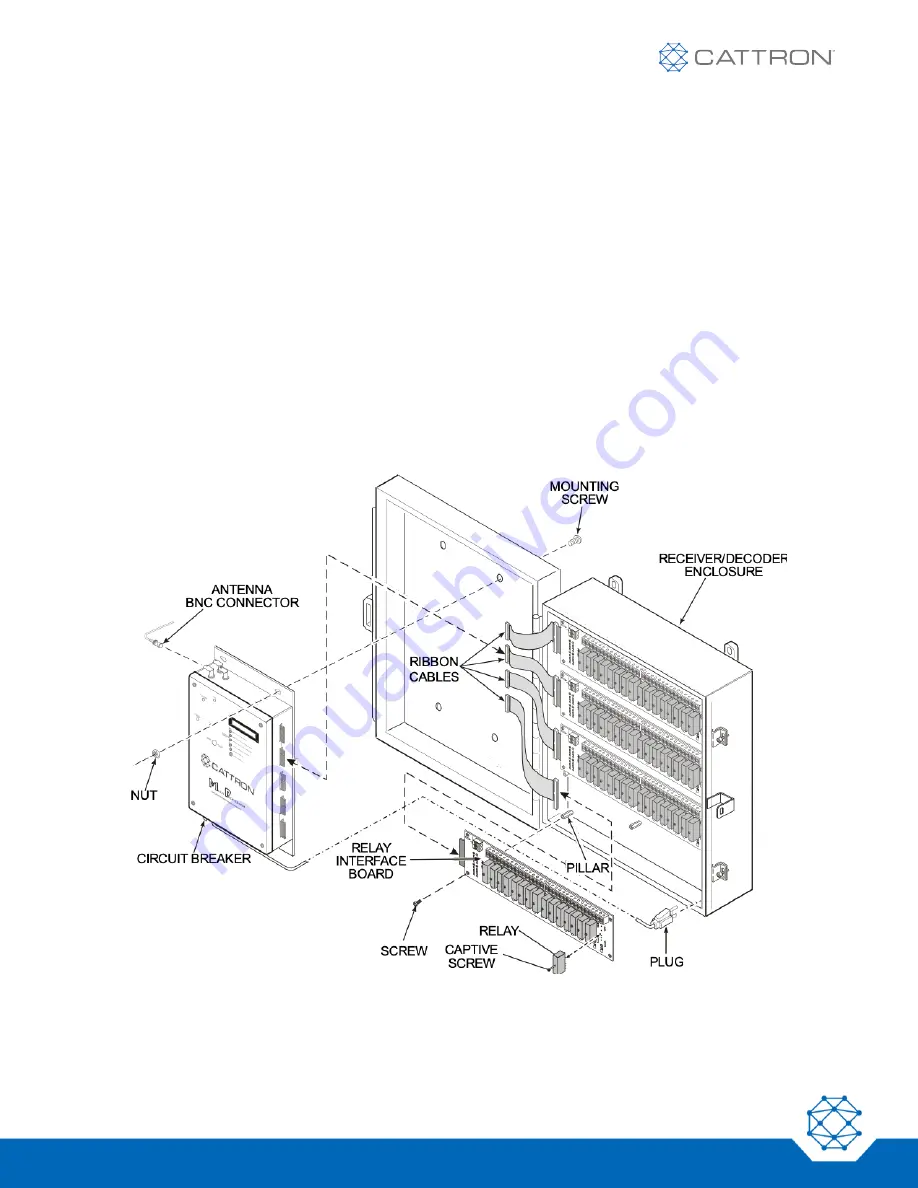
6. Disconnect the ribbon cables connecting the Gold Box to the relay interface boards.
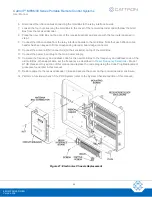
7. Loosen the four nuts securing the Gold Box to the cover of the receiver/decoder and withdraw the Gold
Box from the receiver/decoder.
8. Place the new Gold Box on the door of the receiver/decoder and secure with the four nuts loosened in
step 7.
9. Connect the ribbon cables from the relay interface boards to the Gold Box. Note that each ribbon cable
header has been keyed to fit its corresponding decoder board edge connector.
10. Connect the antenna BNC connector(s) to their socket(s) on top of the Gold Box.
11. Connect the power input plug to the main power supply.
12. Compare the frequency and address code for the new Gold Box to the frequency and address code of the
old Gold Box. When applicable, set the frequency as described in
R1HN Receiver Only section of this manual and replace the code plug using the Code Plug Replacement
procedure found later in this manual.
13. Restore power to the receiver/decoder. Close and secure the cover on the receiver/decoder enclosure.
14. Perform a functional check of the PRC System (refer to the System Checkout section of this manual).
Figure 21: Electronics Chassis Replacement


