11–SR-IOV Configuration
Configuring SR-IOV on VMware
184
AH0054601-00 B
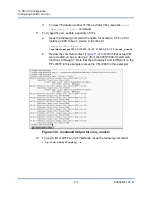
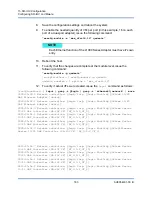
0000:05:0e.3 Network controller: QLogic Corp. QLogic FastLinQ QL41xxx Series
10/25 GbE Controller (SR-IOV VF) [PF_0.5.1_VF_3]
.
.
.
0000:05:0f.6 Network controller: QLogic Corp. QLogic FastLinQ QL41xxx Series
10/25 GbE Controller (SR-IOV VF) [PF_0.5.1_VF_14]
0000:05:0f.7 Network controller: QLogic Corp. QLogic FastLinQ QL41xxx Series
10/25 GbE Controller (SR-IOV VF) [PF_0.5.1_VF_15]
13.
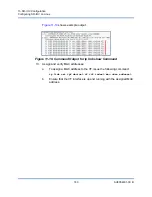
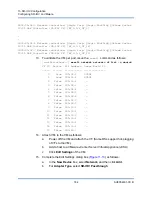
To validate the VFs per port, issue the
esxcli
command as follows:
[root@localhost:~]
esxcli network sriovnic vf list -n vmnic6
VF ID Active PCI Address Owner World ID
----- ------ ----------- --------------
0 true 005:02.0 60591
1 true 005:02.1 60591
2 false 005:02.2 -
3 false 005:02.3 -
4 false 005:02.4 -
5 false 005:02.5 -
6 false 005:02.6 -
7 false 005:02.7 -
8 false 005:03.0 -
9 false 005:03.1 -
10 false 005:03.2 -
11 false 005:03.3 -
12 false 005:03.4 -
13 false 005:03.5 -
14 false 005:03.6 -
15 false 005:03.7 -
14.
Attach VFs to the VM as follows:
a.
Power off the VM and attach the VF. (Some OSs support hot-plugging
of VFs to the VM.)
b.
Add a host to a VMware vCenter Server Virtual Appliance (vCSA).
c.
Click
Edit Settings
of the VM.
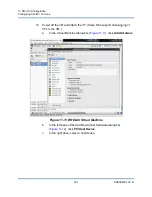
15.
Complete the Edit Settings dialog box (
) as follows:
a.
In the
New Device
box, select
Network
, and then click
Add
.
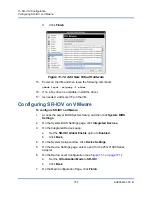
b.
For
Adapter Type
, select
SR-IOV Passthrough
.

