background image

CAVS USA INC 


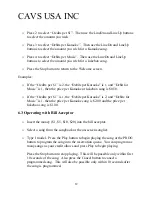
13.3 Press the Stop button twice to return to the welcome screen.  Then press the 

Menu button to enter into <<<FUNCTION>>> screen.  (For Type II, use the 
Remote Control.) 

 
13.4 Select 4.System Setup to display <<SYSTEM SETUP>> screen.  Select 

1.Download from CD-ROM to display the following <<<DOWNLOAD>>> 
screen. 


<<<DOWNLOAD>> 

Insert the SONG DATA CD-ROM 
into Tray 1. 
Then Close the Tray 
and press PLAY 


NOTE

: To understand the use of other available functions in the 

<<<FUNCTION>>> screen and <<SYSTEM SETUP>> screen, please read the 
User’s Manual of JB-99. 
 
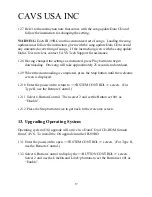
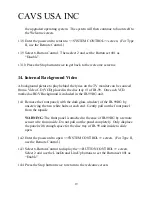
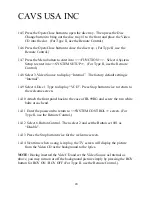
13.5 Insert the Upgrade Data CD into the CD-ROM drive located in the back of the 

JB-99RG and close the tray. 

 
13.6 Press the Play button and the new operating system will begin loading into the 

JB-99RG system.  When the loading is completed, the following message will 
appear at the bottom of the screen: 


System program update 
booting.. POWER OFF 


WARNING

: Pressing the Play button in Step 13.6 may at times fail to update the 

operating system and instead display a sign ‘NO DISC’ on the top right corner of 
the TV monitor.  Press the Play button once more to proceed. 
 
13.7 Turn off the JB-99RG by pressing the Power button on the Remote Control.  

After waiting for a few seconds, restart the JB-99RG by pressing the Power 
button.  Wait for the blue initial screen and display of the version number for 


18 

Summary of Contents for JB-99RG I

Page 1: ...CAVS USA INC Quickstart Manual For CAVS JB 99RG I II Karaoke Jukebox Type I Type II Version 00 73RG and above 1...

Page 2: ...f 11 6 2 Setting prices 11 6 3 Operating with bill acceptor 12 7 Setting karaoke play jukebox play 13 8 Setting score function 13 9 Setting initial welcome screen 14 10 Setting song count 14 11 Collec...

Page 3: ...Microphones Remote Control Manager s kit User s Manual Remote control and AV cable FX cable Swivel joint with 4 bolts Mixer amplifier cover Together they weigh 375lbs with dimensions 22 x 22 x 21 for...

Page 4: ...came with the swivel joint for the attachment o Place the TV monitor on top of the swivel joint and attach it with the four bolts that came in the side pocket of JB 99RG NOTE If you wish not to instal...

Page 5: ...n the back bottom compartment of JB 99RG When the settings for the mixer amplifier have been made to your satisfaction place the cover on the mixer amplifier using the 4 bolts that are holding the mix...

Page 6: ...ct the access see the Step 5 Setting Button Controls 2 5 Instruction Sticker Locate the Instruction sticker from the bottom compartment of JB 99RG Peel off the back cover off the sticker and place it...

Page 7: ...of the bill acceptor has changed to green flashing lights NOTE Once the JB 99RG unit is turned on the Power button along with other selected buttons will be automatically disabled To power off the un...

Page 8: ...to enter Volume Control Adjust the master volume level by pressing the Volume button on the front panel For Type II use the Remote Control NOTE For more detailed instructions on music and vocal volume...

Page 9: ...NTROL should appear on the TV Monitor Press 5 and follow the instruction to register a new 4 digit password After completing the registration of the new password press the Stop button to return back t...

Page 10: ...mended to set Selection 1 as Disable at all times 5 2 Selection 2 Button set 01 sets the following buttons to Enable or Disable DISC1 DISC2 DISC3 JB CD INTRO RESUM MENU SETUP PBC PREV NEXT SLOW RETURN...

Page 11: ...TROL screen For Type II use the Remote Control o Press 1 to choose Select Acceptor Then use the LineDn and LineUp buttons to choose Bill Only Bill Off options are viable in JB 99RG model o Press the S...

Page 12: ...50 o If the Credits per 1 is 1 the Debits per Karaoke is 2 and Debits for Music is 1 then the price per Karaoke song is 2 00 and the price per Jukebox song is 1 00 6 3 Operating with Bill Acceptor o I...

Page 13: ...d enter the SYSTEM CONTROL screen Press 6 to select Button Control 7 1 Press 3 and use the LineDn and LineUp buttons to set the Button set 02 to Kar Juk Kar Juk that lets users play both the Karaoke a...

Page 14: ...a blank initial screen NOTE With the blank initial screen inputting a song number and pressing the Play button will still function to play the selected song Other functions listed in Step 4 will also...

Page 15: ...ds maximum of 600 bills of 1 5 10 20 11 2 Slip a hand into the bottom side of the plastic box There is a latch that holds up the box and is located between the bill acceptor and the plastic box Slide...

Page 16: ...ATA CD ROM into Tray 1 Then Close the Tray and press PLAY NOTE To understand the use of other available functions in the FUNCTION screen and SYSTEM SETUP screen please refer to the User s Manual of JB...

Page 17: ...seconds to download 12 9 When the downloading is completed press the Stop button until the welcome screen is displayed 12 10 Enter the password to return to SYSTEM CONTROL screen For Type II use the R...

Page 18: ...D into the CD ROM drive located in the back of the JB 99RG and close the tray 13 6 Press the Play button and the new operating system will begin loading into the JB 99RG system When the loading is com...

Page 19: ...GV Background is included in the JB 99RG unit 14 1 Remove the front panel with the dark glass window of the JB 99RG by unscrewing the two white bolts at each end Gently pull out the front panel from t...

Page 20: ...ype to display VCD Press Stop button twice to return to the welcome screen 14 10 Attach the front panel back to the case of JB 99RG and screw the two white bolts at each end 14 11 Enter the password t...

Page 21: ...open SYSTEM CONTROL screen For Type II use the Remote Control 15 4 Select 6 Button Control to display the BUTTON CONTROL screen Select 2 and use the LineDn and LineUp buttons to set the Button set 01...

Page 22: ...CAVS CA 242RA mixer amplifier located in the back of the JB 99RG comes with many individual controls for Mic1 Mic2 Echo Music and Master CONTROLS MIC 1 VOLUME BALANCE ECHO LO MID HI x x MIC 2 VOLUME...

Page 23: ...l 16 3 Base LO Level Control If you are finding too much Base LO in the music you can decrease the LO level by turning the LO control knob of the master or the LO control knob of the music 16 4 Echo L...

Page 24: ...ected to external speakers or external audio system Answer Although the mixer amplifier of the JB 99RG has additional speaker connectors it is strongly recommended not to connect any external speakers...

Page 25: ...osed in your JB 99RG unit 18 4 How can the previous credits in the bill acceptor be erased Answer To erase the credit remaining in the JB 99RG turn off and on the bill acceptor from the SYSTEM CONTROL...

Reviews: