background image

12

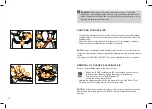
SECURING THE CHILD CAR SEAT USING  

THE ISOFIX CONNECT SYSTEM

NOTE!

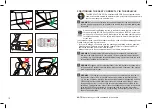
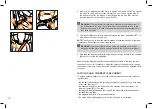
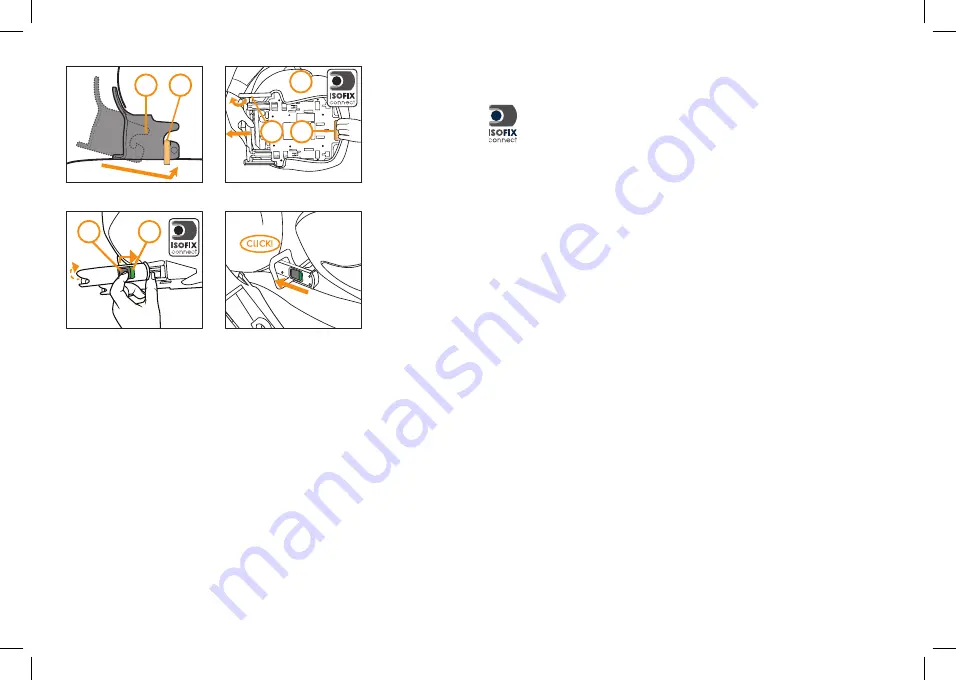
 The ISOFIX fixture points 

(8)

 are two metallic clips for each seat and are 

positioned between the backrest and the seating surface of the vehicle seat. In 

case of doubt, please refer to the driver’s manual of your vehicle.

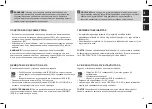
NOTE!

 Before clicking the the ISOFIX Connect locking arms 

(5)

 into the ISOFIX 

fixture points 

(8)

, check the release buttons 

(10)

. If the green safety indicators 

(11)

 are visible, you must first release the ISOFIX Connect locking arms before 

joining by pressing and pulling back the release button 

(10)

. Repeat the process 

if necessary with the second locking arm.

A perceptible click will be heard when the ISOFIX Connect locking arm correctly 

locks into place with the ISOFIX fixture points.

NOTE!

 Note the information in the section “PLACING THE SEAT IN THE VEHICLE”.

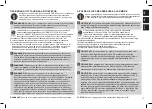
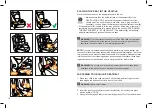
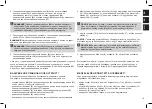
• Push the two locking arms 

(5)

 into the ISOFIX guides 

(7)

 until these lock into 

place in the ISOFIX fixture points with an audible ‘click’.

• Ensure that the seat is secure by trying to pull it out of the ISOFIX guides 

(7)

.

• The green safety indicator 

(11)

 must now be clearly visible on the two red 

release buttons 

(10)

.

• 

You can now use the adjustment lever 

(9)

 on the frame 

(1)

 of the CBX 

SOLUTION 2-FIX child car seat position.

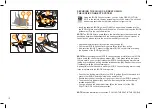
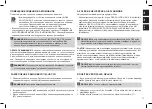
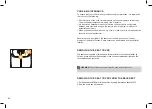
• Insert the supplied ISOFIX guides 

(7)

 with the longer strap upwards into the 

two ISOFIX fixture points 

(8)

. In some vehicles, it is better to mount the ISOFIX 

guides aids 

(7)

 in the opposite direction.

• 

Use the adjustment lever 

(9)

 under the seat cushion 

(1)

.

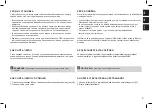
• Pull the two ISOFIX Connect locking arms 

(5)

 as far as they will go.

• Now twist the ISOFIX Connect locking arms 

(5)

 180° so that they are facing 

the direction of the ISOFIX guides 

(7)

.

Using the ISOFIX Connect system, you can fix the CBX SOLUTION 

2-FIX to the vehicle, thereby increasing your child’s safety. The child still 

needs to be secured with the three-point belt of your vehicle.

5

1

7

8

9

10

11

Summary of Contents for SOLUTION 2-FIX

Page 1: ...CYBEX GmbH Riedingerstr 18 95448 Bayreuth Germany info gb online com www mycbx com CY_171_3655_C0718...

Page 2: ...RU EN HU RO EL ECE R44 04 Gr 2 3 15 36 kg ca 3 12 Y SOLUTION 2 FIX USER GUIDE...

Page 3: ...2 3 8 6 10 9 7 11 12 5 4 2 1 max 2 3 15 36 RU Brief instructions Group 2 3 15 36 kg EN R vid haszn lati utas t s 2 3 csoport 15 36 kg HU Instruc iuni succinte grupa 2 3 15 36 kg RO 2 3 15 36 EL...

Page 4: ...epara iile se vor realiza exclusiv de c tre persoane autorizate n cadrul acestora se vor utiliza ntotdeauna numai componente i accesorii originale n caz contrar func ia de siguran a scaunului pentru c...

Page 5: ...tions to hand e g in the designated compartment on the rear of the backrest NOTE Country specific regulations e g regarding colour coding on child car seats may mean that product features may vary in...

Page 6: ...t si szab lyok betart s val k sz lt s megfelel a legszigor bb biztons gi k vetelm nyeknek FONTOS Mindig legyen k zn l ez az utas t s pl az erre a c lra szolg l t rol ban a h tt mla h toldal n FONTOS A...

Page 7: ...CONNECT SYSTEM 12 ADAPTING TO BODY SIZE 14 REMOVAL OF THE CBX SOLUTION 2 FIX 14 PLACING THE SEAT IN THE VEHICLE 16 FASTENING YOUR CHILD S SEATBELT 16 IS YOUR CHILD CORRECTLY SECURED 18 CARE MAINTENAN...

Page 8: ...A GYERMEK L S BESZEREL SE ISOFIX KAPCSOL D SI RENDS ZERREL 13 TESTM RETHEZ IGAZ T S 15 A CBX SOLUTION 2 FIX ELT VOL T SA 15 AZ L S BEHELYEZ SE A G PJ RM BE 17 R GZ T S V D PAJZS N LK L 17 MEGFELEL EN...

Page 9: ...king the guide lug 3 on the axis 4 of the booster 1 WARNING The parts of the CBX SOLUTION 2 FIX must not be used alone or in combination with boosters backrests or headrests from other manufacturers o...

Page 10: ...2 csatlakoz f leit 3 illessze a l smagas t n 1 l v tengelybe 4 FIGYELEM K rj k gondoskodjon r la hogy az l s m anyag r szei soha ne nyom djanak ssze pl ne szoruljanak be az aut l s nek be ll t sakor v...

Page 11: ...le manufacturer NOTE Never leave your child unattended in the vehicle WARNING The seat is not suitable for use with a two point or lap belt If the seat is secured using a two point belt an accident ma...

Page 12: ...szn lhat k tpontos vagy medence vvel Ha az l st k tpontos vvel haszn lj k baleset eset n a gyermek s lyos vagy ak r hal los s r l st is szenvedhet FIGYELEM A fels vsz rnak 6 mindig vesen kell futnia s...

Page 13: ...h the two locking arms 5 into the ISOFIX guides 7 until these lock into place in the ISOFIX fixture points with an audible click Ensure that the seat is secure by trying to pull it out of the ISOFIX g...

Page 14: ...ISOFIX vezet kbe 7 am g a hely kre nem z r dnak hallhat kattan ssal Gy z dj n meg r la hogy az l s megfelel en r gz lt gy hogy pr b lja meg kih zni a vezet kb l 7 A z ld jelz snek 11 j l l that nak k...

Page 15: ...O BODY SIZE The seat can be adjusted to your child s body simply by using the adjustable headrest 12 To do this pull the adjustment level 13 upwards to unlock the headrest 12 Adjust it so that there i...

Page 16: ...eme 12 s a gyermek v lla k z 5 CONNECT ISOFIX FONTOS A csatlakoz k 5 behajt s val nem csak a j rm l s t v dheti hanem a csatlakoz karokat is a szennyez d st l vagy k rosod st l ISOFIX 5 10 ISOFIX 7 5...

Page 17: ...nt lever 9 If the headrest of the vehicle is in the way pull it out all the way or remove it completely for exceptions to this please refer to the section POSITIONING THE SEAT CORRECTLY IN THE VEHICLE...

Page 18: ...that a CBX SOLUTION 2 FIX v z n tal lhat foganty 9 seg ts g vel Ha a j rm fejt ml ja tban van h zza teljesen ki s t vol tsa el ez al l kiv teleket AZ L S HELYES POZ CION L SA A J RM BEN c m fejezetben...

Page 19: ...t is tight and if necessary how to tighten the belt themselves To ensure optimum safety for your child please always check before commenc ing travel that the lap belt 16 has been fed through the lower...

Page 20: ...ermek nyaka k z tt fut Ha sz ks ges igaz tsa az v fut s t gy hogy a fejt mla magass g t ll tja A fejt mla 12 magass ga ll that az aut ban 14 16 17 1 6 17 6 18 12 6 FIGYELEM A j rm vcsatja 14 soha nem...

Page 21: ...e g after a crash the child car seat must be checked by the manufacturer Ensure that only an original CBX seat cover is used as the cover is a key element of the seat s function Spare covers can be ob...

Page 22: ...taven velk mu n razu tj po nehod mus b t autoseda ka zkontrolov na jej m v robcem Ujist te se e je pou van pouze origin ln CBX potah jeliko potah je kl ov m prvkem funkce autoseda ky N hradn potahy lz...

Page 23: ...ion or change of colour If you discover any changes the child car seat must be disposed or checked and possibly replaced by the manufacturer Changes to fabric especially bleaching are perfectly normal...

Page 24: ...k van kit ve a gyermek l st ki kell venni a j rm b l vagy le kell takarni egy vil gos ruh val Ellen rizzen rendszeresen minden f m s m anyag alkatr szt az esetleges s r l sre vagy sz nelv ltoz sra von...

Page 25: ...leteness and manufacturing or material defects immediately at the date of purchase or immediately after receipt Please always keep your dated proof of purchase 3 In case of a defect stop using the pro...

Page 26: ...t en azonnal alaposan ellen rizze a term k ps g t s az esetleges gy rt si vagy anyaghib kat K rj k mindig rizze meg az id ponttal ell tott v s rl st bizony t blokkot 3 Amennyiben meghib sod st szlel n...

Page 27: ...m partimentul special prev zut pe partea posterioar a sp tarului INDICA IE Aspectul exterior al caracteristicilor produsului poate varia n func ie de cerin ele na ionale specifice de exemplu codurile...

Page 28: ...RO EL 27 CBX SOLUTION 2 FIX CBX SOLUTION 2 FIX CBX SOLUTION 2 FIX...

Page 29: ...X CONNECT 34 ADAPTAREA LA N L IMEA COPILULUI 36 DEMONTAREA SCAUNULUI CBX SOLUTION 2 FIX 36 A EZAREA SCAUNULUI N AUTOVEHICUL 38 FIXAREA COPILULUI 38 ESTE ASIGURAT CORECT COPILUL DVS 42 NGRIJIREA 44 NDE...

Page 30: ...RO EL 29 26 31 33 ISOFIX CONNECT SYSTEM 35 37 CBX SOLUTION 2 FIX 37 39 39 43 45 45 47 47 47 49 49...

Page 31: ...ul de ghidare 3 pe axul 4 pernei pentru ezut 1 AVERTIZARE Componentele scaunului CBX SOLUTION 2 FIX nu trebuie utilizate individual i nici mpreun cu perne pentru ezut sp tare sau suporturi pentru cap...

Page 32: ...RO EL 31 1 2 2 3 4 1 CBX SOLUTION 2 FIX...

Page 33: ...iciodat copilul nesupravegheat n autovehicul LOCUL CORECT N AUTOVEHICUL AVERTIZARE Scaunul nu este adecvat pentru utilizarea cu o centur n 2 puncte sau cu centur pentru bazin Dac scaunul este asigurat...

Page 34: ...RO EL 33 CBX SOLUTION 2 FIX ISOFIX Connect System ISOFIX Connect 5 ISOFIX Connect www mycbx com 2 2 6 ISOFIX Connect System...

Page 35: ...OVEHICUL mpinge i ambele bra e de blocare 5 n accesoriile de ghidare 7 p n c nd acestea se fixeaz cu un CLIC audibil n punctele de fixare ISOFIX 8 Asigura i v c scaunul este bine fixat prin ncercarea...

Page 36: ...EM ISOFIX 8 ISOFIX Connect 5 ISOFIX 8 10 11 ISOFIX Connect 10 ISOFIX Connect ISOFIX 5 7 ISOFIX 8 7 11 10 9 1 CBX SOLUTION 2 FIX 7 ISOFIX 8 7 9 1 ISOFIX Connect 5 ISOFIX Connect 5 180 7 ISOFIX Connect...

Page 37: ...adaptat cu ajutorul suportului reglabil pentru cap 12 la corpul copilului dvs n acest scop trage i n sus m nerul de reglare 13 pentru a debloca suportul pentru cap 12 Adaptarea trebuie efectuat astfe...

Page 38: ...RO EL 37 CBX SOLUTION 2 FIX 5 ISOFIX Connect System ISOFIX 5 10 7 5 180 9 1 CBX SOLUTION 2 FIX 5 12 13 12 12 2 2 12 6 CBX SOLUTION 2 FIX 7...

Page 39: ...m nerului de reglare 9 Dac suportul pentru cap al autovehiculului deranjeaz extinde i l sau scoate i l complet pentru excep ii a se vedea sec iunea LOCUL CORECT N AUTOVEHICUL Sp tarul 2 se adapteaz n...

Page 40: ...RO EL 39 2 CBX SOLUTION 2 FIX 9 2 1 14 2 15 14 3 16 17 CBX...

Page 41: ...centura pentru bazin 16 n ghidajele inferioare de centur 17 de la scaunul pentru copii 4 Acum trage i puternic centura diagonal 6 pentru a tensiona centura pentru INDICA IE nv a i v copilul nc de la n...

Page 42: ...RO EL 41 4 6 16 14 6 16 17 5 16 1 17 6 6 18 12 1 14 2 15 14 3 16 17 14 16 6 12...

Page 43: ...hidajele inferioare ale centurii 17 centura diagonal 6 se deplaseaz pe partea cataramei de asemenea n ghidajul inferior al centurii 17 scaunului centura diagonal 6 se deplaseaz prin ghidajul centurii...

Page 44: ...RO EL 43 16 1 17 6 17 6 18 12 6...

Page 45: ...c dere Se va avea n vedere utilizarea exclusiv a unei huse pentru scaun originale CBX deoarece husa reprezint de asemenea o component func ional esen i al Husele de rezerv pot fi procurate din magazin...

Page 46: ...RO EL 45 45 CBX 1 13 12 2...

Page 47: ...onstat vreo modificare scaunul pentru copii trebuie neap rat eliminat sau verificat de c tre produc tor i nlocuit dac este necesar Modific rile materialului n special decolorarea sunt normale la utili...

Page 48: ...RO EL 47 30 C 30 C CBX SOLUTION 2 FIX 7...

Page 49: ...ui consumator garan ia produc torului Verifica i produsul dup cump rare sau dup primire n cazul cump r rii prin coresponden n privin a caracterului complet defectelor de fabrica ie i de material 3 n c...

Page 50: ...RO EL 49 CYBEX GmbH Riedingerstr 18 95448 Bayreuth 921 78 511 511 921 78 511 888 1 2 3 3 4 5...

Page 51: ...50...

Page 52: ...51...

Reviews: