background image

Technical instructions

MPZ

v1.1

www.ccei.fr

4

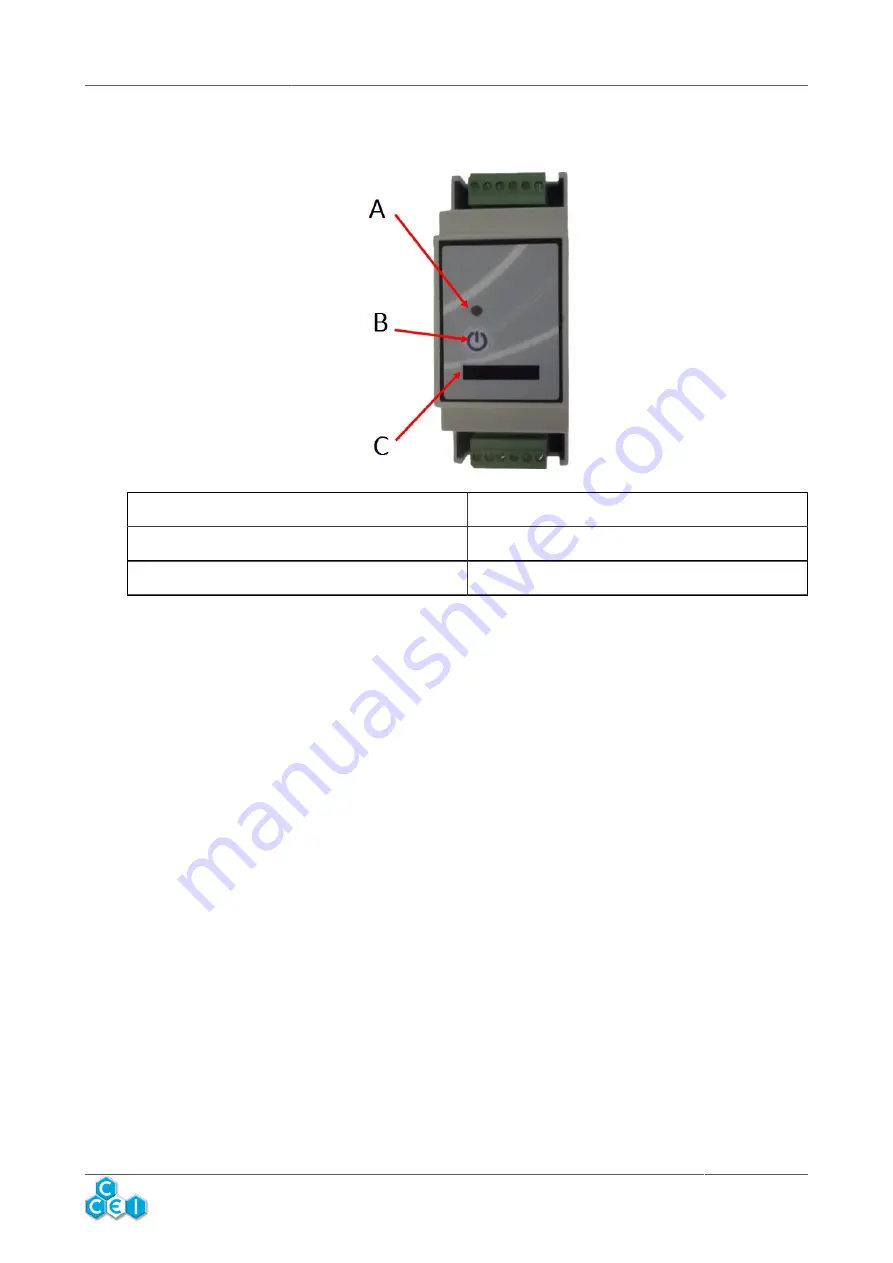
3.2. Description of components

A

Multi-function indicator

B

Command/programming key

C

Configuration switches

Summary of Contents for MPZ

Page 1: ...MPZ 3 3 2 Description of components 4 4 Installation 5 4 1 Integration in a fuse box 5 4 2 Electrical connection 5 5 Configuration 7 5 1 Piezoelectric RGB markers 8 5 2 Mode of operation 10 5 3 Time out 11 6 Operation 12 6 1 Start up 12 6 2 Use 12 6 3 RGB LED command 13 6 4 Multi function module indicator 15 A Declaration of Conformity 16 Read all of this leaflet carefully before installing operat...

Page 2: ...Only controller 100g with unpluggable terminal blocks Full box 280g Installation On standard DIN rail OMEGA rail in fuse box Width 2 DIN modules Protection index IP 10 To be integrated in a fuse box Compatible buttons Piezoelectric switch simple no lighting with 12VDC monochrome LED lighting with 12VDC RGB LED lighting Output points 2 NON independent and configurable contact points Maximum of 250V...

Page 3: ...oice of several time outs Non time delay sequencer a choice of several sequencers Time delay sequencer a choice of several sequencers and time outs Furthermore if it is used with a illuminated piezoelectric switch monochrome or RGB the lighting or the colour of the button is different according to the status of the 2 output points of the MPZ and therefore makes its status known Marker lighting is ...

Page 4: ...Technical instructions MPZ v1 1 www ccei fr 4 3 2 Description of components A Multi function indicator B Command programming key C Configuration switches ...

Page 5: ...ch the MPZ is installed must be set up either more than 3 m 50 from the edge of the pool This distance is measured taking into account any workaround of obstacles If the case of the MPZ is installed behind a wall this is therefore the distance required to go round it and re connect to the case or in an underground room in close proximity to the pool In this case the room must be accessible by a tr...

Page 6: ...Technical instructions MPZ v1 1 www ccei fr 6 ...

Page 7: ... below on the right of the front panel to unclip it and display the configuration switches The configuration switches will enable the smart controller for piezoelectric switch MPZ to be placed in the desired operating mode A flat screwdriver is needed to activate the switches Each switch may only be in two positions it will either be positioned down OFF position or up ON position ON Switches OFF S...

Page 8: ...tric switch MPZ 2 Configure programming switches no 4 5 and 6 according to the table below 3 Press the button on the front side of the module and hold it down 4 Power up by keeping the button pressed down 5 Release the button The RGB lighting of the button flashes a particular colour according to the mode selected to validate the selection see table below The module indicator flashes a certain num...

Page 9: ... flash colour in programming Number of flashes of the module indi cator in pro gramming OFF OFF OFF Marker deacti vated fixed Red 1 OFF OFF ON Regular white flashes fixed Green 2 OFF ON OFF Regular white flashes flashing Yellow 3 OFF ON ON Rainbow per manent colour gradient flashing Blue 4 ON OFF OFF White fade out in a loop fixed Magenta 5 ON OFF ON White fade out in a loop flashing Cyan 6 ...

Page 10: ...rt controller for piezoelectric switch MPZ to be selected No 1 No 2 Mode Seq 1 Seq 2 Seq 3 Seq 4 OFF OFF Remote control switch 2xNO PZ1 PZ2 PZ1 PZ2 X 2 sequences only OFF ON Sequencer A PZ1 PZ2 PZ1 PZ2 PZ1 PZ2 PZ1 PZ2 ON OFF Sequencer B PZ1 PZ2 PZ1 PZ2 PZ1 PZ2 PZ1 PZ2 ON ON Sequencer C PZ1 PZ2 PZ1 PZ2 PZ1 PZ2 X 3 sequences only ...

Page 11: ...selected using switches No 4 to No 6 No 3 No 4 No 5 No 6 Programmed duration OFF X X X No time delay return to initial position No 3 OFF re gardless of the positions of No 4 to No 6 ON OFF OFF OFF 3 seconds ON OFF OFF ON 30 seconds ON OFF ON OFF 3 minutes ON OFF ON ON 15 minutes ON ON OFF OFF 30 minutes ON ON OFF ON 1 hour ON ON ON OFF 2 hours ON ON ON ON 4 hours Consider reconfiguring the switche...

Page 12: ...itial status corresponding to the Seq 1 column of the table in 5 2 regardless of the selected mode After the sector is cut the device will always re start in this status off 6 2 Use With each impulse received from the piezoelectric button and whenever the local control is pressed the module will advance in its sequences according to the table in 5 2 Once the final sequence is reached the module re...

Page 13: ... OFF marker according to the configured mode see 5 1 No active output no pressed button detected Red flash Detection of a pressed button piezo or local Blue fixed or flashing according to the mode see 5 1 PZ1 output active Green fixed or flashing according to the mode see 5 1 PZ2 output active Cyan Blue Green PZ1 and PZ2 output points active If you want to change colours you can cross the R G B th...

Page 14: ...fr 14 Output status Lighting colour PZ1 PZ2 OFF PZ1 PZ2 BLUE fixed or flashing according to the mode see 5 1 PZ1 PZ2 GREEN fixed or flashing according to the mode see 5 1 PZ1 PZ2 CYAN BLUE GREEN fixed or flashing ac cording to the mode see 5 1 ...

Page 15: ...ng table Status of the indicator Meaning Switched off No electrical supply Regular flash 1 flash every 5 seconds Stand by Waiting for the switch to be activated the 2 output points are off Flashing every second In time delay mode meaning that the time out is under way At least one output point is active and at the end of the time out return to the initial position Switched on In non time delay mod...

Page 16: ...y The Company Bleu Electrique SAS FR47403521693 declares that the product MPZ satisfies the safety and electromagnetic compatibili ty requirements of European directives 2006 95 EC and 2004 108 EC Emmanuel Baret Marseille 10 03 2015 Distributor s stamp Date of Sale Serial No ...

Reviews: