CD3000S
1PH from 10A to 90A
User’s manual
9
Quick Start
1.1 Standard version
Attention:
this procedure must be carried out by skilled people only.
If the Order Code of the Thyristor unit is in line with what you really need, then CD3000S has been already
configured in Factory and you just need to do the following steps:
1.
Verify CD3000S Sizing. Be sure that:
• The load current is equal or less than the Max current of CD3000S.
• The load voltage is equal or less than the Max voltage of CD3000S
2.
Verify the Order Code
3.
Verify the Installation
4.
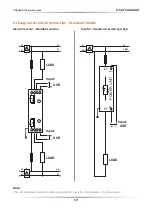
Verify the Diagram of control connection:
• verify that there isn’t a short circuit on the load
5.
Supply the Power unit
The CD3000S is ready to start
1.2 Analog Input and/or HB Option
Attention:
this procedure must be carried out by skilled people only.
If the Order Code of the Thyristor unit is in line with what you really need, then CD3000S has been already
configured in Factory and you just need to do the following steps:
1.
Verify CD3000S Sizing. Be sure that:
• The load current is equal or less than the Max current of CD3000S.
• The load voltage is equal or less than the Max voltage of CD3000S
2.
Verify the Order Code
3.
Verify the Installation
4.
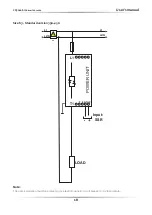
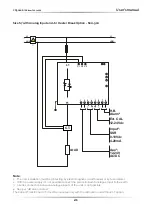
Verify the Diagram of control connection:
• all auxiliary connections must be done in line with wirings on this manual
• verify that there isn’t a short circuit on the load
5.
Supply the auxiliary voltage of the unit (see Order Code)
6.
Supply the Power unit
7.
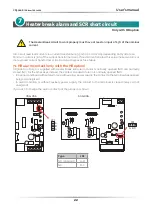
If you have HB option makes Calibration procedure
The CD3000S with Analog Input and/or Heater Break Option is ready to start
1
Summary of Contents for CD3000S-1PH series
Page 2: ......


