background image

Igniting the Burners

To ignite the burners, follow these instructions:

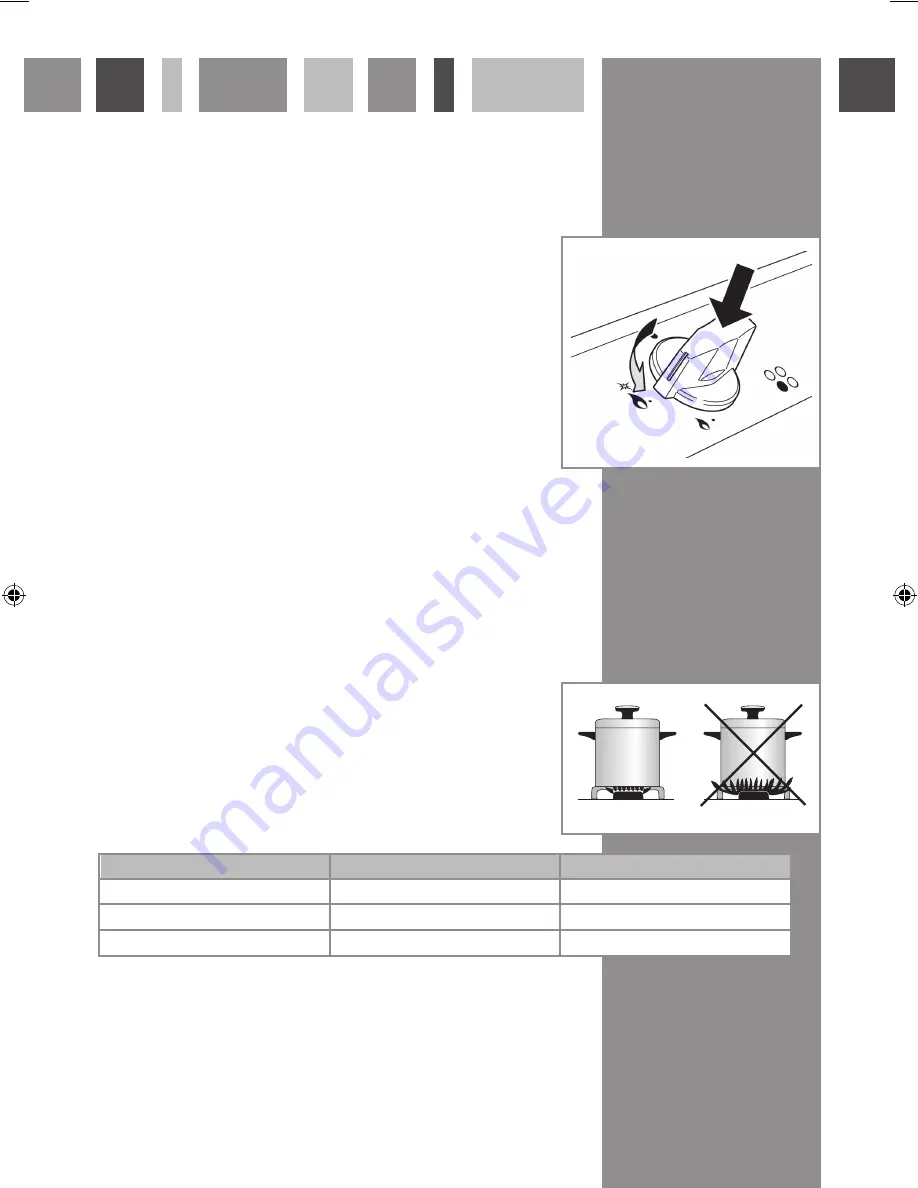
1.  Lightly press the control knob (shown on the right) and turn the knob anti- 
 

clockwise  to  the  maximum  position.  Press  and  hold  the  control  down  to  


begin the ignition process (a clicking sound will be heard).

2.  Once  the  burner  is  lit,  adjust  the  burner  power  to  the  required  position. 
 

To turn the burner off, turn the knob clockwise past the maximum setting to  


the off position. 

Please note:  


  If a burner does not ignite, or turns off accidentally, turn the control knob  


to the ‘off’ position, and wait for one minute before attempting to reignite  


the burner. 


  If the burner does not ignite, repeat the ignition process with the burner at  


the minimum position. 


Efficient use of your Hob

The  hob  is  equipped  with  burners  of  different  sizes,  designed  to  accommodate 
most shapes and sizes of pan. For best results, only use pans with flat bottoms and 
choose an appropriate burner depending on the size of the pan. The most efficient 
use of the hob is shown below, where the pan and burner are correctly chosen.

Ensure  that  the  pans  do  not  overlap  the  edge  of  the  pan  stand,  or  cover  the 
control panel.

The table below shows the sizes of pan that should be used with each burner:

Fig.2

Fig.3

Burner Size 

Auxiliary

Semi-Rapid

Rapid

Minimum Pan Diameter (cm) 

12

16

20

Maximum Pan Diameter (cm) 

14

20

24

0220 HCG500 HCG520 Manual.indd   4

26/6/09   09:35:49

The ignition device should not be operated for more than 15 seconds.  

in the event that the flame is extinguished accidentally.

is lit. Flame-failure devices operate by shutting off the supply of gas to the burner 

a few seconds after ignition to allow the safety device to detect that the burner 

The hob are fitted with a  flame-failure device. Hold down the  control  knob for

Summary of Contents for HCG501

Page 1: ...The Group Ltd Harby Road Langar Nottinghamshire NG13 9HY T 01949 862 012 F 01949 862 003 E service cda eu W www cda eu Passionate about style Manual for Installation Use and Maintenance GB IE gas hob...

Page 2: ...9 IMPORTANT INFORMATION FOR CORRECT DISPOSAL OF THE PRODUCT IN ACCORDANCE WITH EC DIRECTIVE 2002 96 EC At the end of its working life the product must be taken to a special local authority waste colle...

Page 3: ...burner control knob This appliance is class 3 Gas burners Gasflowtotheburnersiscontrolledbythecontrolknobs 5 6 7 and8onthediagramabove Thereare3positionsshownonthe control panel Turning the control k...

Page 4: ...ped with burners of different sizes designed to accommodate most shapes and sizes of pan For best results only use pans with flat bottoms and choose an appropriate burner depending on the size of the...

Page 5: ...he control panel markings Stainless steel can be effectively cleaned by simply using a dilute solution of water and mild detergent and drying to a shine with a clean cloth Over time with use the stain...

Page 6: ...n Yellow Earth Blue Neutral Brown Live As the colours of the wires in the mains lead for the appliance may not correspond with the coloured markings identifying the terminals connecting to the fuse sp...

Page 7: ...ses This appliance must not be connected to a combustion gas recovery scavenging system The connection to the gas supply must comply with all current regulations in force We are not legally able to of...

Page 8: ...ls to the minimum position as indicated by the small flame 3 Insert a 2 5mm screwdriver into the hole at the top of the tap and turn the adjustment screw fully clockwise as shown in figure 6 4 Turn th...

Page 9: ...00mm The minimum height of any adjacent units including light pelmets is 400mm unless they are manufactured from a material resistant to fire steel for example Notes Do not position this appliance abo...

Page 10: ...to the back wall is 50mm If a splashback worktop upstand is to be fitted take this into account when cutting the hole The minimum distance that the hob should be positioned away from the rear wall or...

Page 11: ...Notes...

Page 12: ...Nottinghamshire NG13 9HY T 01949 862 012 F 01949 862 003 E service cda eu W www cda eu Passionate about style To contact our Customer Care Department or for Service please contact us on the details be...

Reviews: